Still have questions?
Come chat with us and we will get back to you as soon as possible!

Ruben B
Partnership Manager

How to Add Mods to Your Project Zomboid Server
Mods are an amazing way to customize your server and make it stand out among others. Luckily, our servers support Project Zomboid Workshop mods.
#How to Install Mods on Your Server
To install mods to your Project Zomboid server, you will require both their Workshop IDs, and Mod IDs found at the bottom of each Steam Workshop mod page.
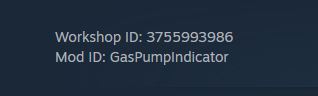
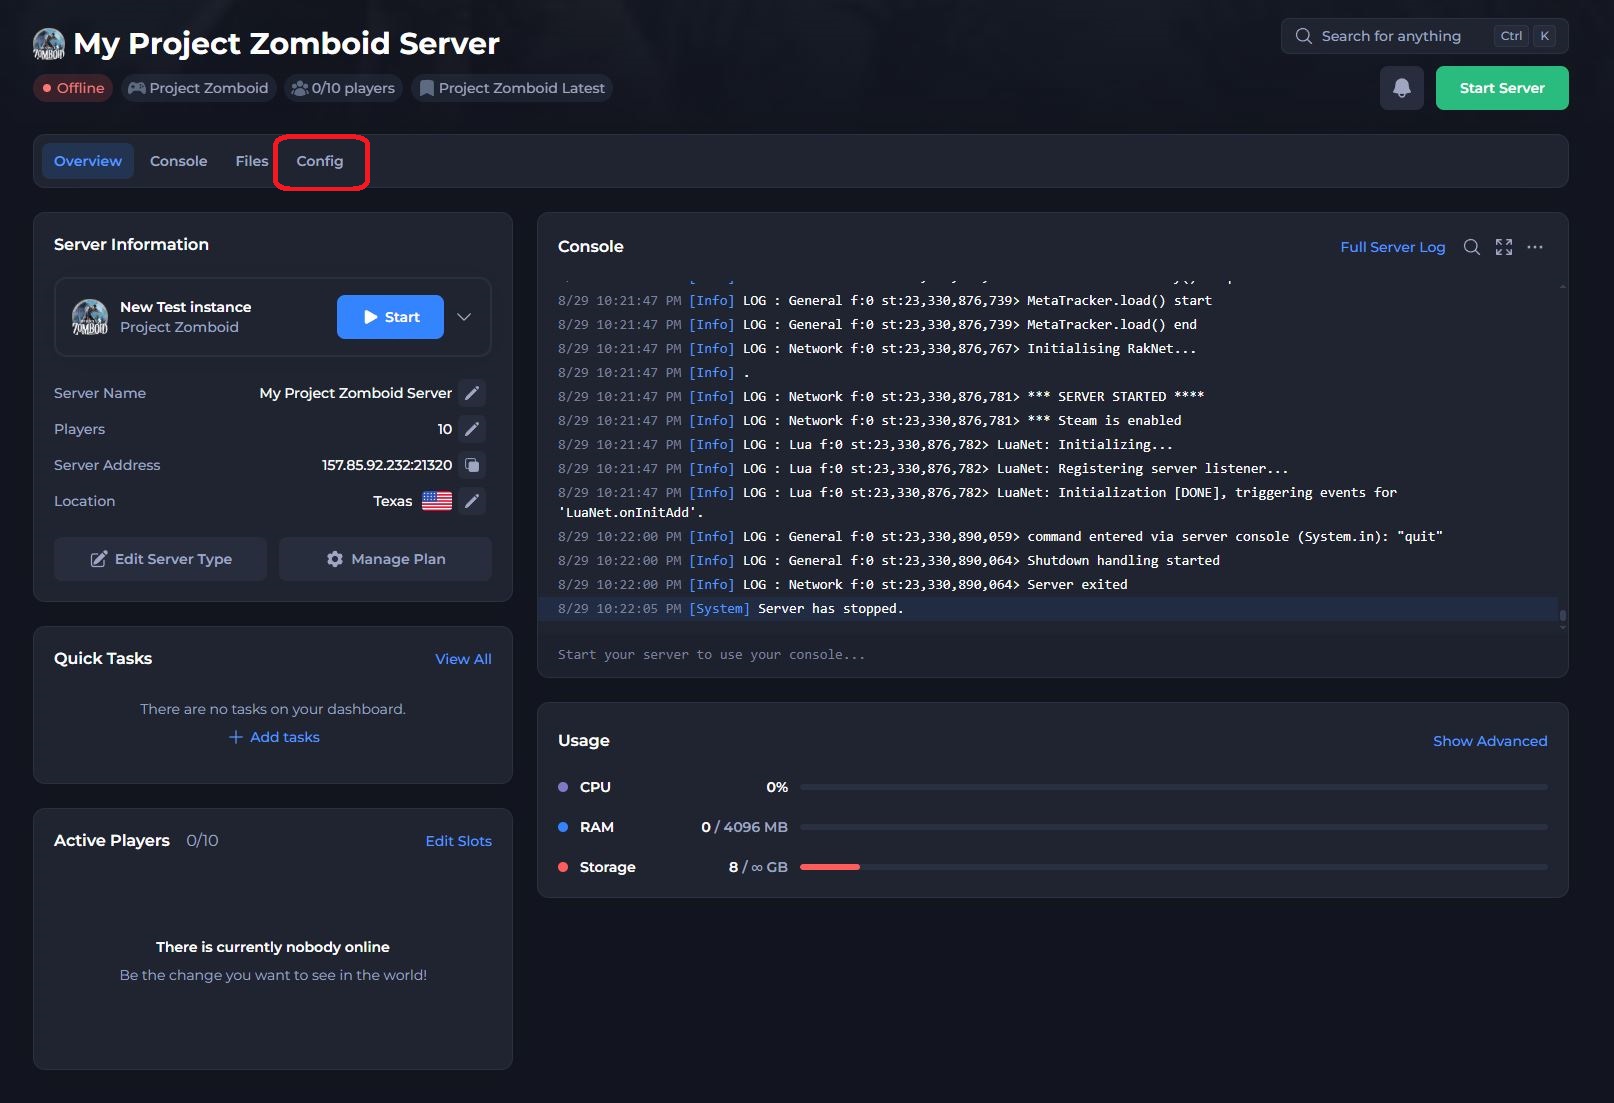
- Access your control panel and Stop your server.
- Navigate to the Config tab.
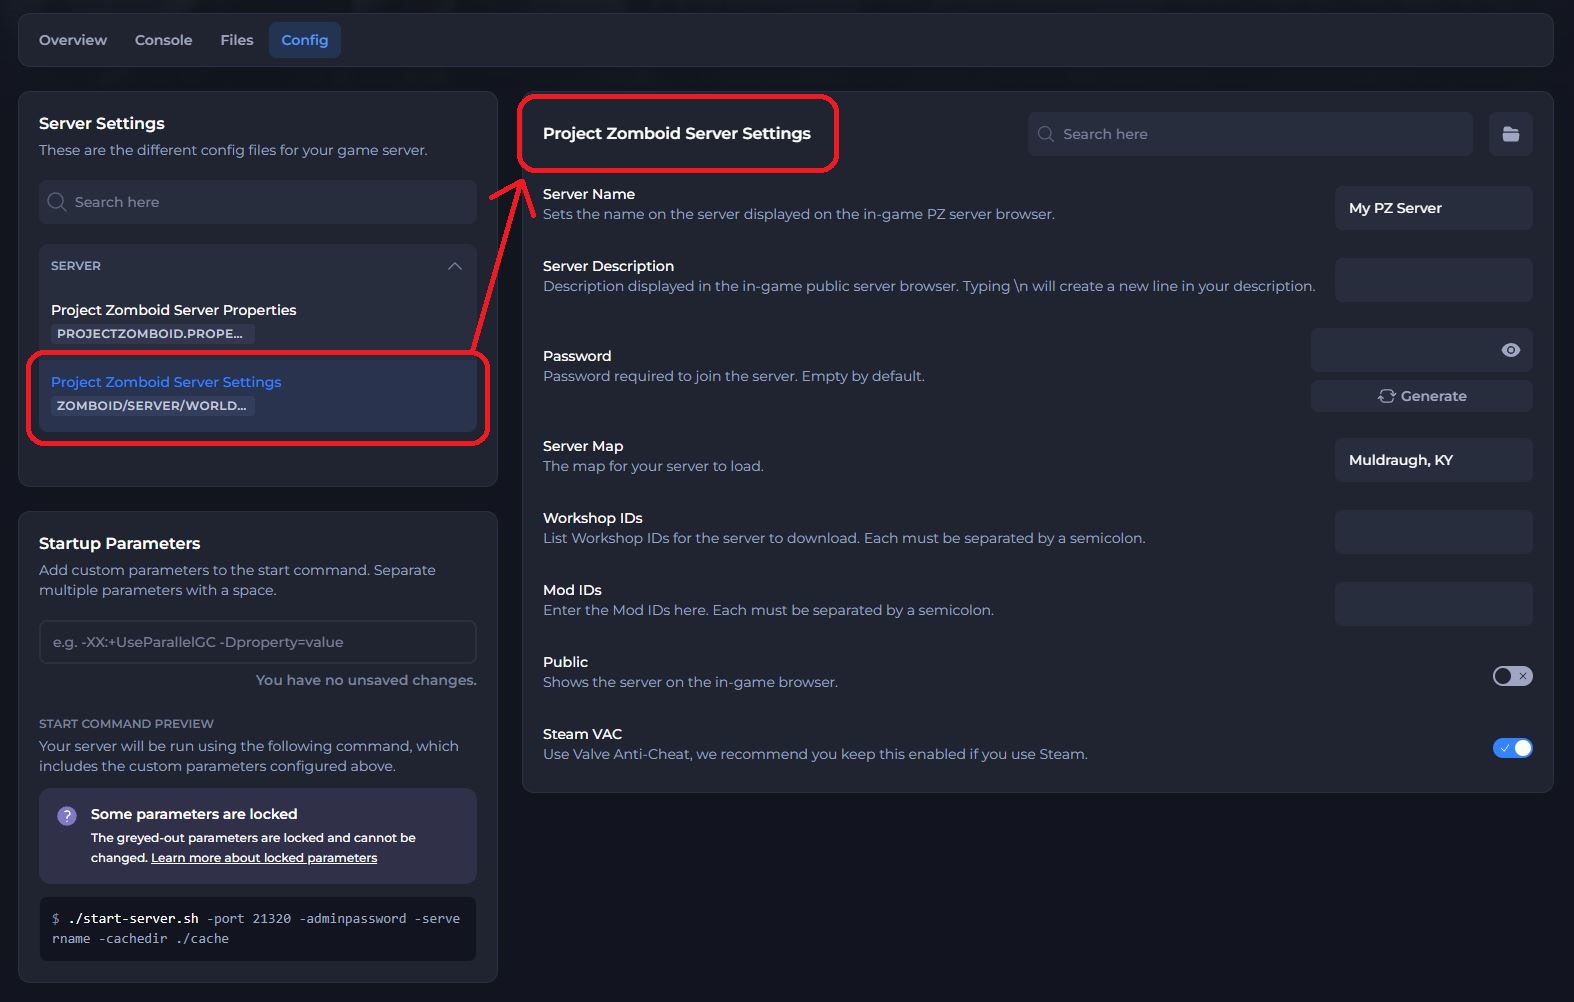
- Select Project Zomboid Server Settings.
- Locate Workshop IDs field and enter the mod Workshop IDs, separated by semicolons.
- Locate Mod IDs field and enter the Mod IDs, also separated by semicolons.
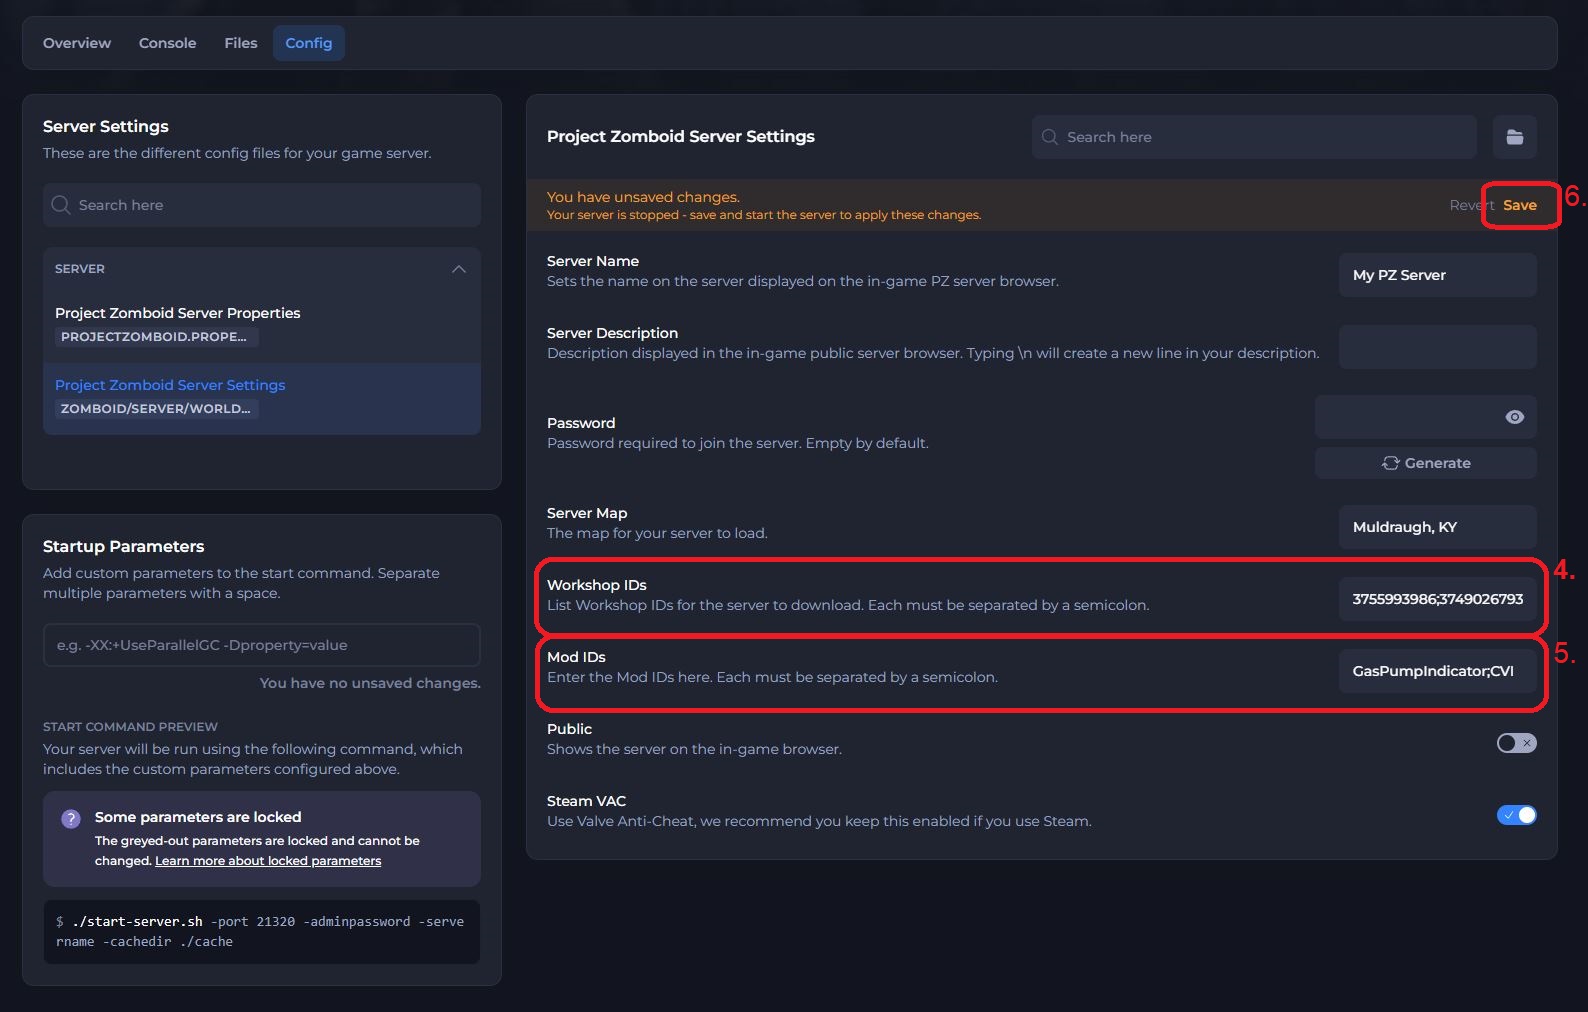
- Click Save and Start your server.
You have now installed mods on your server! If you wish to enable map mods, see below.
#Enabling Map Mods
Note
When installing map mods, you will also need to enter both the Workshop IDs and Mod IDs sections similar to the steps above.
- Access your control panel and Stop your server.
- Navigate to the Config tab.
- Select Project Zomboid Server Settings.
- Locate the Workshop IDs, Mod IDs & Server Map fields within the Project Zomboid Server Settings.
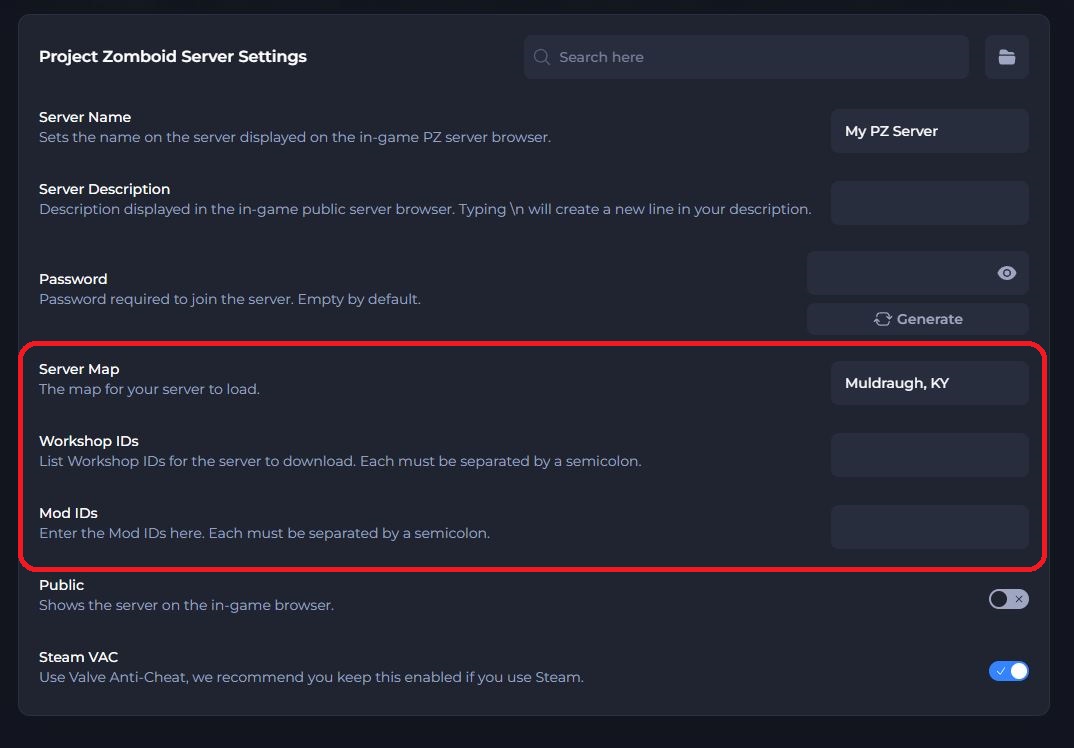
- On the Workshop Page of your chosen map mod, locate the three values associated with the configs shown in Step 4. This will usually be listed at the bottom of the Workshop page.
Please note that Server Map may also be listed as Map Folder.
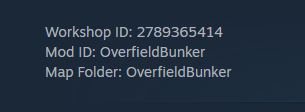
- Add the three Workshop ID, Mod ID & Server Map values to their associated configs within the control panel.
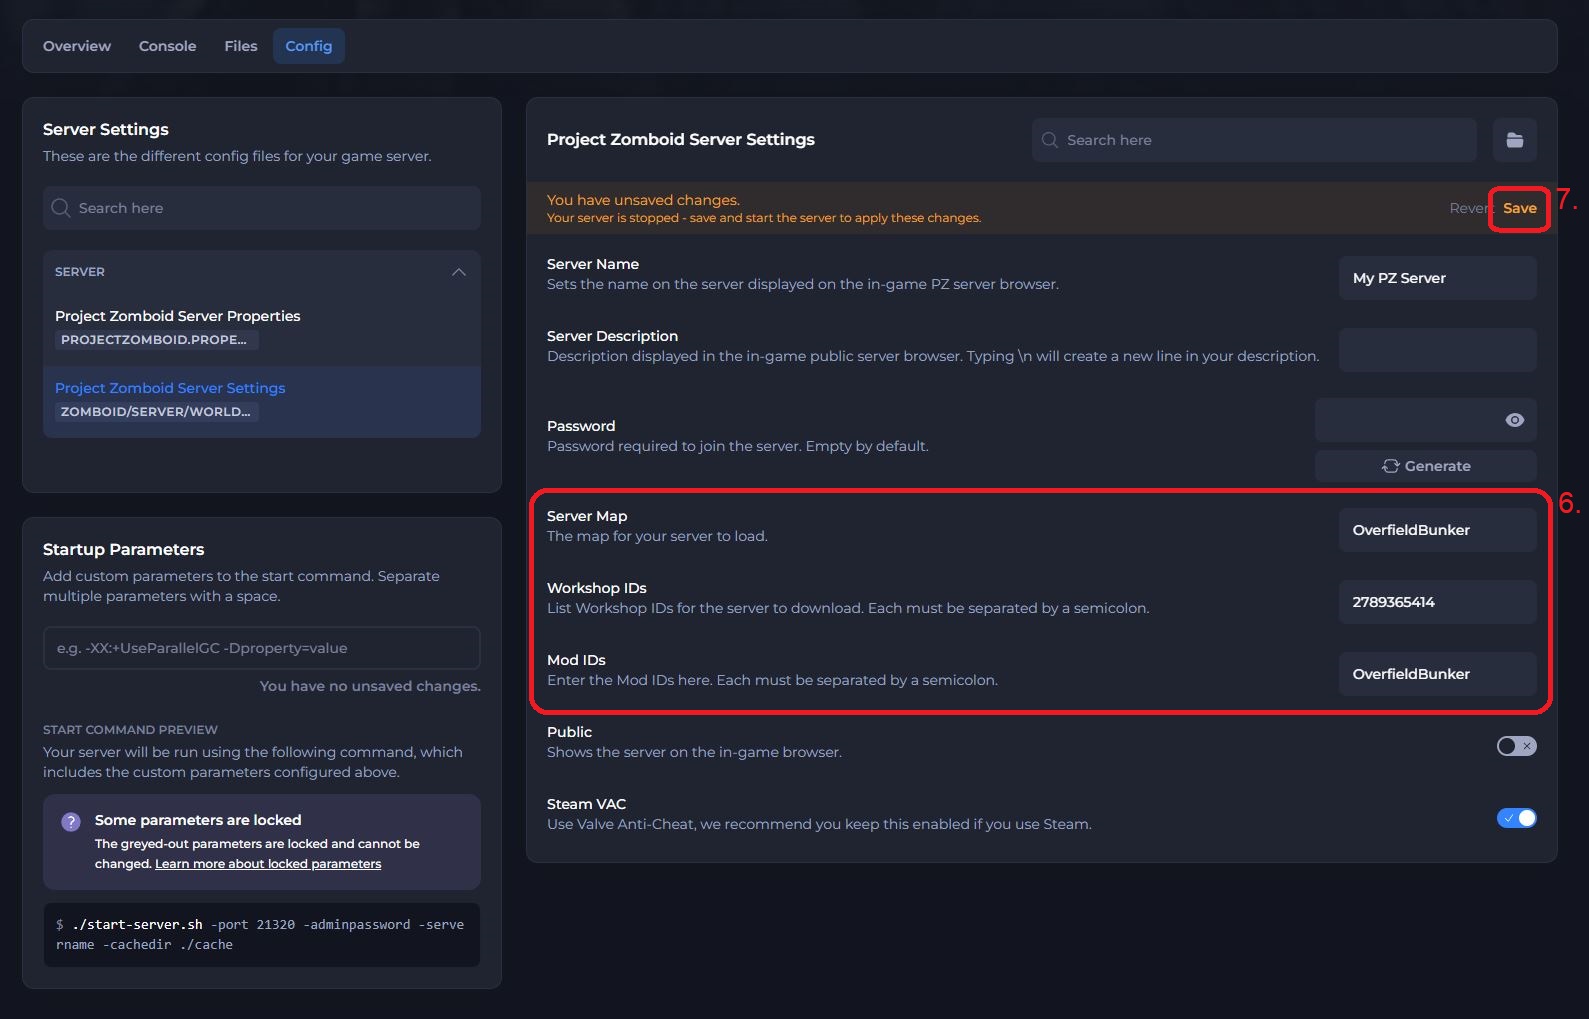
- Save the file and Start your server.
The server should now be running your chosen map mod. Be sure to follow the next section of this article to enable the map mod client-side.
#How to Install Mods Locally
Note
You must have the same mods installed both client-side and server-side to join your server.
- Find your desired mod on the Project Zomboid Workshop page and click Subscribe.
- In a file explorer tab, navigate to
User > Zomboid > Mods. - In a new file explorer tab, head over to
C:\Program Files (x86)\Steam\steamapps\workshop\content\108600or the equivalent folder on your operating system. - Open the folder with the Workshop ID of the desired mod.
- Copy the folder named after the Mod ID into the previous mods folder you opened.


- Launch Project Zomboid and click Mods in the in-game main menu.
- Select the mod from the list on the left, and click Enable.
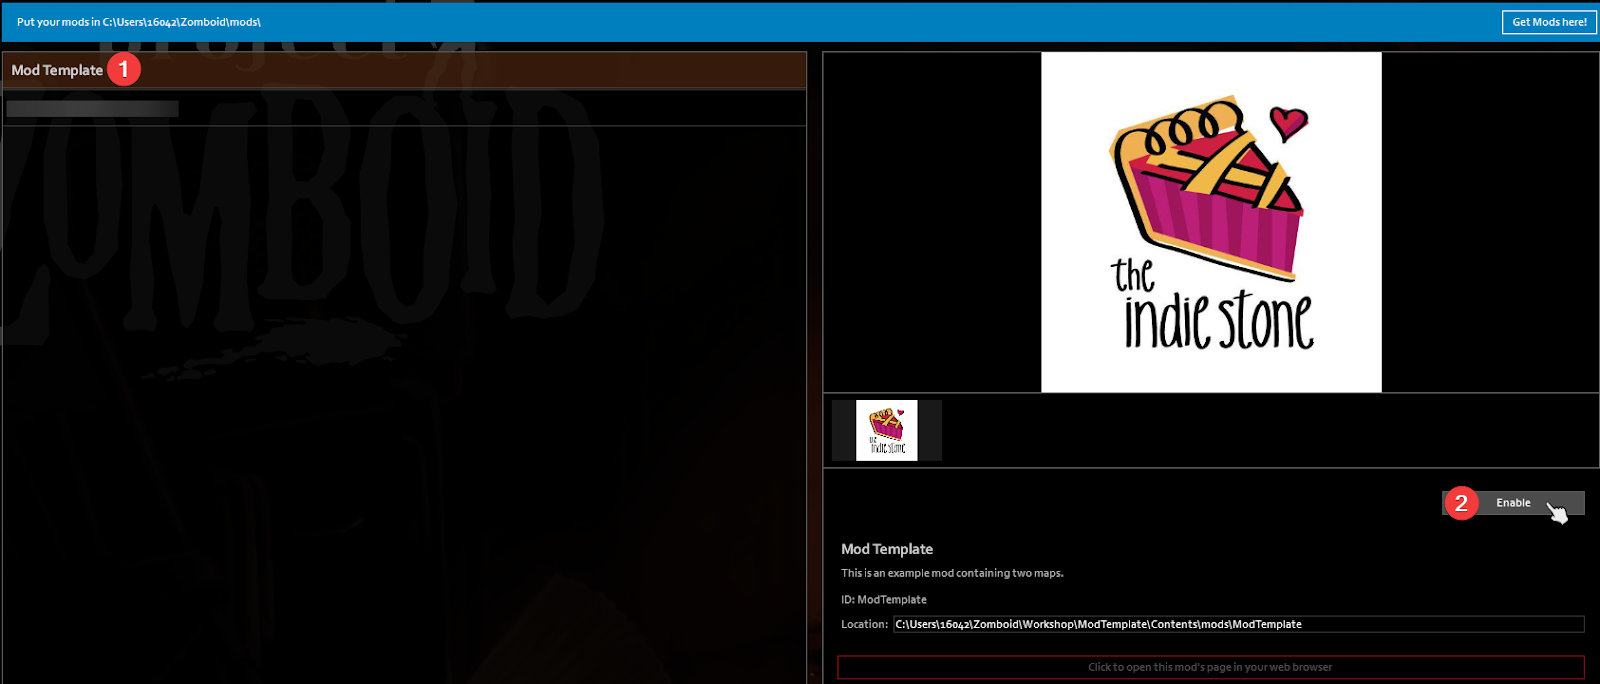
You can now join your server with mods installed!