Minecraft


Minecraft
208 ArticlesRelated Categories
Still have questions?
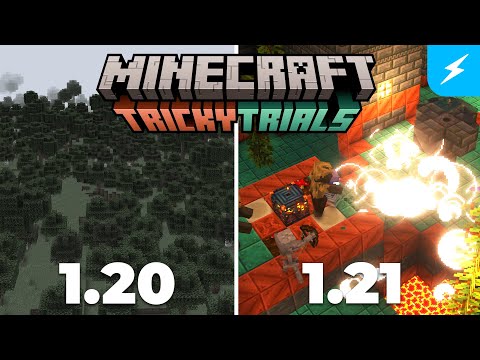
How to Update your Existing Minecraft World to a New Version
When Minecraft releases new updates, you may be keen to update your existing world to experience all of the new features. Updating your singleplayer world is relatively easy, but you should make sure to create a backup in case any issues arise. How you back up and update your world depends on whether you play Minecraft: Bedrock Edition or Minecraft: Java Edition. ::ProseNote{title="Important" description="You can only update existing worlds to newer versions of Minecraft. Loading an existing world in a version older than the one it was generated with will cause world corruption issues." appearance="danger"} :: Updating a Java Edition World 1. Open Minecraft and navigate to the Singleplayer tab. 2. Select the world you want to update and click Edit. 3. Click and close the game. 4. Relaunch the game in the newer version, then join your world. Your world will automatically load new features or biomes in newly generated chunks. If you wish to locate the backup you took later on, you can do so by clicking the button in the Edit menu. --- Updating a Bedrock Edition World 1. Open the game and click Play. 2. Click the Edit button next to the world you would like to update. 3. Scroll to the bottom and select to make a backup copy. Alternatively to making a world copy, you can also click the Export World button to download a copy of the Minecraft world file itself to your computer. 4. After creating a backup, join your world normally. Your world will now load the new version of Minecraft in newly-generated chunks!
How to Update a Minecraft Server
When new Minecraft content is released, you will need to update your server to the latest version if you want to try out the new features. ::ProseNote{title="Backup" description="We strongly recommend generating a backup of your server before following the steps in this guide. Please refer to this article for more information." appearance="error"} :: Updating your Server To update your Minecraft server to a newer version, you can either edit your current server instance or create a brand new server instance. In this guide, we will be simply updating our current server instance so that we can retain our old world, plugins, and plugin data if present. It's also a good idea to reset your world dimensions when you update your server, especially if there are new biomes or structures in the version you are updating to. If you would like to reset your worlds when updating, feel free to follow the following guides: How to Reset your Minecraft World How to Reset The End on your Minecraft Server How to Reset The Nether on your Minecraft Server 1. Access your Control Panel and Stop your server. 2. Click the Edit Server button on your server overview. 3. Select your current server type, then click Next Step. We recommend keeping the same server type as you had before, as changing it could have unintended consequences. If you would like to use a different server type entirely, you should consider making a new server instance. 4. Select the newer version you'd like to use, then click Next Step. 5. Click Save Changes to save and apply your changes. After your server finishes the instance modification and boots back up, your server will be running on the new version of Minecraft you selected!
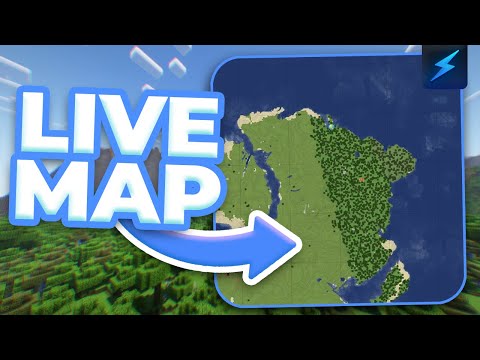
How to Setup Dynmap
Dynmap is a plugin that allows you to view a live map of your Minecraft server world, similar to Google Maps. This tutorial will teach you how to set this plugin up for your server. Before anything else, you should already have Dynmap installed on your server. These can either be downloaded from SpigotMC or CurseForge, depending on your Server Type. Additionally, it is recommended to Setup a World Border for your worlds before generating your Dynmap to limit how much server space Dynmap (and your world) can take up. ::ProseNote{title="Plugin Installation" description="This article covers a plugin, which must first be installed onto your server. If you have not already installed the plugin onto your server, please follow this guide." appearance="danger"} :: Reserving an Additional Port In order for Dynmap to work properly, it requires its own dedicated port. Luckily, it's a short process to reserve an additional port for your server. 1. Open your server panel, then click the Ports tab on the left-hand sidebar 2. Click the Add Additional Port button 3. Give the new port a name and description, then click Add Port 4. Click the copy button next to your new port to copy it to your clipboard --- Configuring Dynmap After installing Dynmap onto your server, you will also need to configure some essential options before having access to your server's Dynmap web server. 1. Access your server's control panel and navigate to the Files tab. 2. Select the plugins folder to open it 3. Next, open the dynmap folder 4. Click configuration.txt to begin editing the Dynmap configuration 5. Set the field to or Dynmap generates images for each chunk, which can accumulate and occupy a large space in your server storage. Setting this option to or ensures that the generated images are not too large and that your server does not violate Shockbyte's Fair Use Policy. 6. Set the webserver-port field to the additional port you generated earlier 7. Save the file, then restart your server 8. Open a web browser and navigate to Make sure to replace the IP:PORT part of the provided web URL with your server's IP and the additional port you used to configure Dynmap. For example, in our case, our web URL will be . You may notice that not much of your world will display at first. This is because Dynmap has to generate an image for each chunk when a player loads it. If you would like, you can fully generate your Dynmap with the command. Keep in mind, generating your map will use up a huge portion of your server RAM and may cause lag spikes, which is completely normal. It is recommended to do this when there are no players on your server to prevent interruptions or lag while playing.
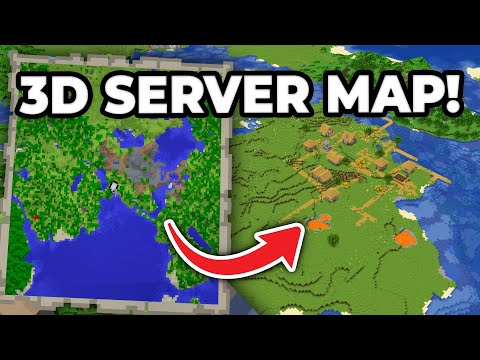
How to Set Up BlueMap
BlueMap is a plugin that allows you to create and view a live map of your Minecraft server world. Compared to its alternative, Dynmap, BlueMap offers some additional features but is a bit more resource-intensive. To follow this article, you will need to have BlueMap installed on your server. It is also recommended that you Setup a World Border for your worlds before generating your BlueMap to limit how much server space BlueMap (and your world) can take up. All of the BlueMap files are stored locally in the server files, as we do not support MySQL Databases as a storage method for BlueMap. --- Setting up BlueMap For BlueMap to function, you are required to set up an Additional Port for your server. 1. Access your control panel and Shut Down your server. 2. Navigate to the "Files" tab. 3. Navigate to the folder. 4. Click on to edit the file. 5. Set the option to true. Then click Save. 6. Go back and click on to edit it. 7. Set to your newly generated port, then Save the file. 8. Start your server to load the changes you've made. Once your server has fully loaded, you will be able to access your BlueMap map by navigating to in your web browser, replacing "IP" with your Server IP and "PORT" with the BlueMap Webserver Port that you specified in Step 7. You might see a blank map when first accessing your map. This is normal because the map images have not yet been generated. This will gradually be generated as players move around the world. For more configuration options, please visit the BlueMap Wiki.

How to Set Up a World Border in Minecraft
A world border is a boundary or limit that surrounds an area of a Minecraft world that prevents players and other entities from moving beyond the border. Setting a world border is especially useful to limit the chunks being generated when players travel your world, which sometimes causes lag or makes your world file's size get excessively large. Players will take damage when outside the border. While redstone builds and water or lava flows are unaffected, the placement of blocks and liquids outside of the border may be limited, if at all possible. ::ProseNote{title="Please Note" description="The world border feature is available to Minecraft Java Edition only. For Bedrock Edition servers (NukkitX or PocketMine-MP), you will need plugins to configure your world border." appearance="default"} :: Setting Up a World Border If you have OP permissions in-game, you can follow these steps using in-game commands as well. However, for this tutorial, we will be using the server console only to set up our world border. 1. Open your server's Control Panel. 2. In the Console window, enter . Specify the center of your world border by using this command, replacing and with your desired X and Z coordinates. It is recommended to set this on your world spawn or to , the physical center of the world. 3. Enter the command . Once the center is set, you can now specify the size of the world border using this command. For example, entering will change the diameter or distance from one end of the border to the opposite end to 20 blocks. --- Other World Border Configuration Commands You can configure some additional world border details using more World Border commands. You can learn more information about the world border and the worldborder commands on this wiki page. - Displays the current size of the world border. - Adjusts (increase or decrease) the world border to the given size within the provided time, in seconds. For example /worldborder set 20 5 will resize the current border size to 20 within 5 seconds. - Sets the amount of damage a player receives every second they're outside the world border. For example /worldborder damage amount 1 will cause the player to take 1 damage per damage tick. \- Sets <distance as the number of blocks from the world border that a player starts to take damage. For example /worldborder damage buffer 5 will cause players to take damage when they're more than 5 blocks outside of the border. \- Sets <distance as the number of blocks from the world border when a player sees a warning of the border's proximity. For example /worldborder warning distance 2 will cause the player to begin seeing the border warning when they are 2 blocks away. - Sets <time as the number of seconds when the player begins to see a warning of the border's proximity as it gets closer. For example /worldborder warning time 2 will wait 2 seconds before warning the player that they are within the border warning proximity. That's it! You now know how to set up a world border for your server. Should you have any issues, please feel free to contact us.
How to Set Up a Minecraft Spawn
The spawn (spawn point) is a location in a Minecraft world where a player or entity is generated. For servers, this is where new players will be located when joining for the first time. Players will also respawn on this location upon death when they have not used a bed or changed their individual spawn point. A lot of servers, through the use of mods or plugins, have a command that allows players to teleport back to the world's spawn point. --- Setting the World Spawn If you have OP permissions in-game, you can simply enter the command to set the world spawn to the location and orientation you are currently standing in. If you would like to set the world spawn point in your server's console, you will need to add coordinates to the command you send. 1. Open your server's Control Panel. 2. In the Console window, enter . After replacing the placeholders , , and with their respective in-game coordinates, you can enter the command to set the world's spawn point to that location. Setting Player Spawn Points You can use the command to set the spawn point of individual players as well, as long as they are online when you run the command. Similarly to the setworldspawn command, if you have OP permissions, you can use this command in-game to set the spawn point of the specified player to the location and orientation you are currently standing in. If you're going to send the spawnpoint command from the server console, you will need to add the exact coordinates of where you'd like to set a player's spawn point. 1. Open your server's Control Panel. 2. In the Console window, enter . After replacing the placeholder with the name of the player you would like to edit the spawn point of, and replacing , , and with their respective in-game coordinates, you can enter the command to change the target player's spawn point to that location. That's it! You've now learned how to set a spawn point on your server.

How to Install Plugins on a Minecraft Server
Plugins are server-side modifications that allow server owners to change certain aspects of the game, which are a great way to extend the capabilities of their server. These plugins do not require a player to have anything additional installed on their client. Don't know what plugins you should install? Feel free to check out our Best Minecraft Plugins list. ::ProseNote{title="Plugin Compatible Server Type Required" description="Before getting started, your server must be running a Server Type that supports plugins such as Paper for Minecraft Java Edition. For more information on what Minecraft server types are available to you, please refer to this guide." appearance="danger"} :: ::ProseNote{title="Important" description="Make sure the plugins you download are compatible with the server version you have installed!" appearance="error"} :: Installing Plugins Manually Plugins are installed by uploading the file to the folder in your server files. We recommend searching popular and reputable websites like Modrinth or SpigotMC when downloading plugins, as it is possible for malware to exist in untrustworthy plugins. Be careful! 1. Access your server's Control Panel and navigate to the Files tab. 2. Select the plugins folder to open it. 3. Upload your desired plugin jar files. You can drag and drop your desired plugin jar files into this folder on your control panel to upload them, or you can click the upload button in the top right. Additionally, you can upload your plugin files using an SFTP client, should you wish to. 4. Start or Restart your server if it is already running. Installing Using the Shockbyte Plugin Installer Shockbyte automatically integrates the plugin libraries of some popular plugin provider websites like Modrinth and Paper Hangar. As a result, you can easily install thousands of popular plugins with one single click! 1. Open your server's Control Panel. 2. Click the Plugins tab to open the Shockbyte plugin library. 3. Locate your desired plugin, then click the Install button. 4. Start or Restart your server if it is already running. That's it! You've now successfully installed a plugin, and when the server restarts, you will be able to see it by running the command.