Still have questions?
Shockbyte
Support Team

How to Change your Server Icon on your FiveM Server
A custom server icon helps your FiveM server stand out in the server list and makes it easier for players to recognize your community. This guide walks you through preparing the icon, uploading it to your server, and enabling it in the server configuration.
Important
Please ensure that you have followed the Getting Started with your FiveM Server guide before proceeding with the following steps.
#Choosing a Server Icon
Before uploading the icon, it must meet FiveM’s requirements:
-
Image size:
96 × 96 pixels -
File format:
PNG (.png)
You can use an image editing program such as GIMP, or an online image tool, to resize and convert an existing image. Once your icon meets these requirements, save the file and note the file name for later use.
#Uploading your Server Icon to the Server
Once you have setup your server via txAdmin with a framework, you will be able to add resources to your server. We will be using QBCore in the following example:
-
Go to your Shockbyte Control Panel.
-
Navigate to the Files tab and locate the following directory:
/txData/QBCore_XXXXX.base/. The "XXXXX" represents the ID of your template. -
Select the Upload File(s) button and upload your Server Icon file. For this example,
myLogo.pngis our server's icon.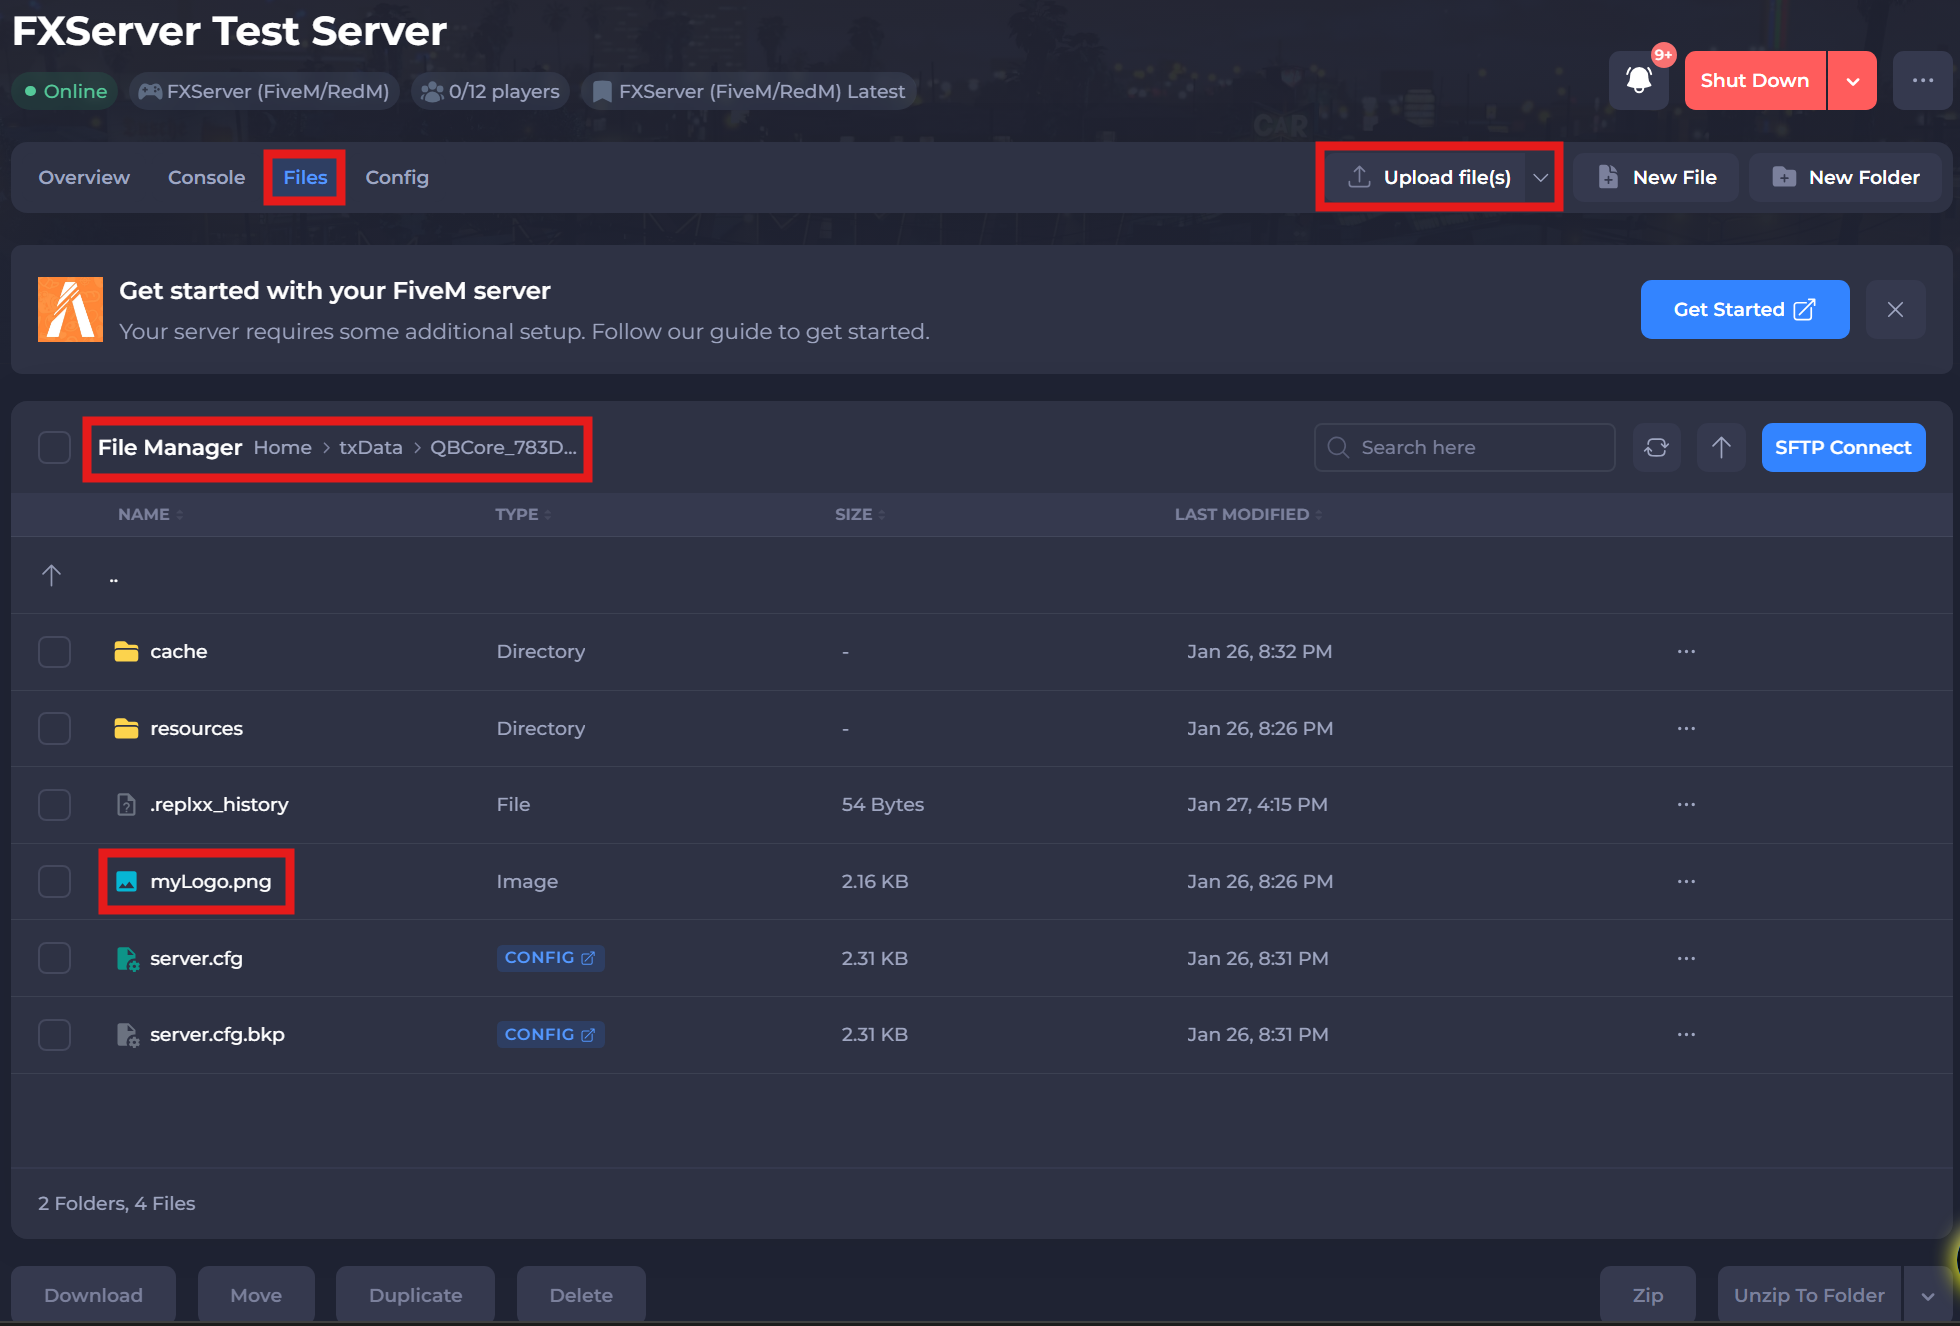
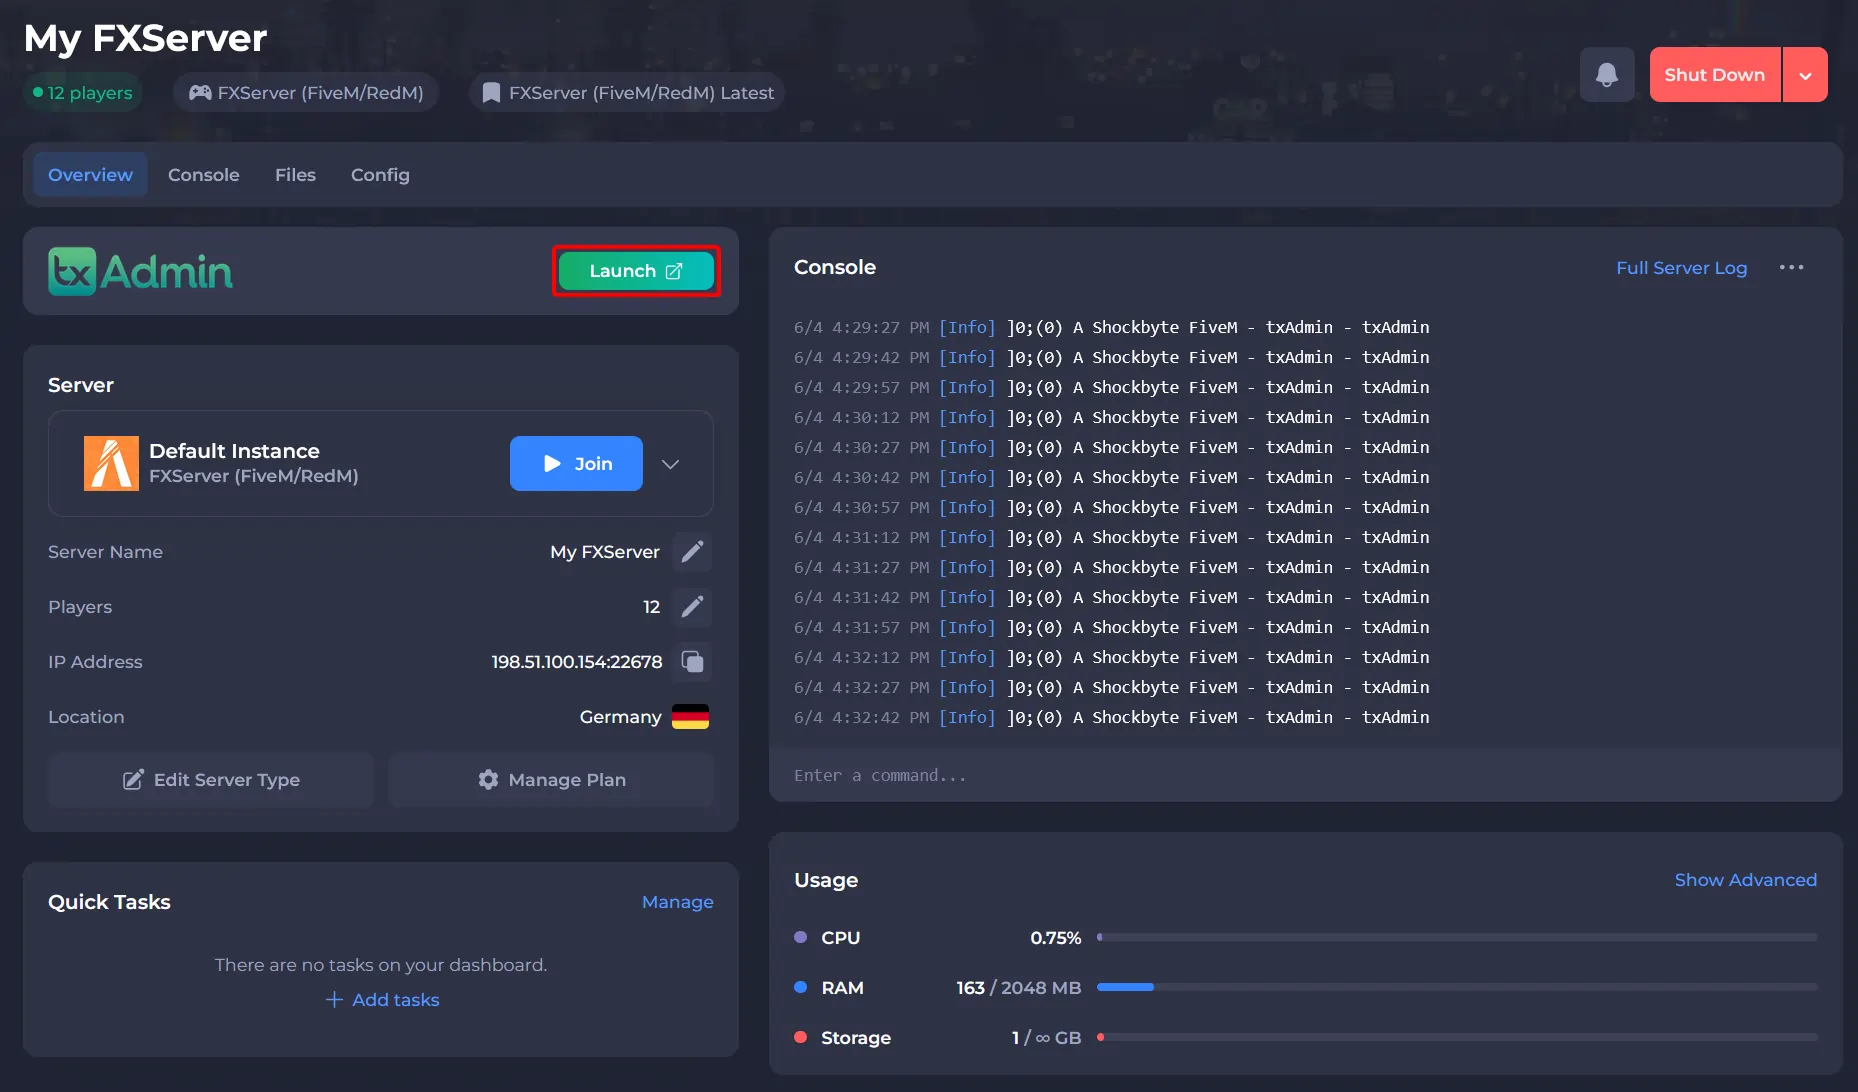
#Activating the Server Icon in txAdmin
For the server icon to be added to your FiveM server officially, it must be added to the server.cfg file. You can manage this file easily through the CFG Editor in the txAdmin panel.
-
Go to your Shockbyte Control Panel.
-
Launch txAdmin.
-
Navigate to the CFG Editor area and add the line:
load_server_icon myLogo.png.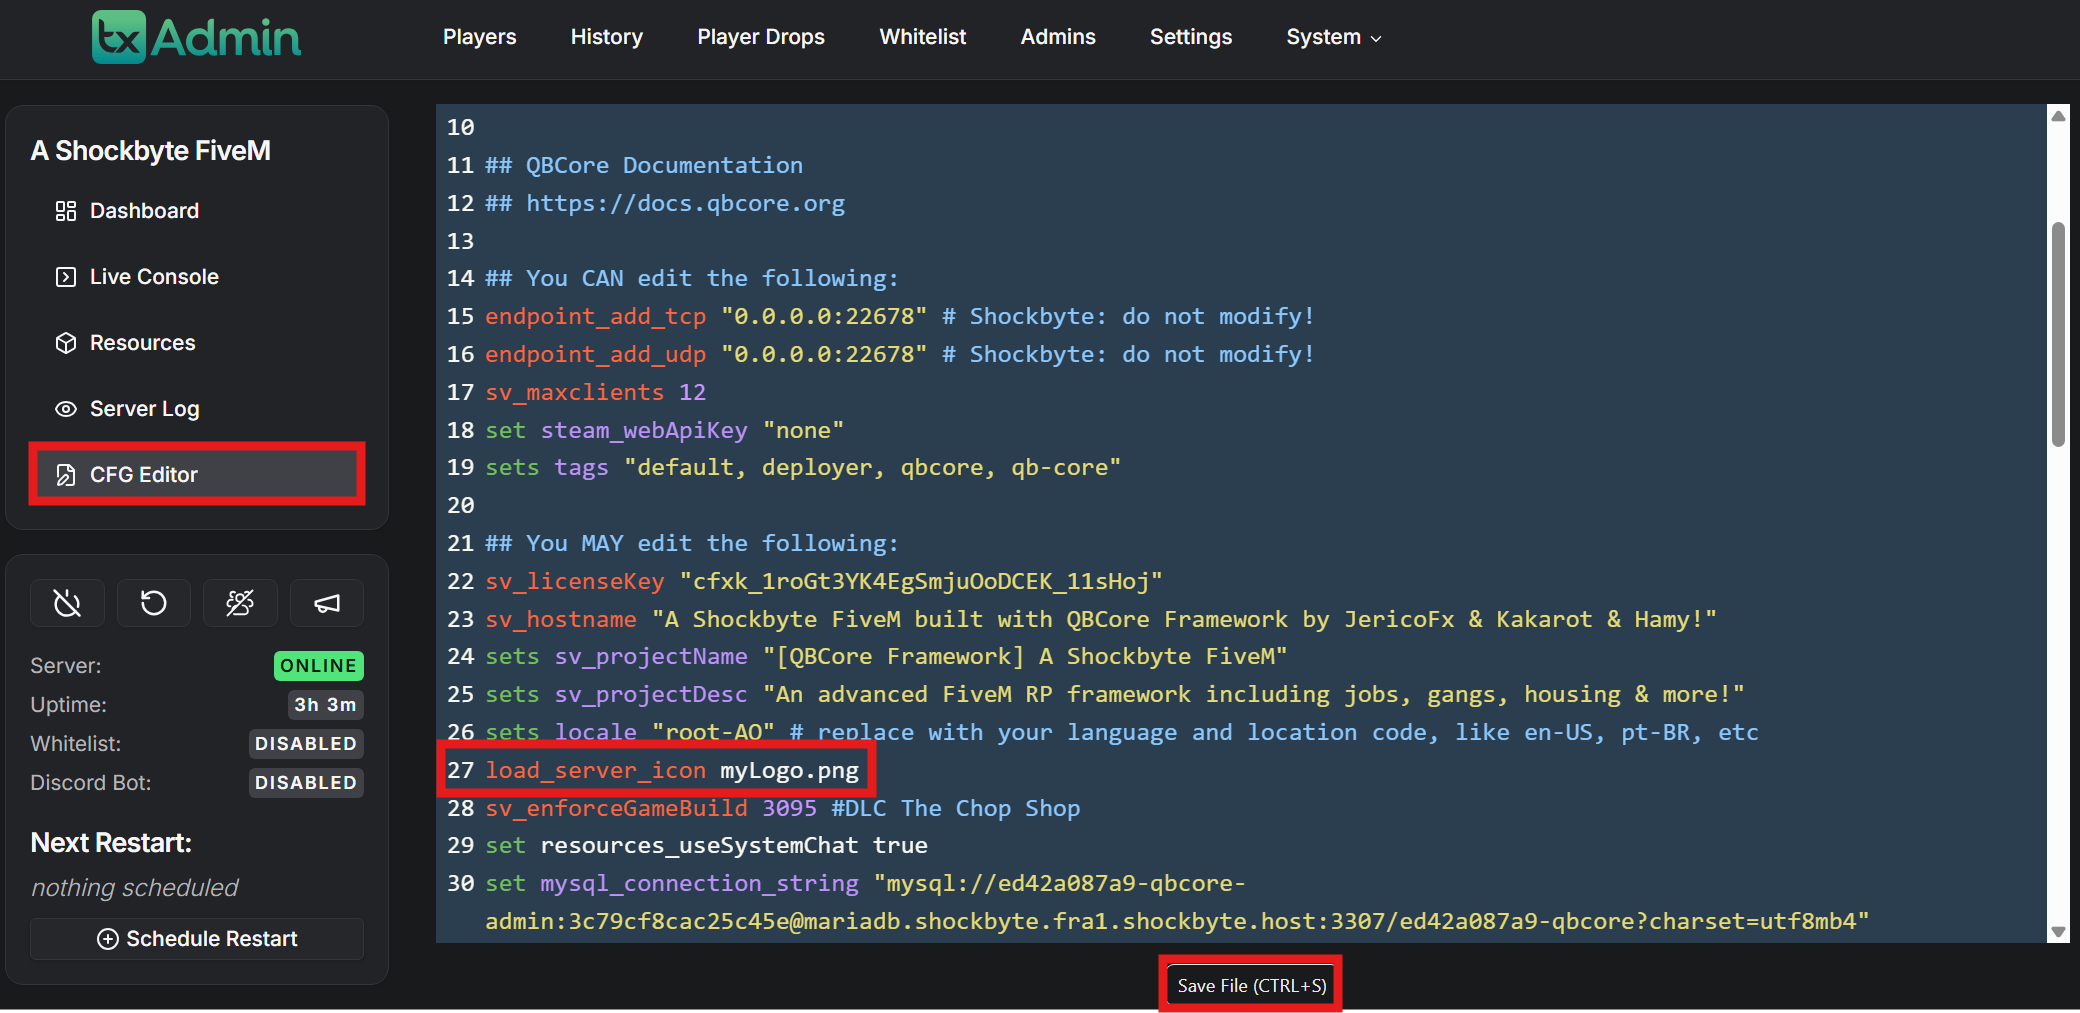
-
Click Save File at the bottom of the page.
To learn more about FiveM server hosting, you can browse our library of Knowledgebase articles here.