Table Of Contents
Uploading a Custom World to Your ServerStill have questions?
Jay Miller
Game Engineer

How To Upload A Custom World To Your Valheim Server
Uploading a custom world to your Valheim server can be a great way to migrate your single-player world progress to your server, or to use a specific seed you want. Fortunately, there is a method available that allows Valheim server owners to import external worlds.
You can have as many world files uploaded to your server as you want. In fact, you can swap between these worlds by simply changing what world is selected in your valheim.properties file.
#Uploading a Custom World to Your Server
-
If you haven’t already, generate the world you want in single-player.
-
Single-player worlds are located in
C:\Users\<username>\AppData\LocalLow\IronGate\Valheim\worlds. Or inC:\Program Files (x86)\Steam\userdata\(Steamid)\892970\remote\worlds\.
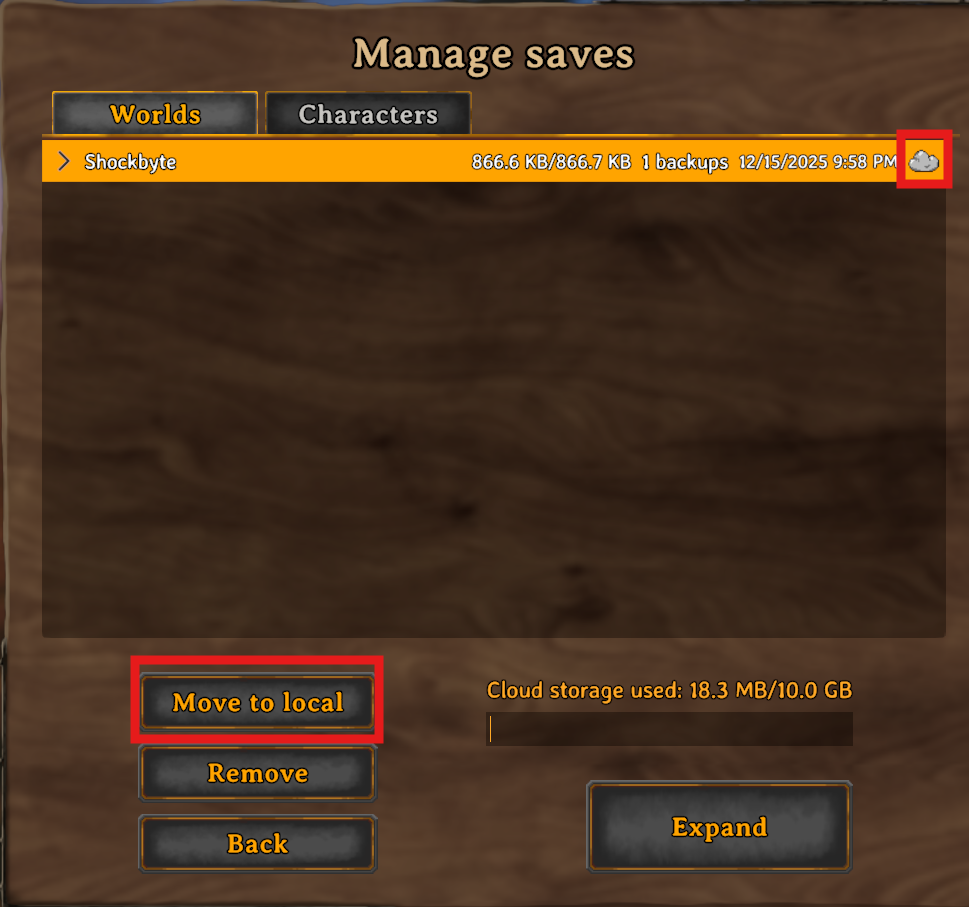
Note
Some Valheim worlds are saved to the Steam cloud, and you have to use the Move to Local feature in-game to access saves locally. These saves can be found in the C:\Users\<username>\AppData\LocalLow\IronGate\Valheim\worlds_local directory.
- Locate the
<worldname>.dband<worldname>.fwlfiles.
Note
Sometimes this may be named <worldname> in File Explorer, but the .db may be hidden
-
Access your server Control Panel and Stop the server.
-
Go the Files tab and Navigate to the
/savedata/worlds_localdirectory.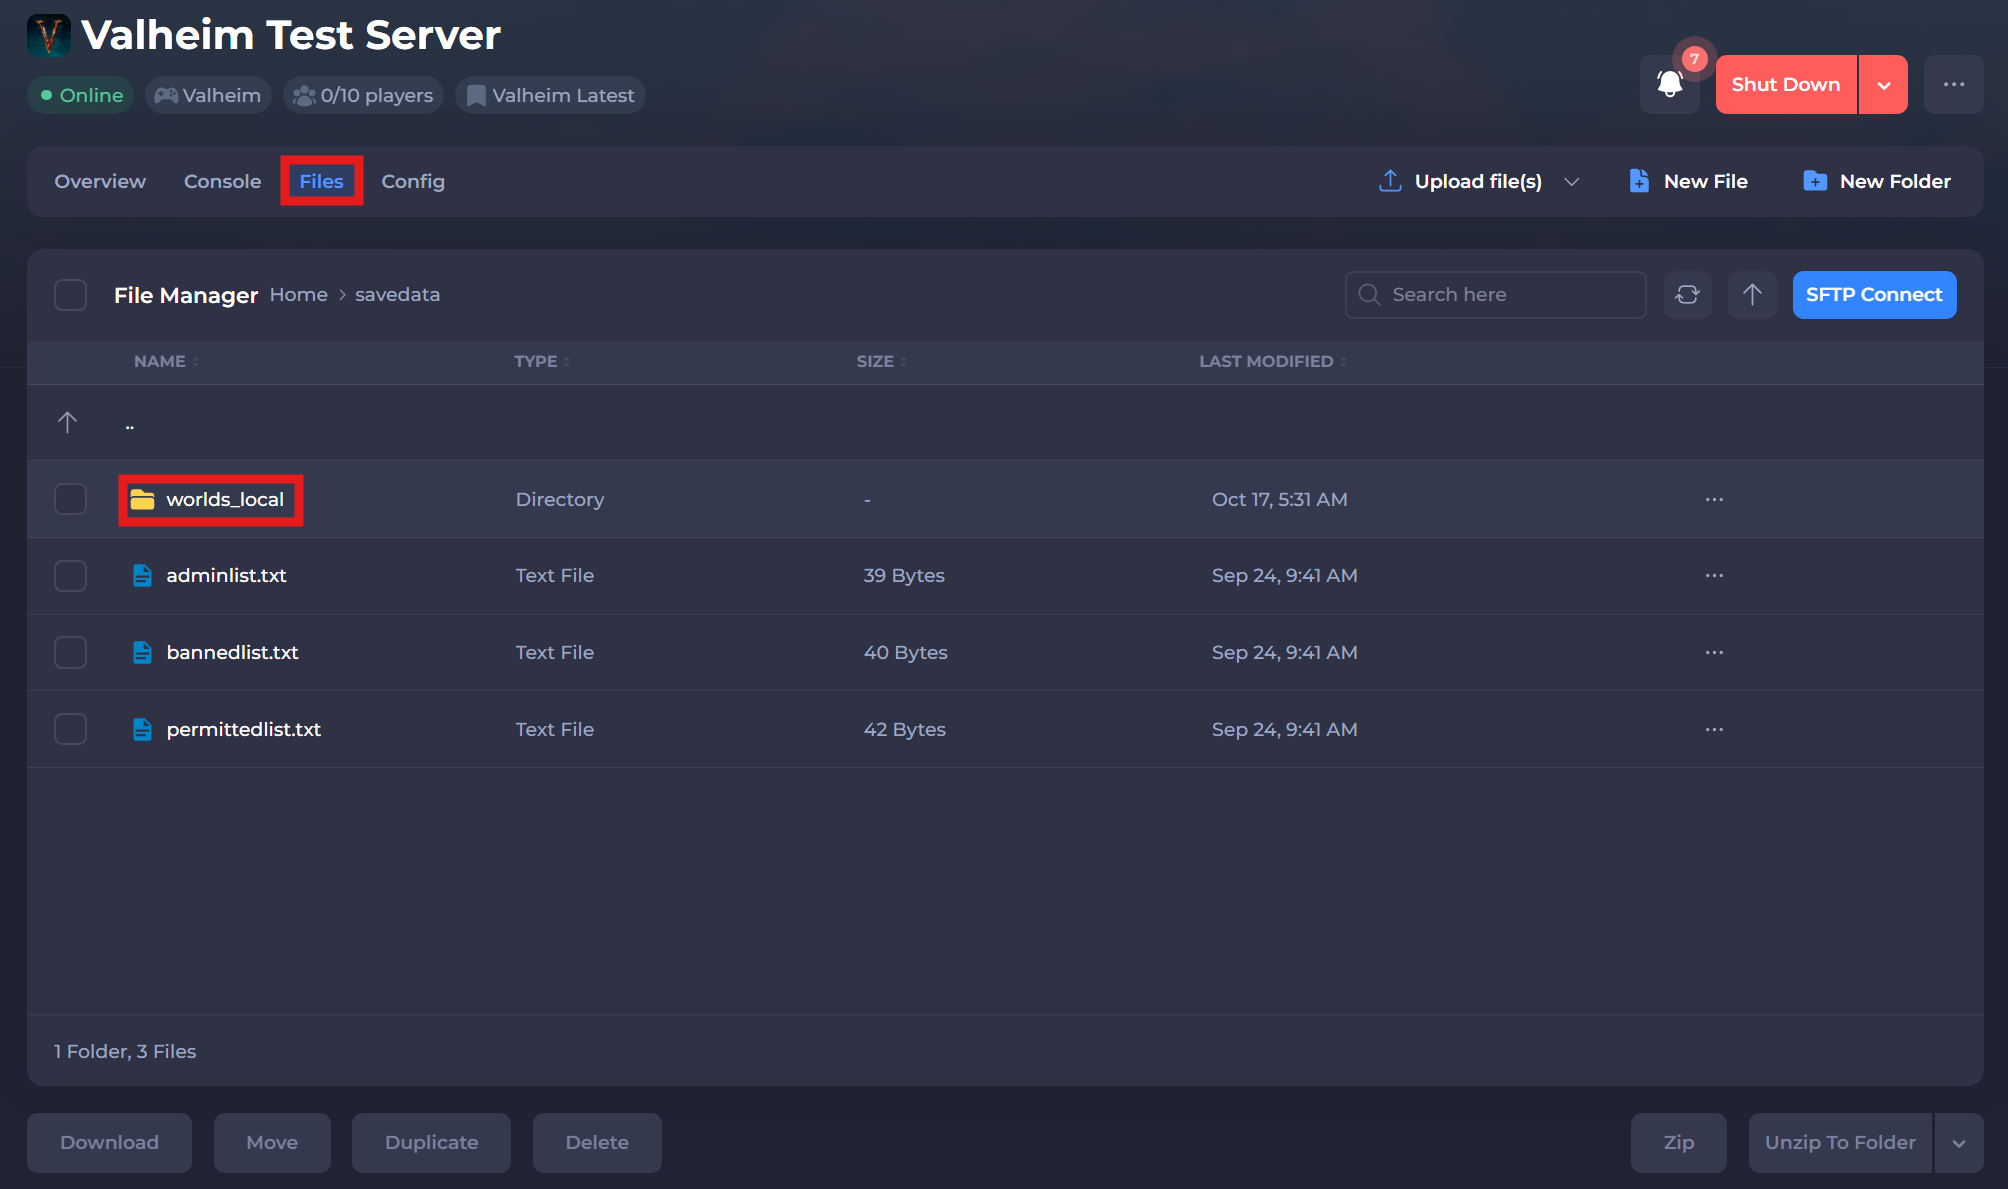
-
Upload the
.dband.fwlfiles to this directory. -
Navigate to the Config tab.
-
Set your custom world's name in the
worldsetting.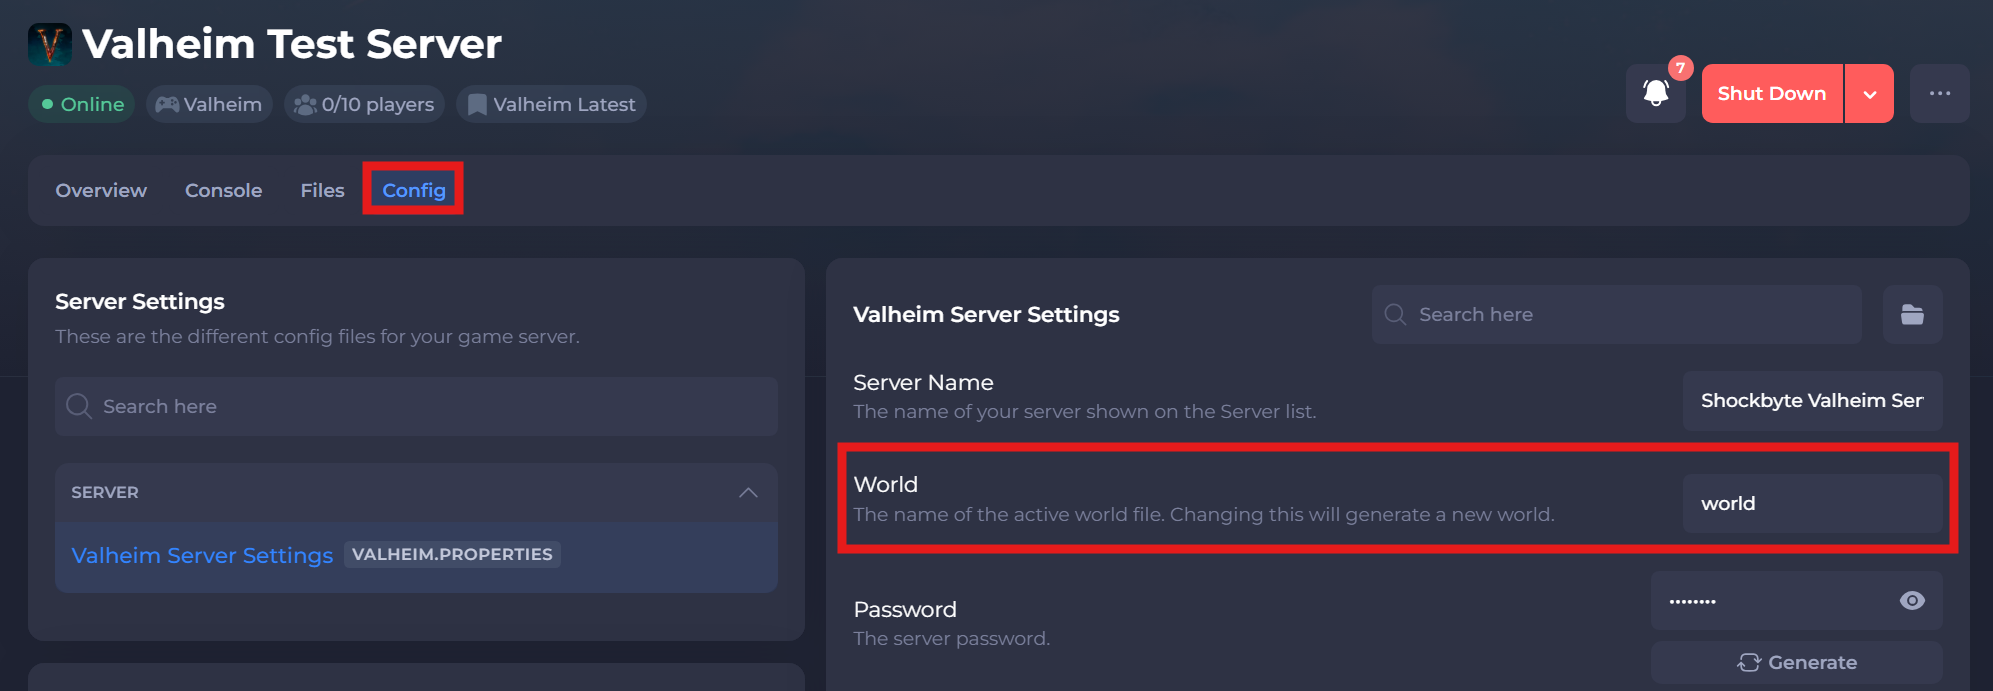
-
Click Save and Restart your server.
Congratulations, you should now have successfully uploaded and loaded your desired Valheim world to your server!