Table Of Contents
Changing the DifficultyStill have questions?
Come chat with us and we will get back to you as soon as possible!
Contact SupportJay Miller
Game Engineer

How to Change the Difficulty of Your 7 Days to Die Server
7 Days to Die
·Oct 27, 2024
·3 min read
Most customisation of your 7 Days to Die Server will be done through its serverconfig.xml file, including changing the difficulty. There are 5 difficulty levels, as explained below with their differences.
| Level | Skill | Description | % Damage done by Zombie | % Damage done by Player |
|---|---|---|---|---|
| (0) Scavenger | Easiest | Easiest setting, intended for absolute beginners | 50 | 150 |
| (1) Adventurer | Easy | More challenging than the easiest level | 75 | 125 |
| (2) Nomad | Normal | Designed for players with FPS game experience | 100 | 100 |
| (3) Warrior | Hard | More challenging than normal mode | 150 | 75 |
| (4) Survivalist | Harder | Even more challenging! | 200 | 50 |
| (5) Insane | Hardest | The hardest difficulty level! | 250 | 25 |
#Changing the Difficulty
You can change the difficulty of your server via the serverconfig.xml file.
-
Open your server's control panel and Stop the server.
-
Navigate to the Files tab.

- Find and open the serverconfig.xml file.

- Locate and set the value of the Game Difficulty property to your desired difficulty, referring to the number in the first column of the table above.
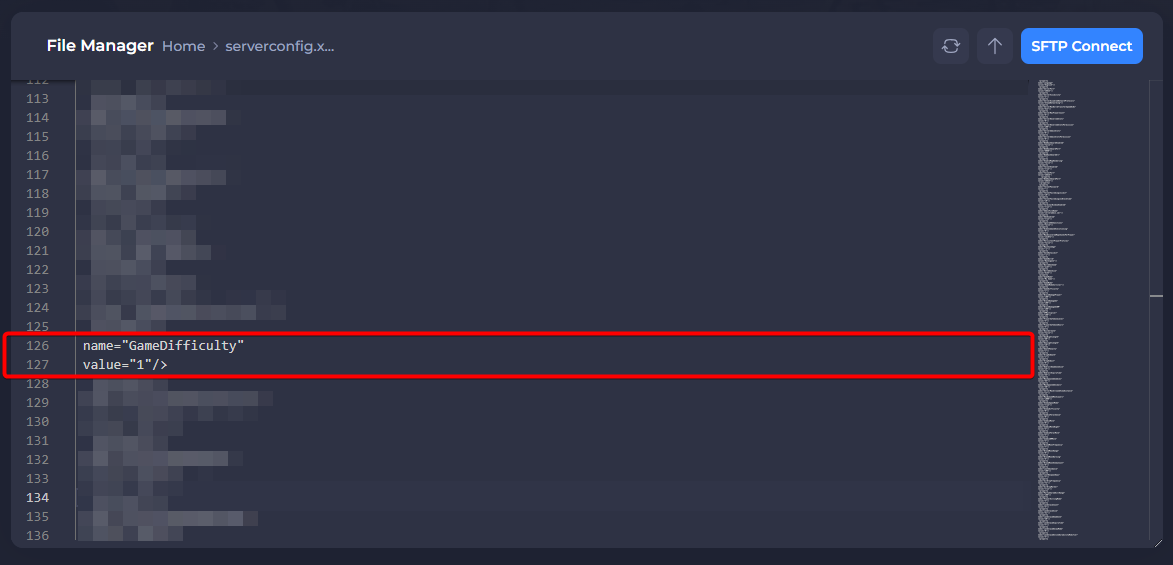
- Save the file and then Restart your server to apply the changes.