Still have questions?
Shockbyte
Support Team
How to Enable Voice Chat for your V Rising Server
Voice chat can be a great way for players to communicate with one another, unfortunately, there is no built-in way to do this with V Rising so you will have to go through a few steps to complete this with Unity Gaming Services.
#Signing Up For Unity Gaming Services
You will require a Unity Gaming Services account to use Vivox VoIP.
Unity Gaming Services is required to enable voice chat with your V Rising server.
- Access Unity Gaming Services Dashboard.
- Click Create An Account.
- Complete the registration process.
#Getting your VoIP Credentials
Before you can complete your ServerVoipSettings.json, you will be required to generate the information to fill it in and download the Vivox DLL file.
-
Log into your Unity Gaming Services Dashboard.
-
Click Create Project, and give it a name.

-
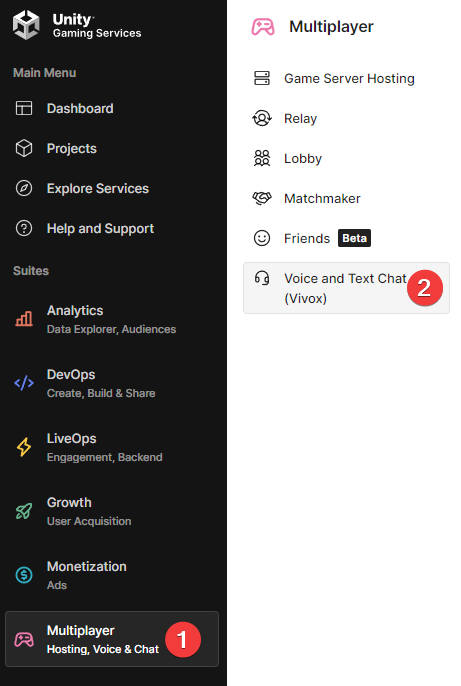
Navigate to Multiplayer > Voice and Text Chat (Vivox).
-
Click Setup Voice Chat.
-
In the Setup Guide, select
Custom, and downloadCore Windows SDK.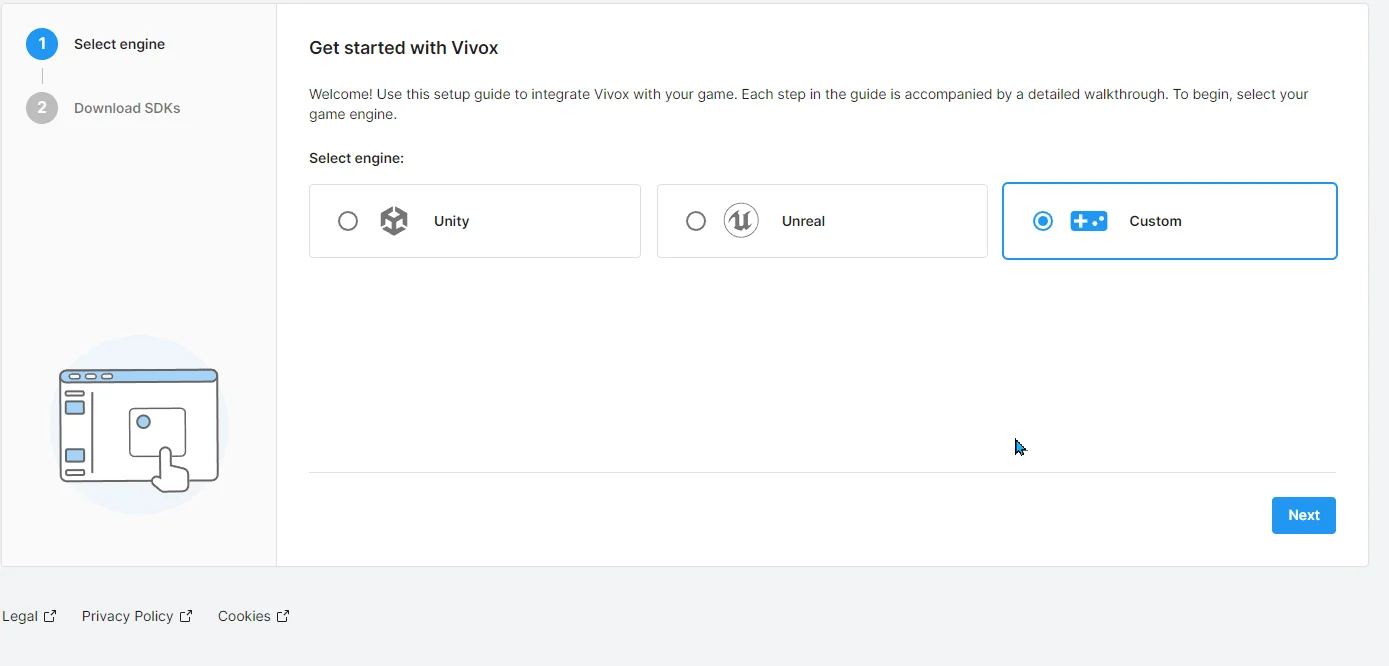
-
In the downloaded file navigate to
\vivox-sdk\SDK\Libraries\Release\x64as you will requirevivoxsdk.dllto be uploaded to your server later.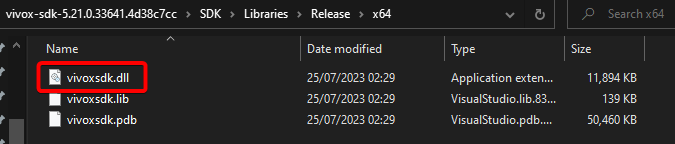
-
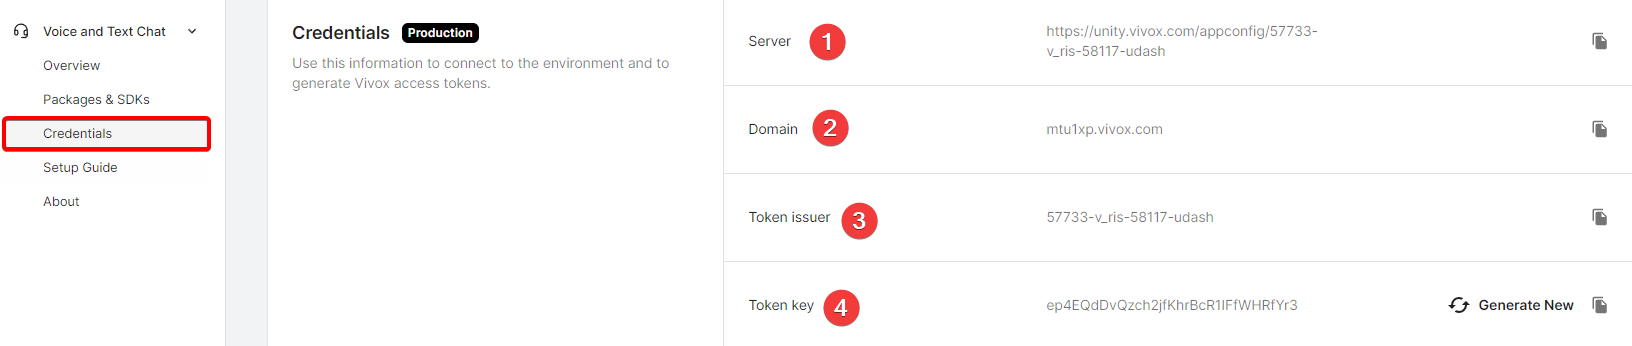
Once downloaded navigate to Credentials as you will require each of the credentials on this page.
#Configuring your Server
Once you have the credentials and files, you will be required to upload the DLL file and fill in your ServerVOIPSettings.json file.
-
Access your Control Panel and Stop your server.
-
Navigate to the Files tab, select locate the
/VRisingServer_Data/StreamingAssets/Settingsdirectory. Open theServerVoipSettings.jsonfile.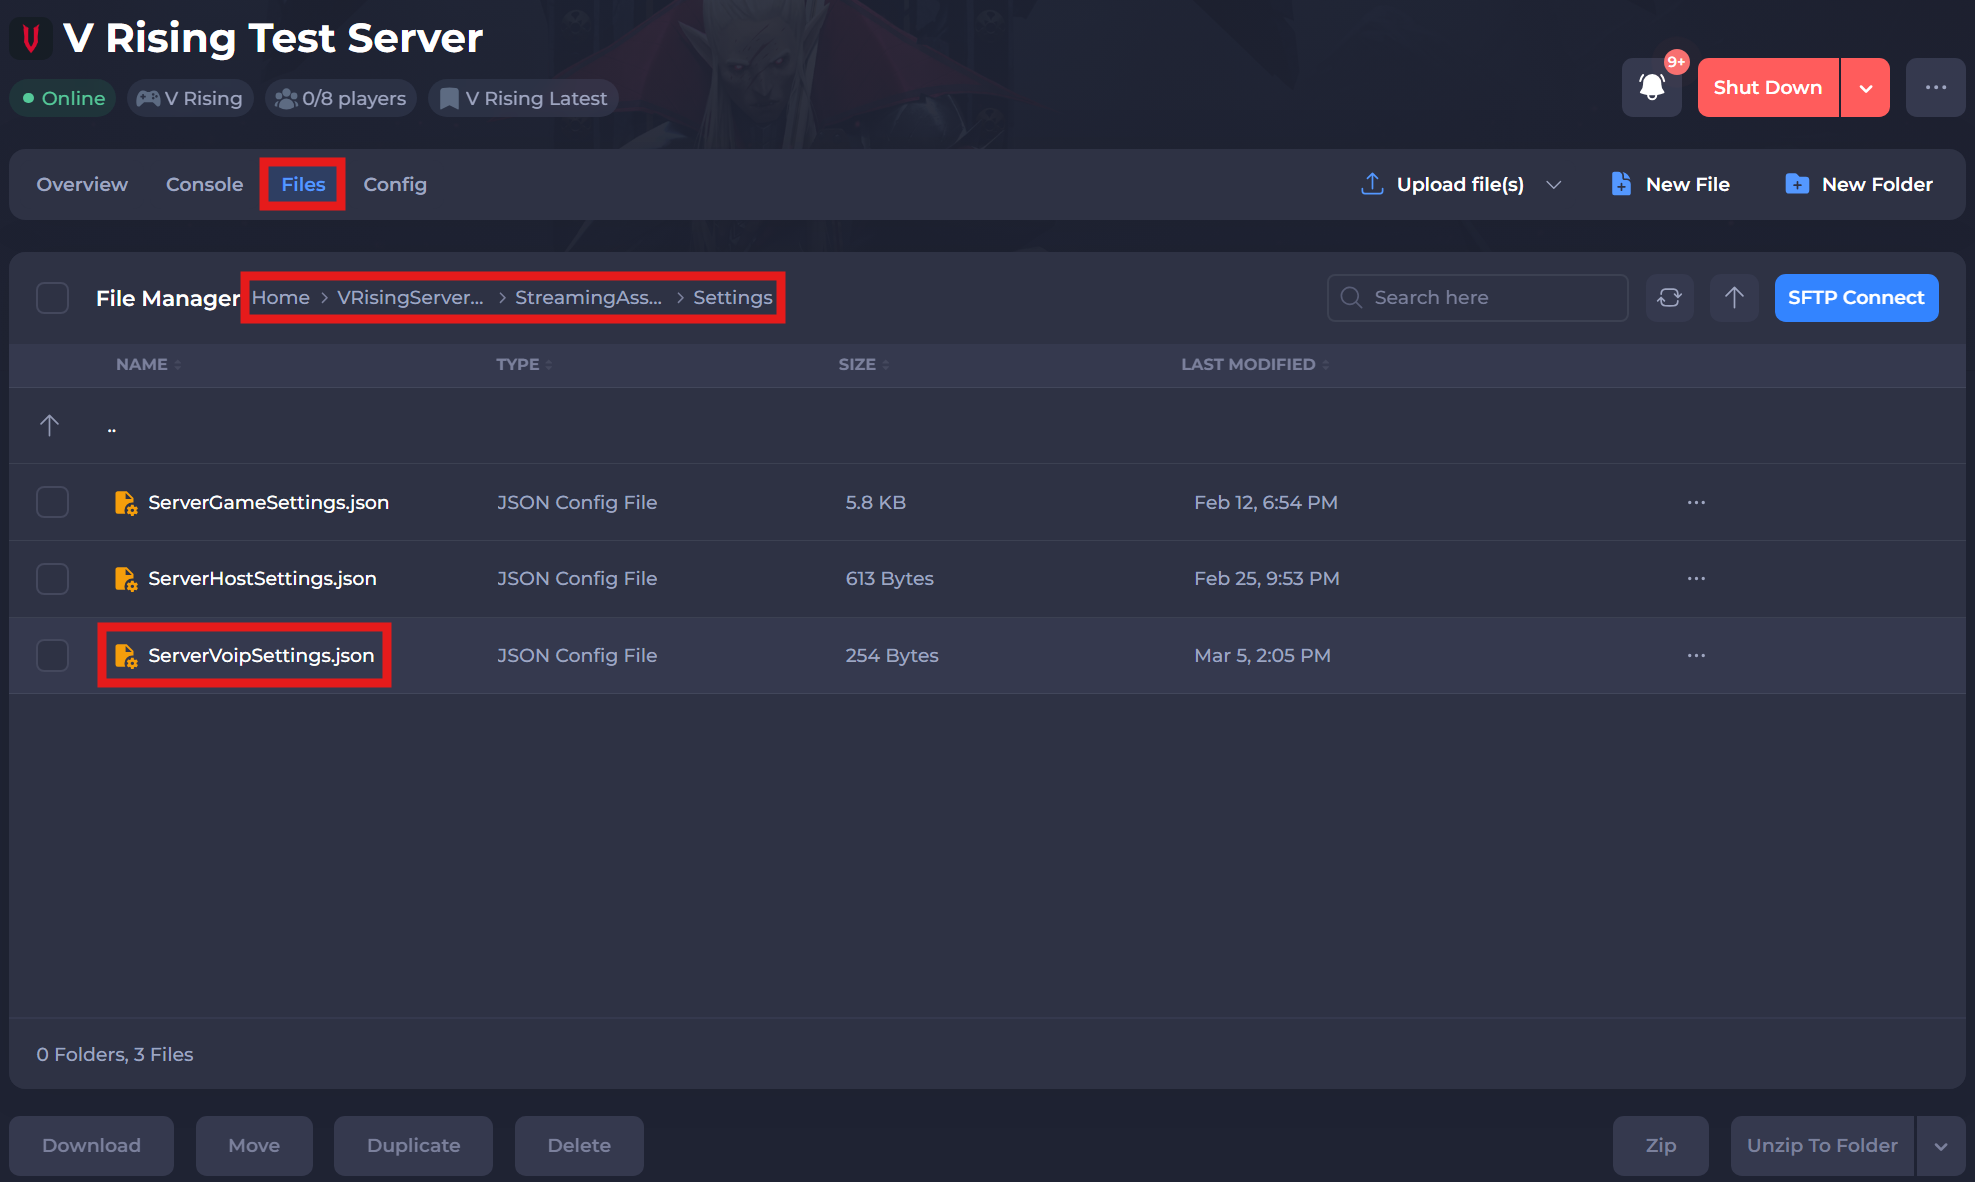
-
Edit the following config lines based on your Vivox Credentials:
| Config Line | Vivox API Info |
|---|---|
| VOIPEnabled | True |
| VOIPIssuer | Token Issuer |
| VOIPSecret | Token Key |
| VOIPVivoxDomain | Domain |
| VOIPAPIEndpoint | Server |
- Save this file, then navigate to the
/VRisingServer_data/Plugins/x86_64directory. - Upload the previously found
vivoxsdl.dllto this folder, if there is already one in there then replace it with this new file. - Restart your server.
#Enabling Voice Chat
Once your server is setup you'll need to enable voice chat in-game.
- Open V Rising.
- Navigate to Options > Sound.
- Enable
Proximity Voice chat.
If you require any further assistance, please contact our support at: https://shockbyte.com/billing/submitticket.php