Still have questions?
Jay Miller
Game Engineer

How to Create a Randomly Generated World on your 7 Days to Die Server
By default, 7 Days to Die servers will use one of several predefined maps. 7 Days to Die also supports random world generation that can be enabled by modifying your server’s configuration file.
Important
The GameWorld property refers to the name of a map to load, not the name of the save file or session. Using arbitrary values that aren’t the names of maps in Data/Worlds or RWG will result in the game crashing during startup.
#Enabling Random World Generation
You can enable random world generation using the following procedure:
-
Open your server's Control Panel and Shut down the server.
-
Navigate to the Files tab.

- Find and open the serverconfig.xml file.

-
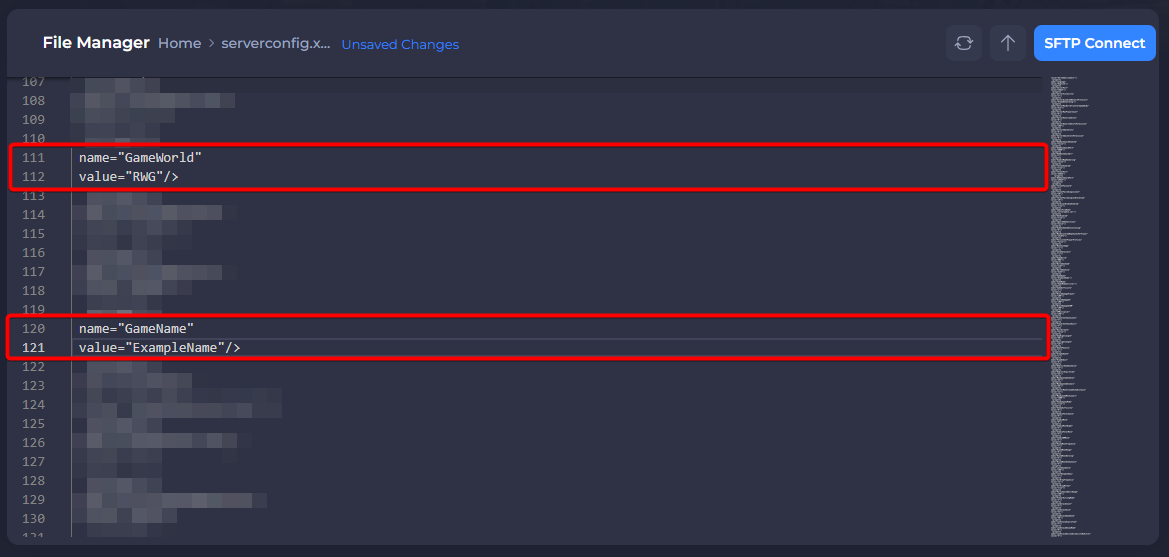
Scroll until you find the option
GameWorld. -
Change the value of
GameWorldtoRWGand the value ofGameNameto a world name of your choice.
- Change the size of your map with the
WorldGenSizesetting.
Supported World Sizes
Currently, 7 Days to Die only officially supports the following world sizes for maps using random generation: 4096, 6144, 8192, and 10240.
Large World Sizes
Large world sizes consume more RAM on average than smaller worlds. The world sizes 8192 and 10240 may require additional RAM to run smoothly if your server is on the base plan.
- Save the file then Start your server.
Your server should use a new map with random world generation upon restarting!
#Other World Types
If you’re looking to use a pre-generated or custom world instead of a randomly generated world, check out our guide on all the different methods to change your world here: How to Change the World on your Server