Still have questions?
Shockbyte
Support Team

How to Setup Player Permissions in Garry's Mod
Often, server owners will want to grant specific players permission to perform administrative actions to use cheat commands on their servers. This article covers using the ULX admin mod to setup permissions on your GMOD server. This guide assumes that you have followed the instructions in our Installing ULX & ULIB Admin System to your Garry's Mod Server guide prior to continuing with this guide.
#ULX Basics
Before you’ll be able to interact with ULX’s admin commands, you’ll want to add yourself as a superadmin. You can accomplish this by joining your server and issuing the following command on your server’s console (Accessible by clicking the Console button): ulx adduserid YOURSTEAMID superadmin
You should replace YOURSTEAMID with your SteamID, which can be found using a site like steamid.io.

Once you have added yourself as superadmin, you should be able to use admin commands in-game. You can open the ULX menu by typing !menu in the chat or using the ulx menu command in the in-game console. The following menu should appear:
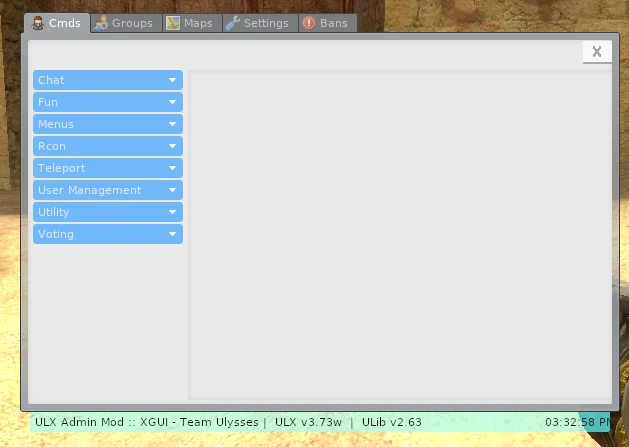
In the ULX menu, you can find all of ULX's functionality organized into 5 main tabs at the top of the page:
| Command | Description |
|---|---|
| Cmds | Contains all of the commands that are available to your group organized into several different categories. You can click on a category name on the left side to expand it and view the commands that are a part of that category. To run a command, simply click it, fill out the form in the middle and right sides to supply the required arguments, and click the button with the command's name on the right side of the menu. |
| Groups | Allows you to create groups, assign permissions, add/remove users to/from groups, as well as various other functionality related to group management. |
| Maps | Allows you to change the map and for players to vote for the next map. |
| Settings | Contains various client and server settings. Only superadmins can change server settings. |
| Bans | A list of everybody who has been banned from your server. You can also remove and add new bans from here. |
Most ULX commands have a chat command equivalent. For instance, you can teleport another player to you by typing !bring PLAYER in the chat and it will work exactly the same as the bring command in the Cmds tab of the ULX menu.
#Configuring Player Permissions
Adding/Removing Groups
Warning
Many addons expect the admin and superadmin groups to be used for administrators and super administrators. If you choose to rename these groups, or use a group like owner over superadmin, you may experience issues with some add-ons not allowing access to these groups properly.
By default, ULX includes 3 administrator groups, which are (from least privileged to most privileged) operator, admin, and superadmin. You can add additional groups or remove existing groups as required within the Groups tab of the ULX menu. To manage groups:
- Open the ULX menu.
- Select the Groups tab.
- Expand the dropdown in the top left corner.
- Select Manage Groups.
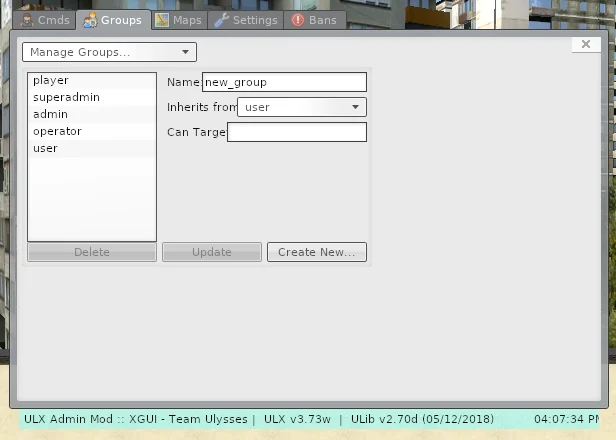
Once your ULX menu looks like the screenshot below, you are ready to manage your server's groups:
Creating a Group
To create a group, simply fill out the form on the right side of the menu and press Create New. The meaning of the fields can be found in the table below:
| Setting | Description |
|---|---|
| Name | The name of the group to create. This can be anything, but the general convention is that group names are all lower case and all spaces are replaced with underscores (_). |
| Inherits From | An existing group that the new group should inherit permissions from. The new group will be able to do anything the chosen group can in addition to any other permissions you may grant to it. |
| Can Target | The new group will only be able to target users and groups that this rule allows. If set to *, the group will be able to target everybody. A common use for this is preventing a group from targeting anybody who is higher in rank than they are. For instance, if you wanted to stop the operator group from targeting any member of admin and any group that inherits from admin, you would enter !%admin into this field. |
Updating an Existing Group
Any of the above listed attributes of an existing group can be updated by selecting the name of the group you would like to update from the left side of the menu, changing the desired attributes, and clicking the Update button.
Removing an Existing Group
Warning
Deleting a group is a destructive action. All permissions and users associated with a group are lost when the group is deleted.
A group may be deleted by selecting a group from the menu on the left side of the ULX menu and clicking the Delete button.
Granting/Revoking Permissions
Permissions can be added and removed as needed in the Groups tab of the ULX menu. To manage the permissions for a group, simply open the Groups tab, select the group that you would like to modify the permissions of in the dropdown in the upper left corner of the menu, and click the Manage Permissions button on the bottom of the menu. Once you’ve done this, you should see something like the menu below:
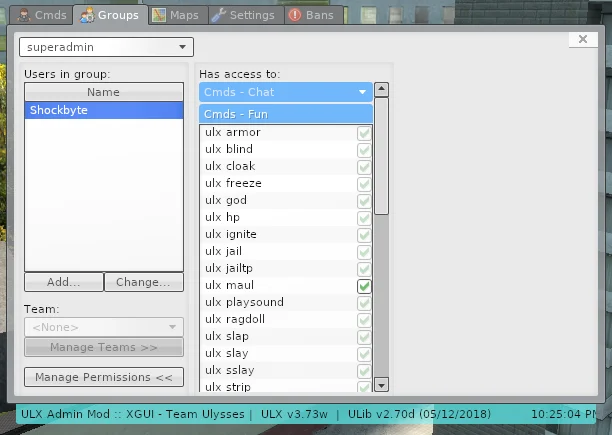
Similarly to the categories on the Cmds tab, the categories in this menu can be clicked on to reveal all permission that comprise the category.
You can grant a permission to the selected group by checking the box next to permission and you can revoke a permission by unchecking the box.
If a box is faded and checked, it means that the permission has been granted to a group that the group you are editing inherits permissions from and that the permissions must be revoked for that group too in order to remove them from the current group.
Restriction Command Arguments
You can add restrictions to what arguments players are allowed to use with a command by selecting the permission, editing the fields on the right side of the menu, and clicking the Apply restrictions button.
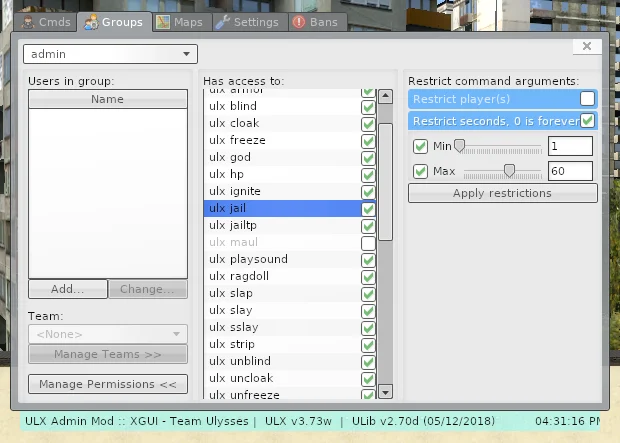
For instance, if one wanted their admins to only be able to jail a player for 60 seconds at a time, they should restrict the seconds arguments of the ulx jail command to a minimum of 1 second (so they couldn’t specify 0, which is forever) and a maximum of 60 seconds as shown in the screenshot above.
#Managing Users
Warning
If you assign a new group to yourself or you remove your existing group, you may inadvertently remove your ability to manage permissions in-game. To restore your privileges, simply use the console command method in the Assigning Users to Groups section of this article to grant yourself superadmin access.
Upon joining the server for the first time, all users will be a member of the default user group. This group has very limited access and is suitable for any players that you don’t trust with administrator access. For everybody else, however, you’ll want to add them to a group with more access.
Assigning Users to Groups
You can assign a user to a group through the ULX menu or by using console commands. Through the menu:
- Open the ULX menu using the
!menuchat command - Switch to the Groups tab
- Select the group from the dropdown in the top left corner that you would like to add the user to.
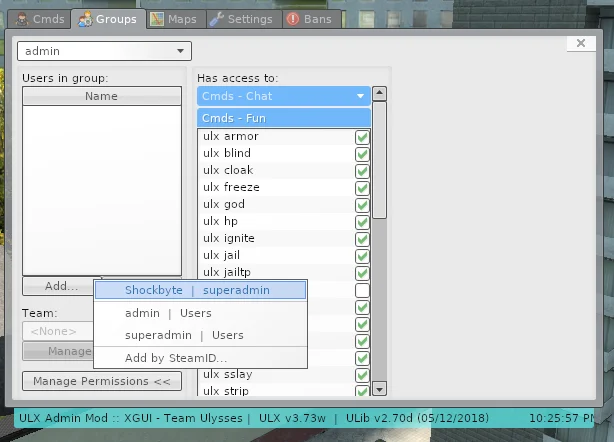
- Click the Add button and click the name of the user you would like to add to the group. If the user is not online, you can use their SteamID to add them by selecting Add by SteamID. You can find a user’s SteamID using a site like steamid.io.
To add a user to a group via console command, you can run the following command in your server’s console or in your in-game console:
ulx adduserid STEAMID GROUP
You should replace STEAMID with the user’s SteamID, which can be found using a site like steamid.io, and GROUP with the name of the group you would like to add the user to.
Removing Users from Groups
Similar to adding users to groups, removing a user from groups may also be done through the menu or the console. To remove a user from a group in the menu:
- Open the ULX menu.
- Select the Groups tab.
- Select the group that the user is currently a member of from the dropdown in the top left corner.
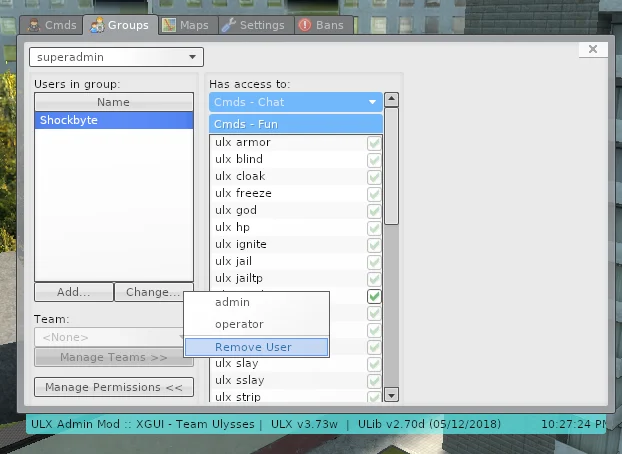
- Click the change button and select either the new group you would like the user to be moved to or the Remove User button to revert them to the default group.
To remove a user from a group via console. Issue the following command in the server console or in your in-game console:
ulx removeuserid STEAMID
If you require any further assistance, please contact our support at: https://shockbyte.com/billing/submitticket.php