Still have questions?
Come chat with us and we will get back to you as soon as possible!

Shockbyte
Support Team

How to Use Beacon to Configure Your ARK: Survival Evolved Server
ARK: Survival Evolved has extensive configuration files that let you change how your server plays, including breeding multipliers, difficulty, harvest rates, creature spawns, and more. These files use strict formatting, and a single mistake can cause your server to reset them.
Beacon is a free third-party app that lets you edit all of these settings in one place. Beacon writes the files with the correct formatting for you, and it can upload your changes straight to your server over SFTP.
Important
Beacon doesn't need your SFTP details, and the Beacon team doesn't store them. If you'd rather not enter them, use Export instead of Deploy and upload the files to your server yourself.
#Installing Beacon
- Go to the Beacon download page.
- Download the version for your operating system, then install and open Beacon.
- Sign in to a Beacon account, or continue without one by selecting Use Anonymously.
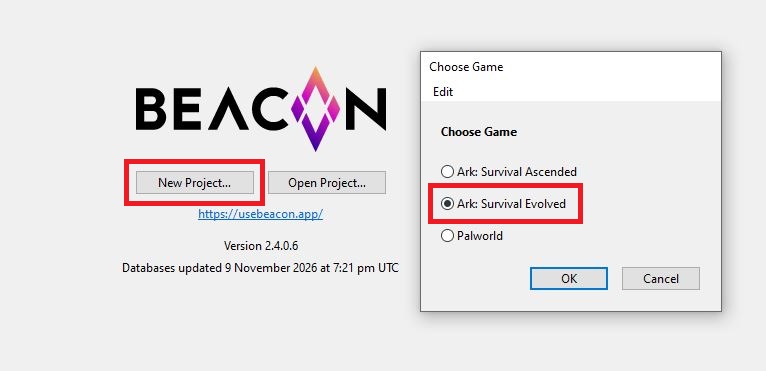
- Click New Project and select Ark: Survival Evolved.
#Connecting Beacon to Your Server
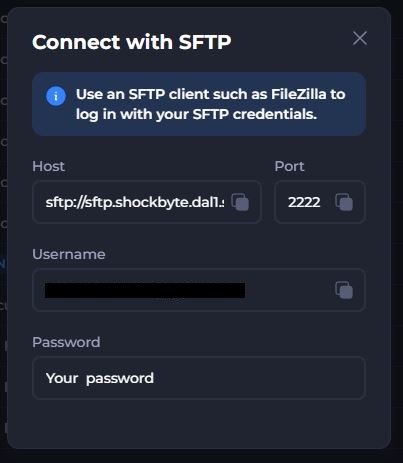
You'll need your server's SFTP details from the Shockbyte Panel to link Beacon to your server.
-
Navigate to the Shockbyte Control Panel and open your ARK server.
-
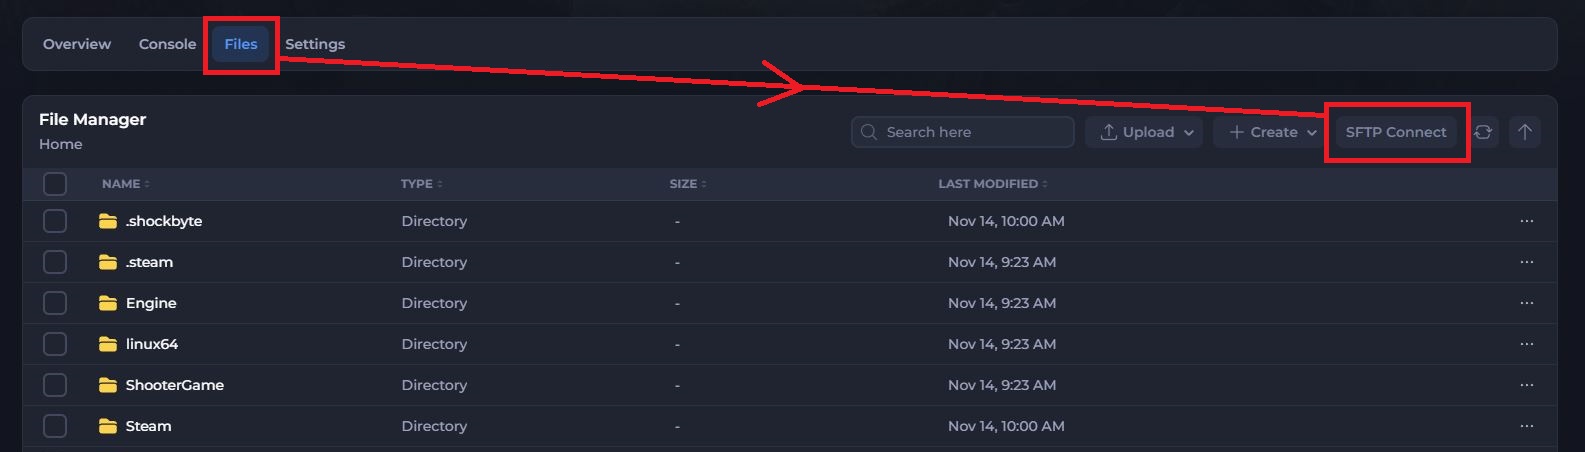
Open the Files tab, select SFTP Connect, and note your host, port, username, and password.
-
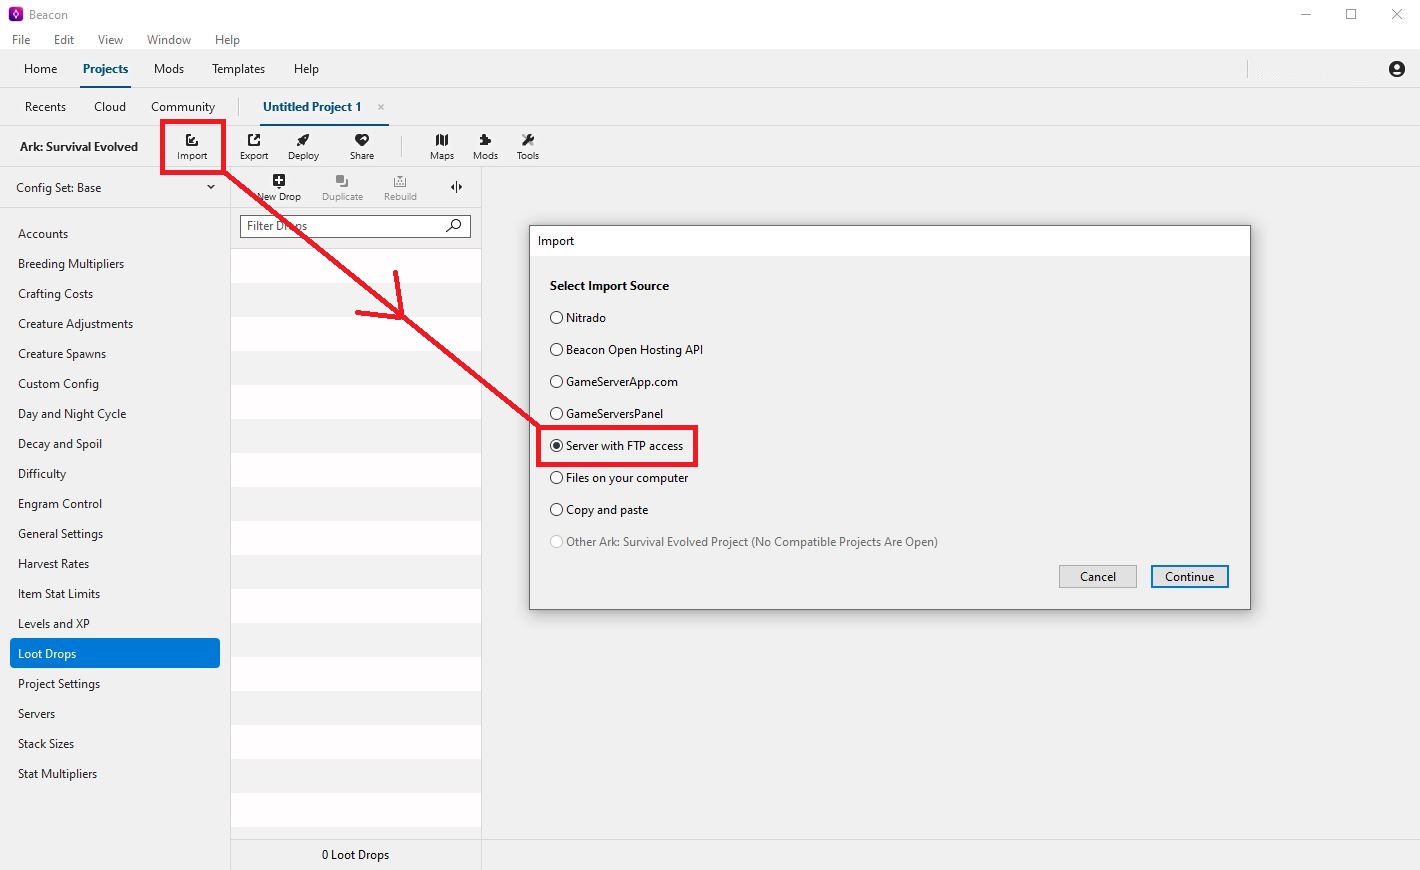
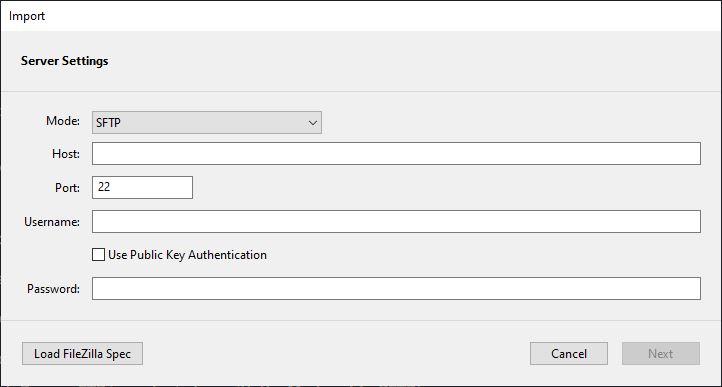
In your Beacon project, click Import.
-
Select Server with FTP Access and click Continue.
-
Set the Mode to SFTP, enter your SFTP details from the Shockbyte Panel, and click Next.
-
When Beacon finishes reading your config files, click Import, then click OK.
#Configuring Breeding Multipliers
Once Beacon has imported your server's settings, you can change any of them and deploy the changes to your server. The steps below use breeding multipliers as an example.
-
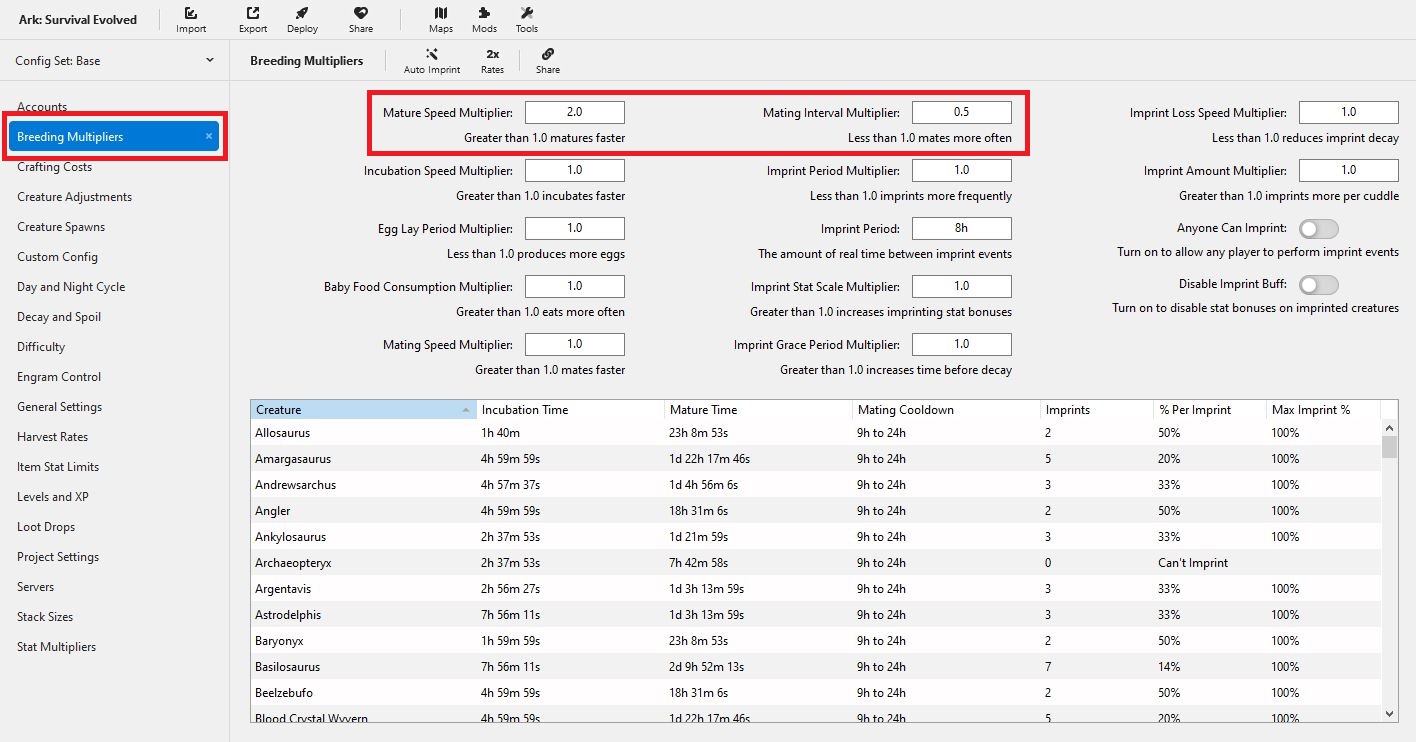
In your Beacon project, select Breeding Multipliers from the list of editors.
-
Find the Mating Speed and Mating Interval multipliers and enter your new values.
-
In the Shockbyte Panel, click Stop to shut down your server.
-
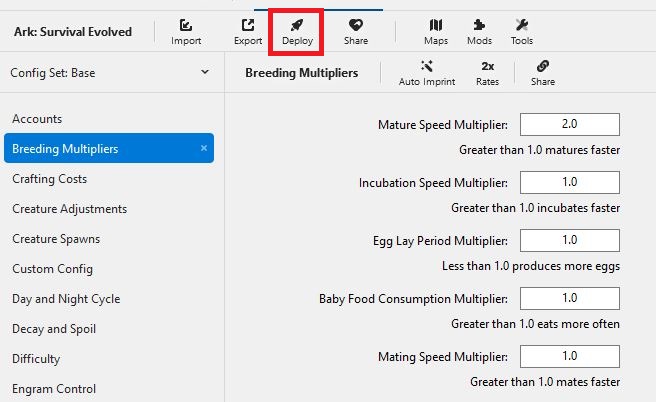
In Beacon, click Deploy.
-
Select your server in the left column, make sure Back up config files is ticked, and click Begin.
-
When the deploy finishes, click Start Server in the Shockbyte Panel to start your server with the new settings.
Note
Always stop your server before you deploy. ARK saves its config files when the server shuts down, so a running server can overwrite the changes Beacon uploads.
#Troubleshooting
- Beacon can't connect to my server.
Check that the Mode is set to SFTP and that the host, port, username, and password match the details in the Shockbyte Panel exactly.
- My changes disappeared after I restarted.
Stop your server, deploy from Beacon again, and then start your server. If you edit the same setting in the Shockbyte Panel Settings tab afterwards, the panel value replaces the Beacon value.
- Some settings in Beacon are locked.
Beacon puts some editors behind its paid Omni upgrade. You can still edit those settings from the Settings tab in the Shockbyte Panel.
To learn more about ARK: Survival Evolved server hosting, browse our ARK: Survival Evolved Knowledgebase articles.
If you still need help, contact our support team and we'll take a look for you.