Still have questions?
Shockbyte
Support Team

How to Add an MLO to your FiveM Server
MLOs (Map Location Objects) allow you to add custom interiors or modify existing GTA V interiors on your FiveM server. This guide walks you through safely installing an MLO resource so it loads correctly for all players.
Important
Please ensure that you have followed the Getting Started with your FiveM Server guide before proceeding with the following steps.
#Download & Inspect the MLO Package
Verify the Source
For security and stability, always download MLOs from reputable sources:
-
Vendors that provide SHA-256 checksums or public Git repositories
-
Avoid re-packed or modified archives from unknown sources
-
Check the Folder Structure
A valid MLO resource should follow a structure similar to the example below:
my-mlo/
├─ stream/
│  ├─ *.ydr   (models)
│  ├─ *.ytyp  (interior/item definitions)
│  ├─ *.ybn   (collisions, if included)
│  └─ *.ytd   (textures)
├─ fxmanifest.lua
└─ README.md (optional)
If this structure is present, you’re ready to proceed.
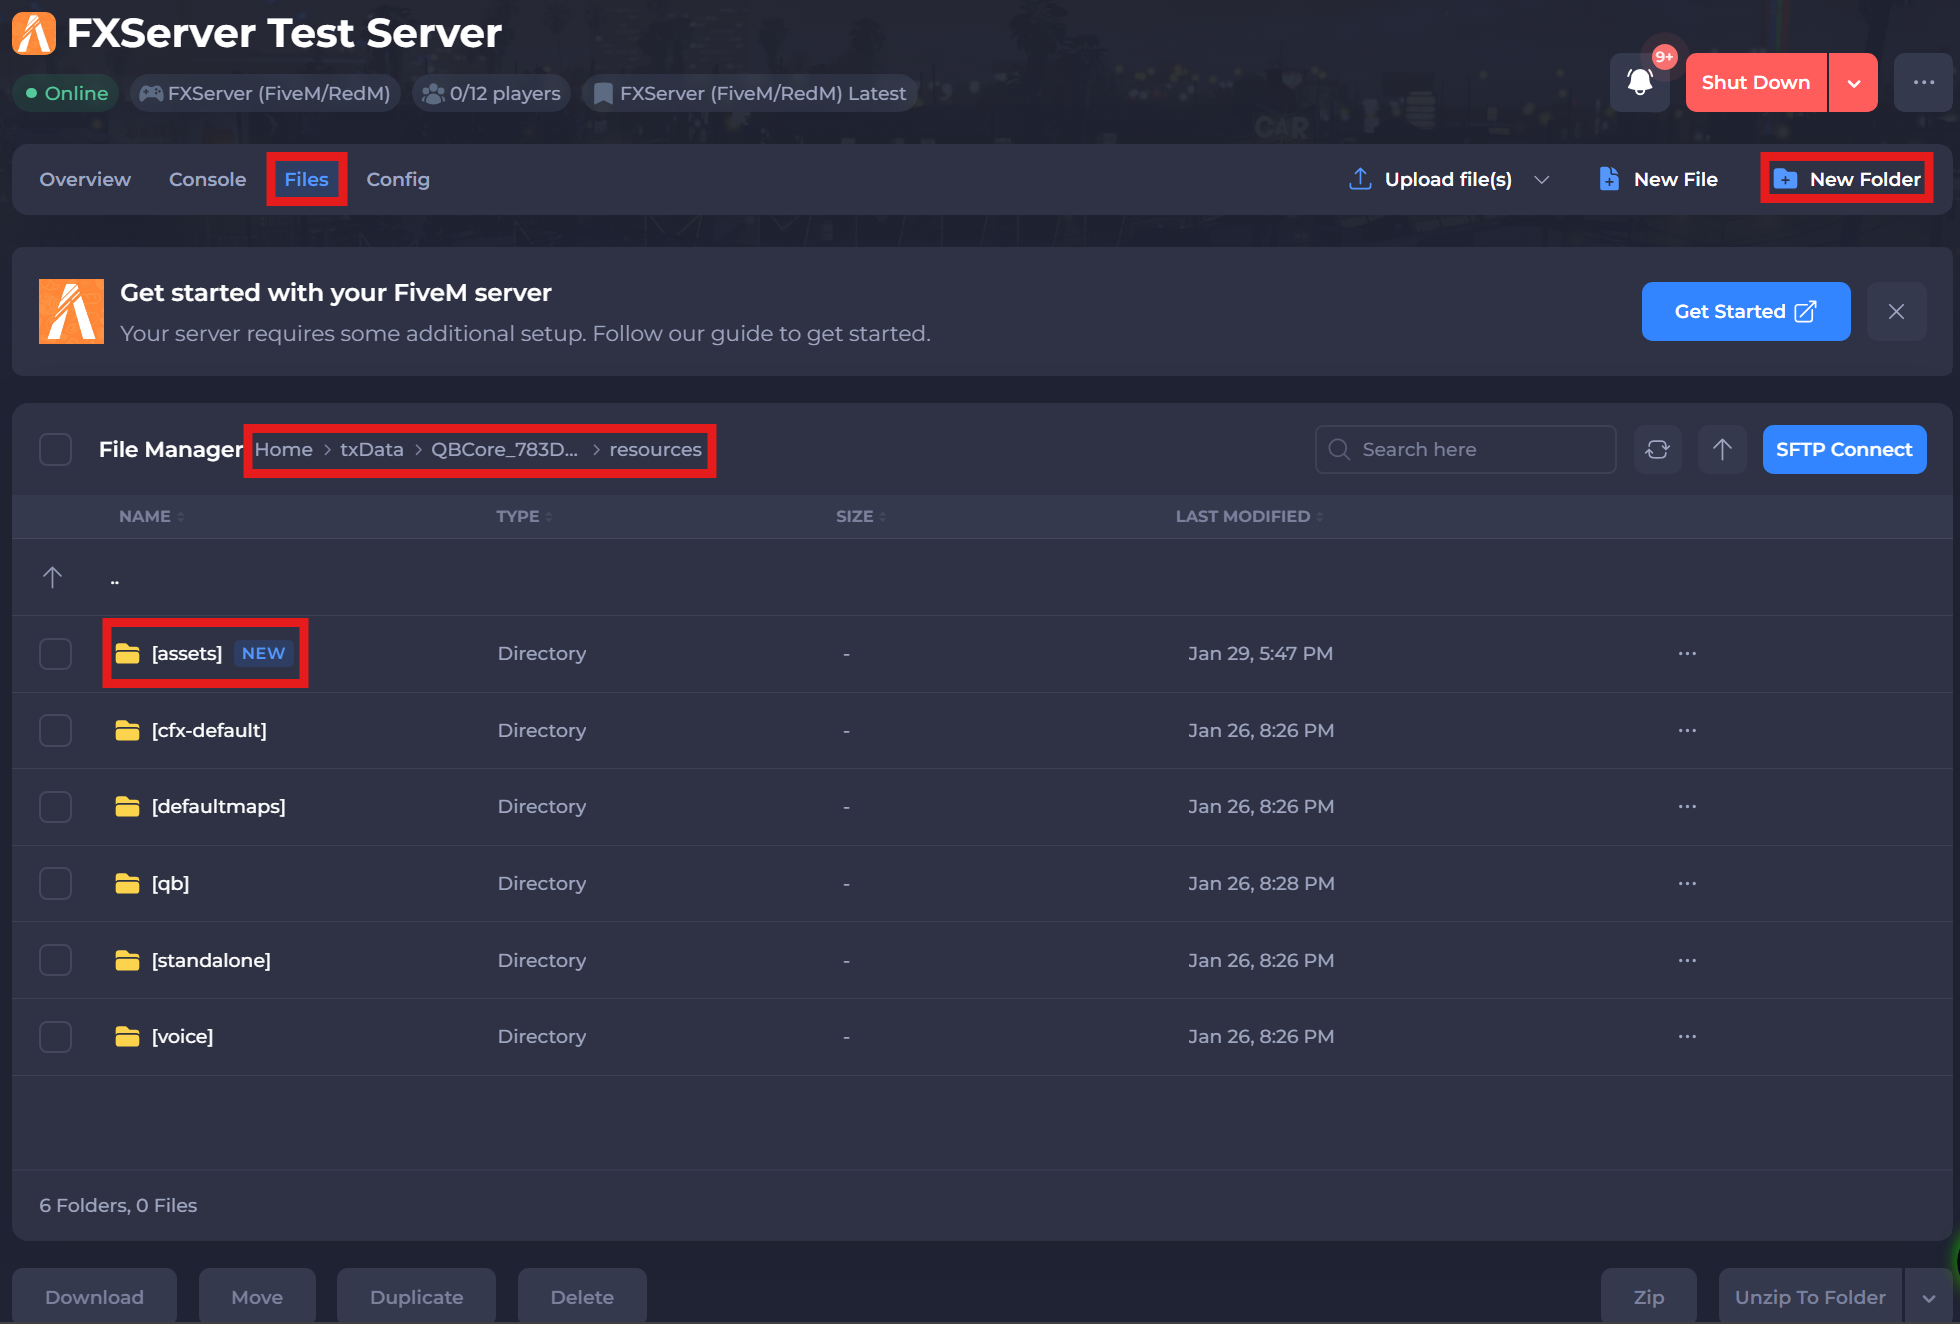
#Creating the Assets Directory
Once you have setup your server via txAdmin with a framework, you will be able to add resources to your server. We will be using QBCore in the following example.
-
Go to your Shockbyte Control Panel.
-
Navigate to the Files tab, and locate the following directory:
/txData/QBCore_XXXXX.base/resources. -
Create a folder in this directory. For this example we will call it:
/[assets].
#Creating Assets & fxmanifest.lua
-
Navigate to the
/txData/QBCore_XXXXX.base/resources/assetsdirectory. -
Create a file by selecting the New File button and create a new file called:
fxmanifest.lua.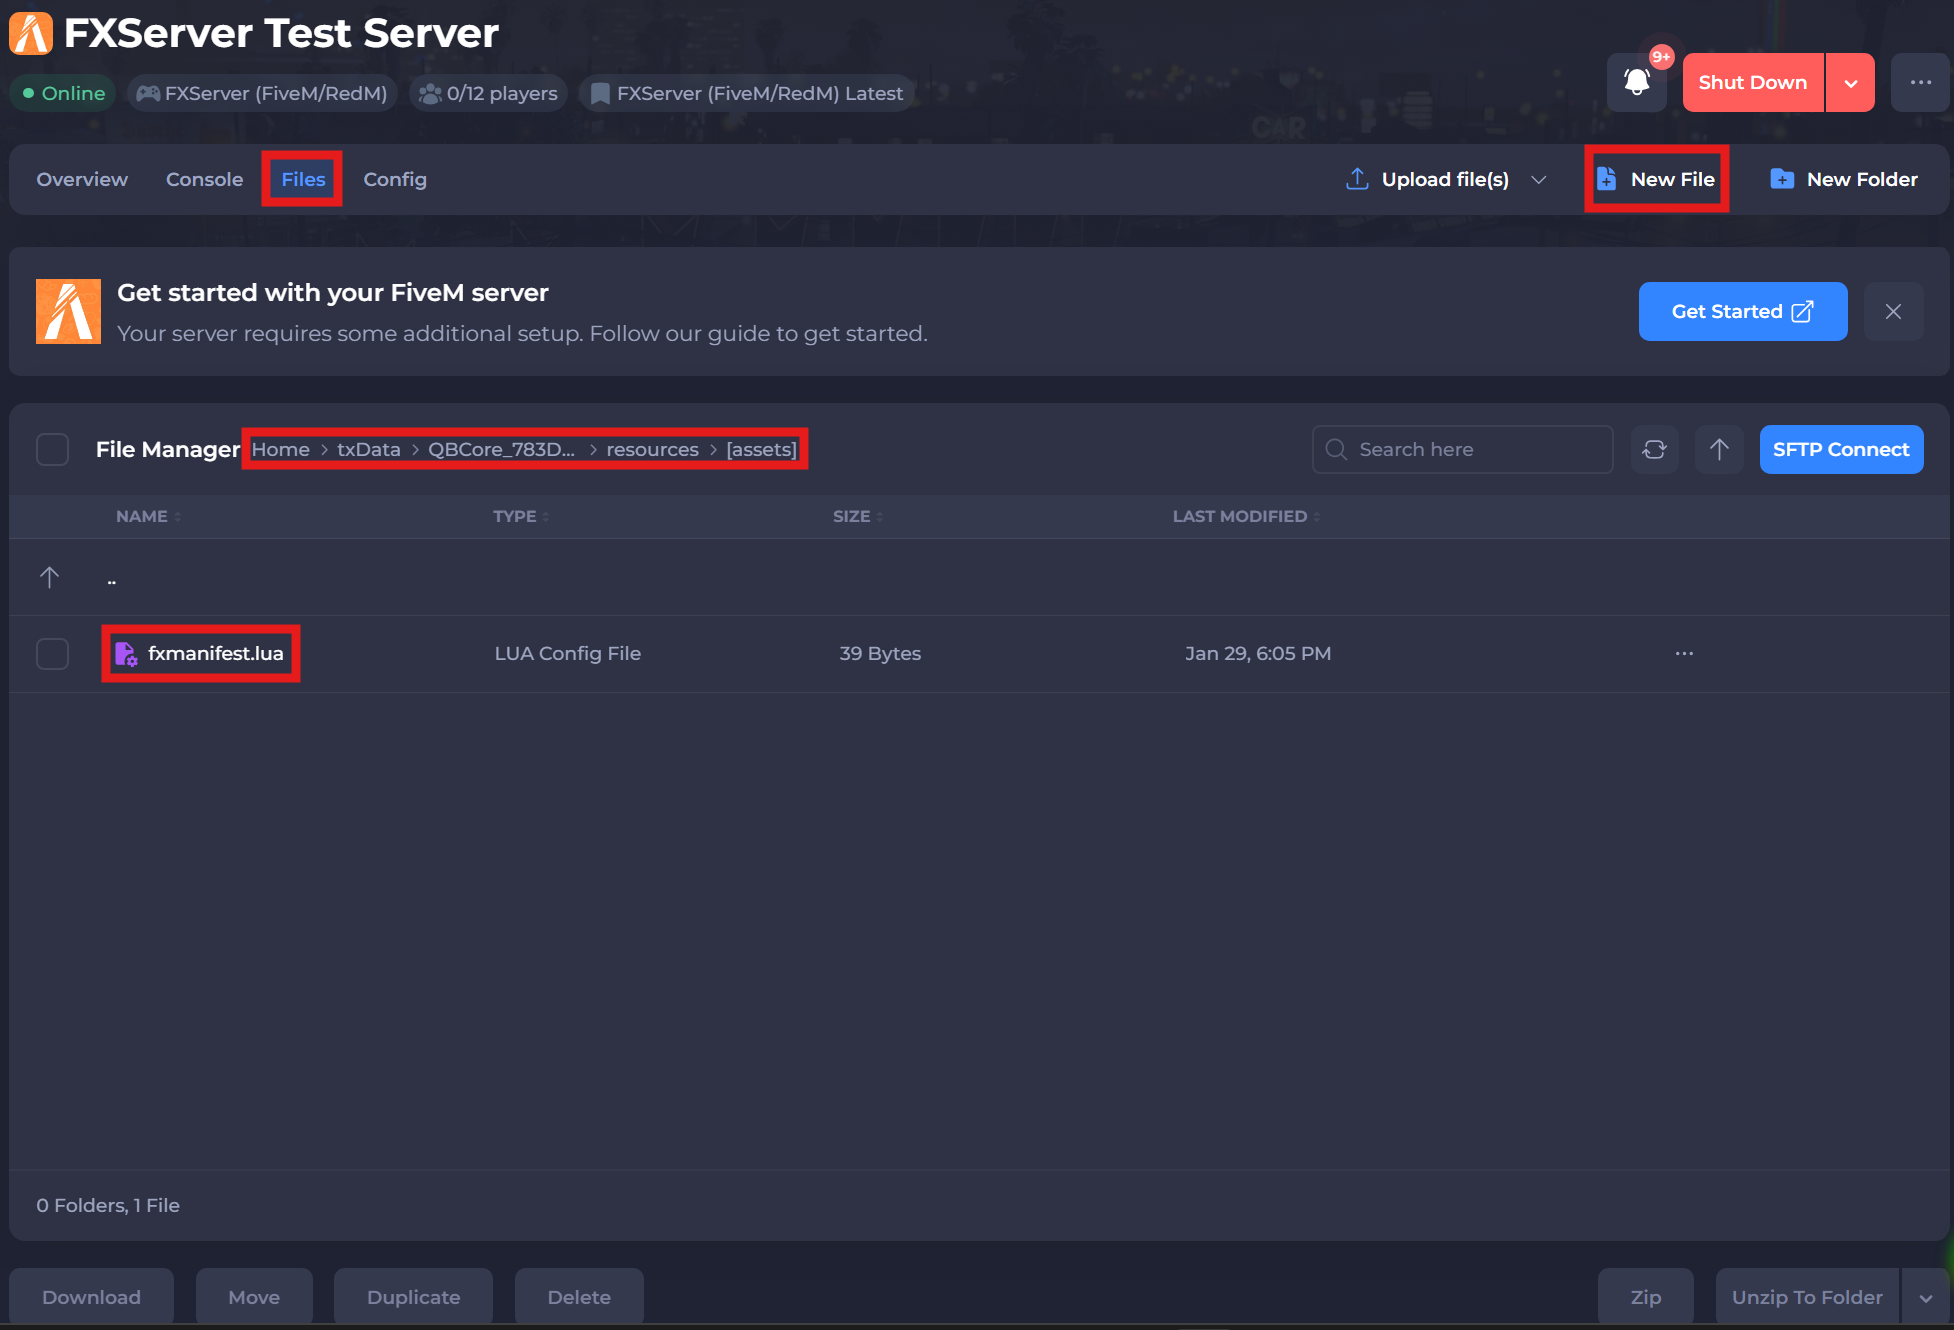
-
Open the
fxmanifest.lua. Enter the following text inside of thefxmanifest.luafile:
fx_version 'cerulean'
games { 'gta5' }

author 'YourName'
description 'My Custom MLO'
version '1.0.0'

this_is_a_map 'yes'

files {
    'stream/**/*.ydr',
    'stream/**/*.ytyp',
    'stream/**/*.ytd',
    'stream/**/*.ybn'
}

data_file 'DLC_ITYP_REQUEST' 'stream/**/*.ytyp'
Note
This manifest follows the official FiveM resource manifest standards. Do not remove this_is_a_map 'yes', as it is required for MLOs to load correctly.
- Save the file.
#Upload the MLO Resource
- Navigate to the
/txData/QBCore_XXXXX.base/resources/and create a[maps]directory by selecting the New Folder button.
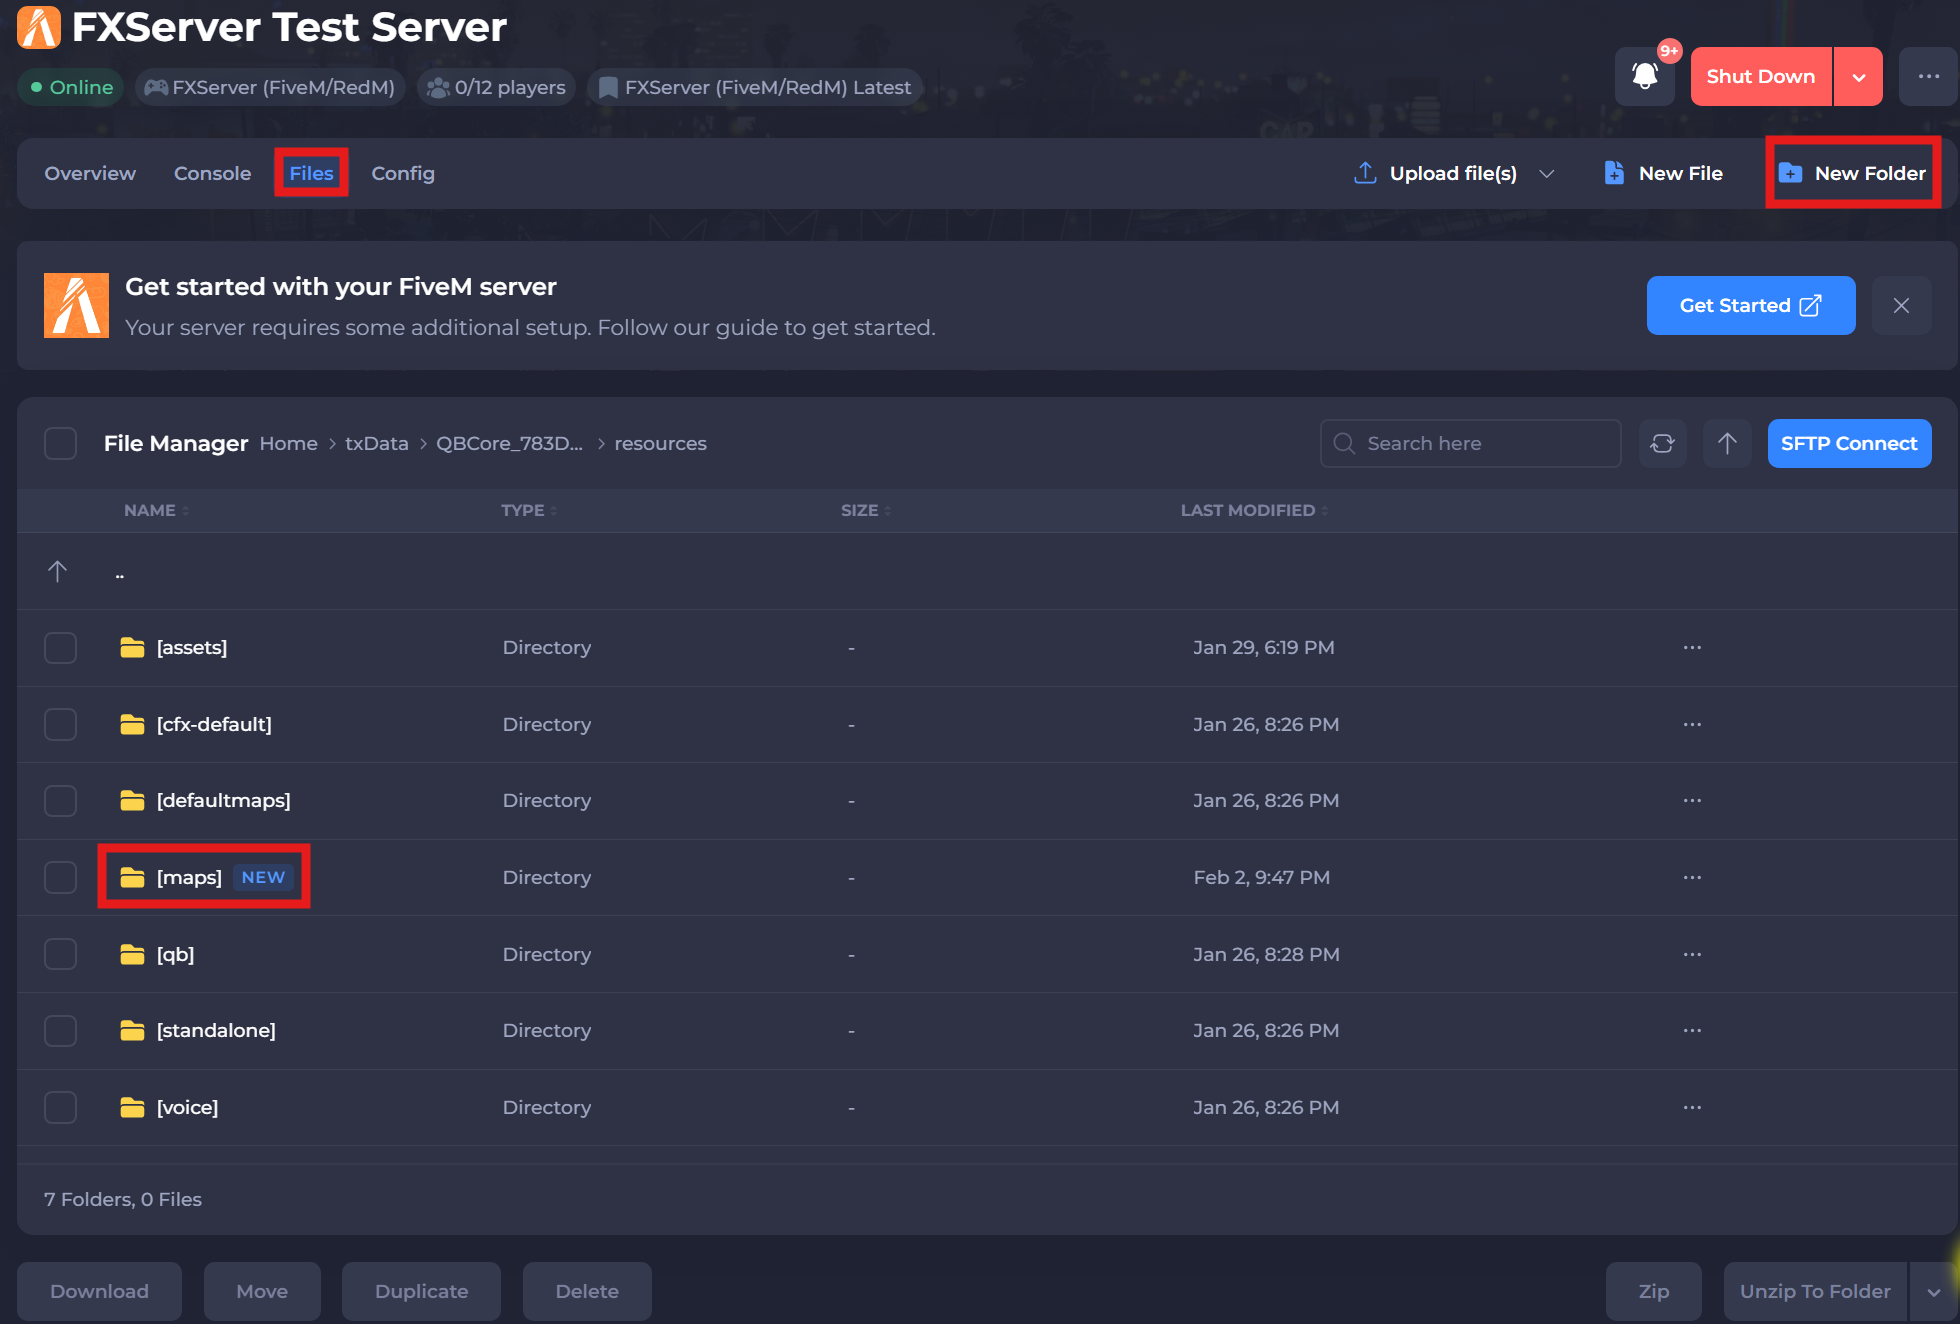
- Upload the entire MLO folder inside the
/[maps]directory (e.g. my-mlo) without modifying its contents using the Upload File(s) button.
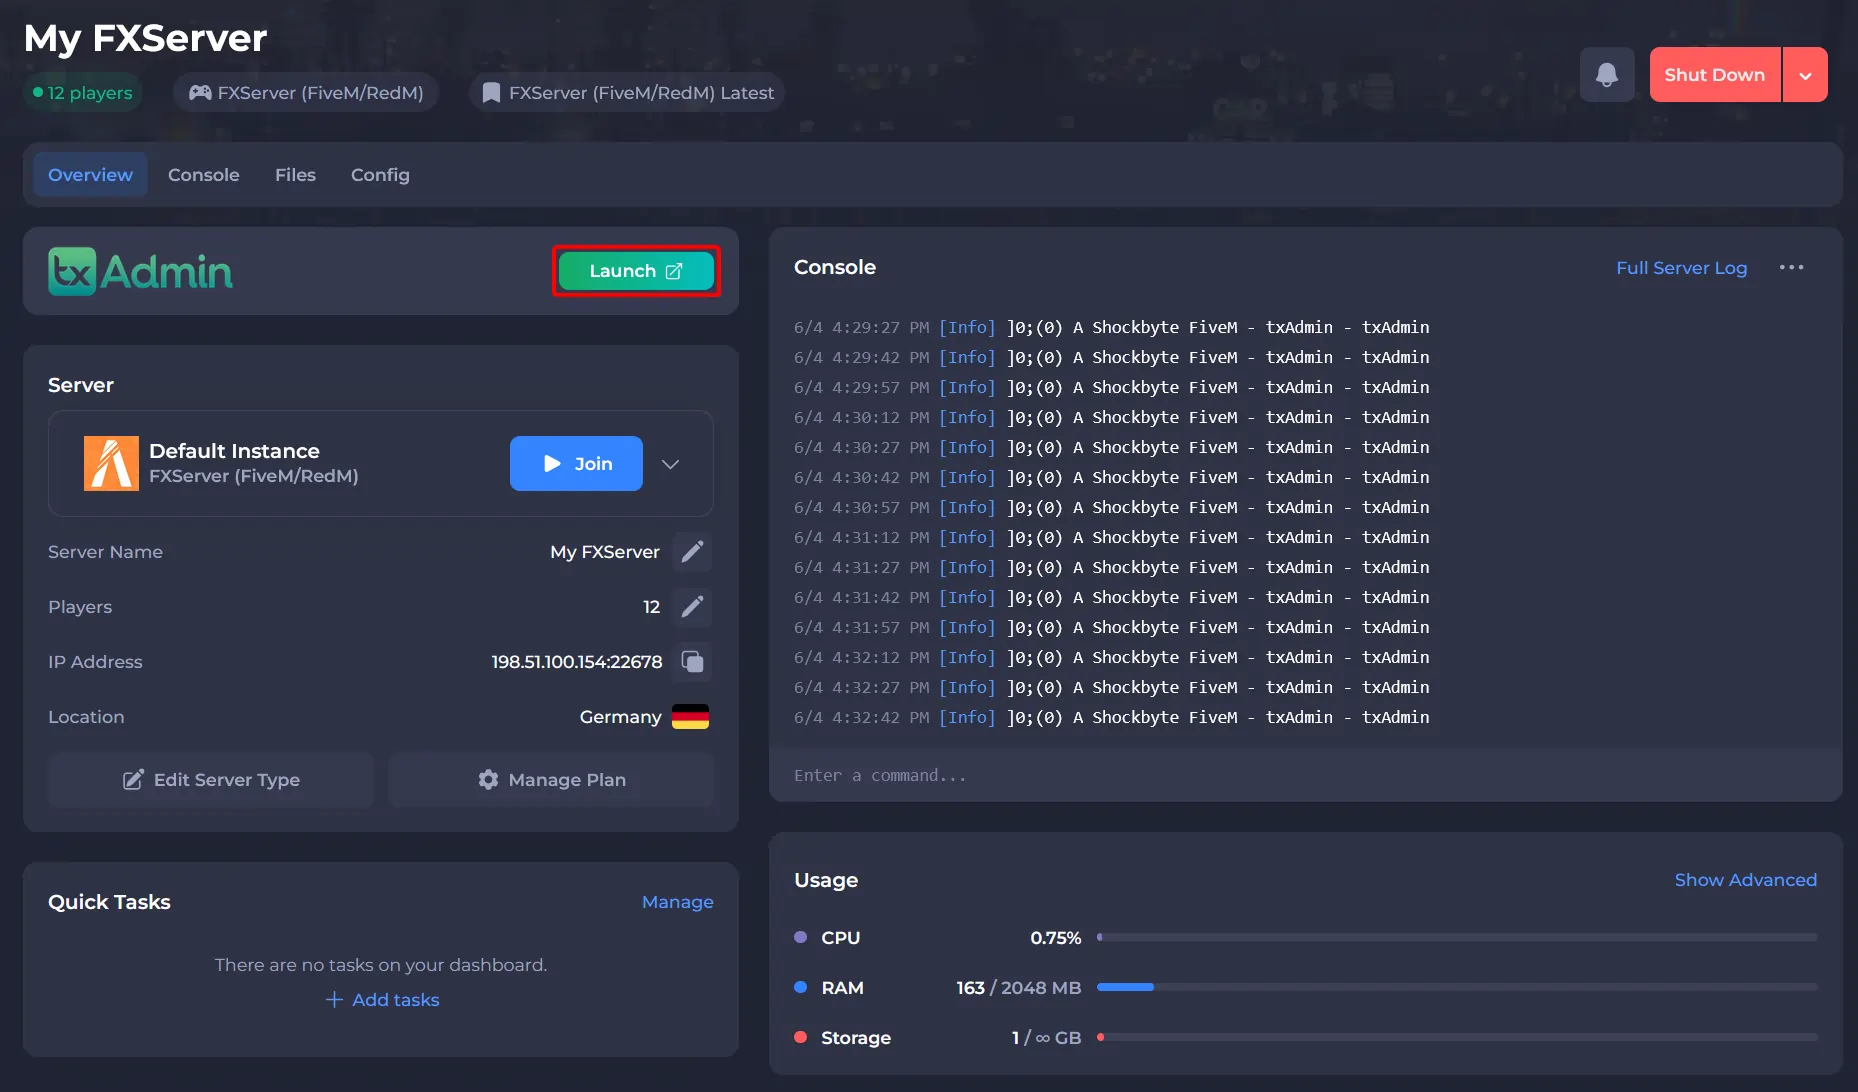
#Activating the Map & Assets in txAdmin
For a resource to start automatically, it must be added to the server.cfg file using the ensure resource-name command. You can manage this file easily through the CFG Editor in the txAdmin panel.
-
Go to your Shockbyte Control Panel.
-
Launch txAdmin.
-
Navigate to the CFG Editor area and add the line:
ensure [maps]andensure [assets].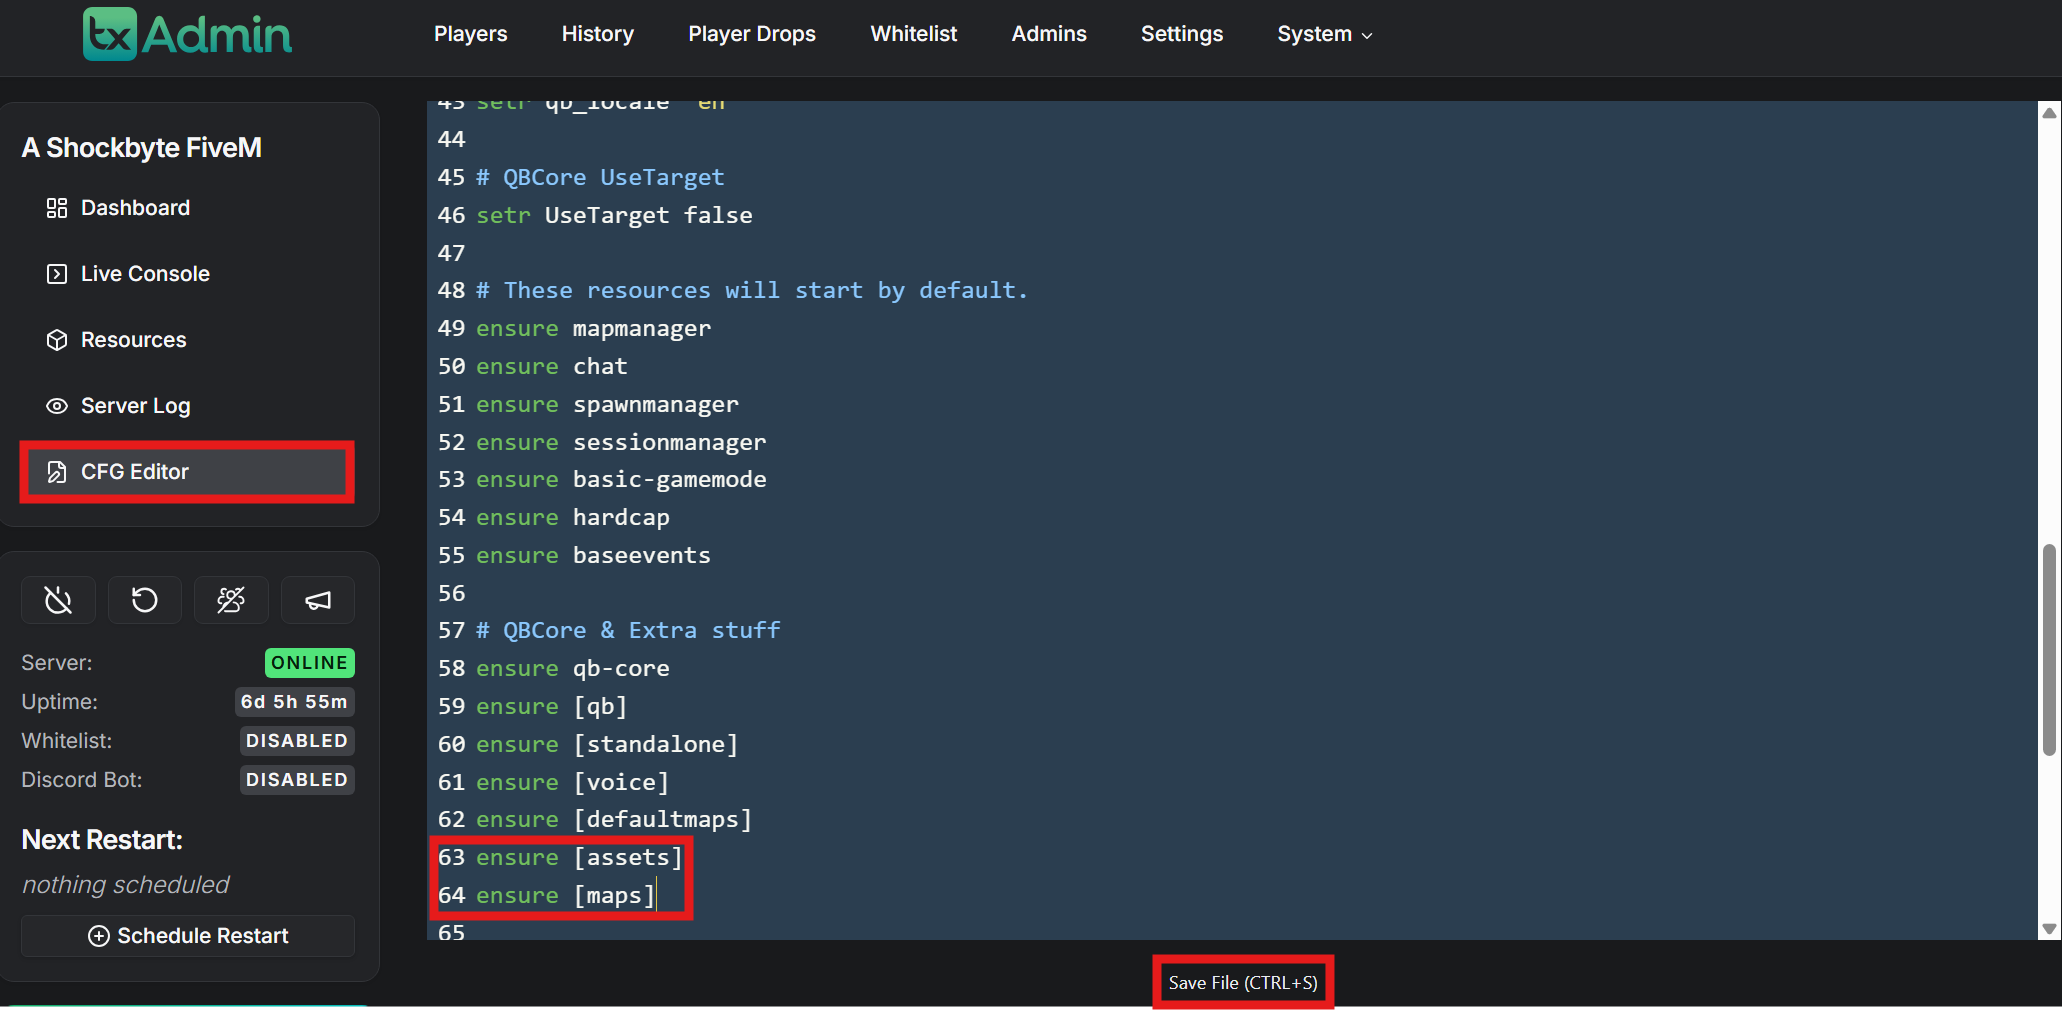
-
Click the Save File button at the bottom.
To learn more about FiveM server hosting, you can browse our library of Knowledgebase articles here.