How to Install Mods/Workshop Items to your Don't Starve Together Server
Still have questions?
Ruben B
Partnership Manager

How to Install Mods/Workshop Items to your Don't Starve Together Server
We've done our best to make adding mods to your Don't Starve Together server as simple as possible. All you'll need is the mod or collection workshop ID and access to your server's control panel.
#Finding Steam Workshop Mods
Find the Mod IDs of each mod you wish to install on the Steam Workshop.
- Browse the Steam Workshop and find a mod you would like to use. You can find the Steam Workshop for Don't Starve Together here.
- Once you have found the mod you wish to install, you can find the Mod ID in the URL of the web page for the mod.
- Copy the numbers as the end of the URL, this is the Mod ID that you will need to paste into your server config.
In the example above, the Mod ID would be 2843097516.
#Adding the Mods to the Server
Once you have Workshop Mod/Collection IDs of the mods you wish to install, you're ready to add them to your server. Your server will automatically install and enable any workshop items you have specified, you are not required to perform advanced configuration to set these up.
-
Access your Control Panel and navigate to the Config tab.
-
In the
Workshop Mods IDsfield, enter the Workshop IDs of each mod you wish to use, separated by commas.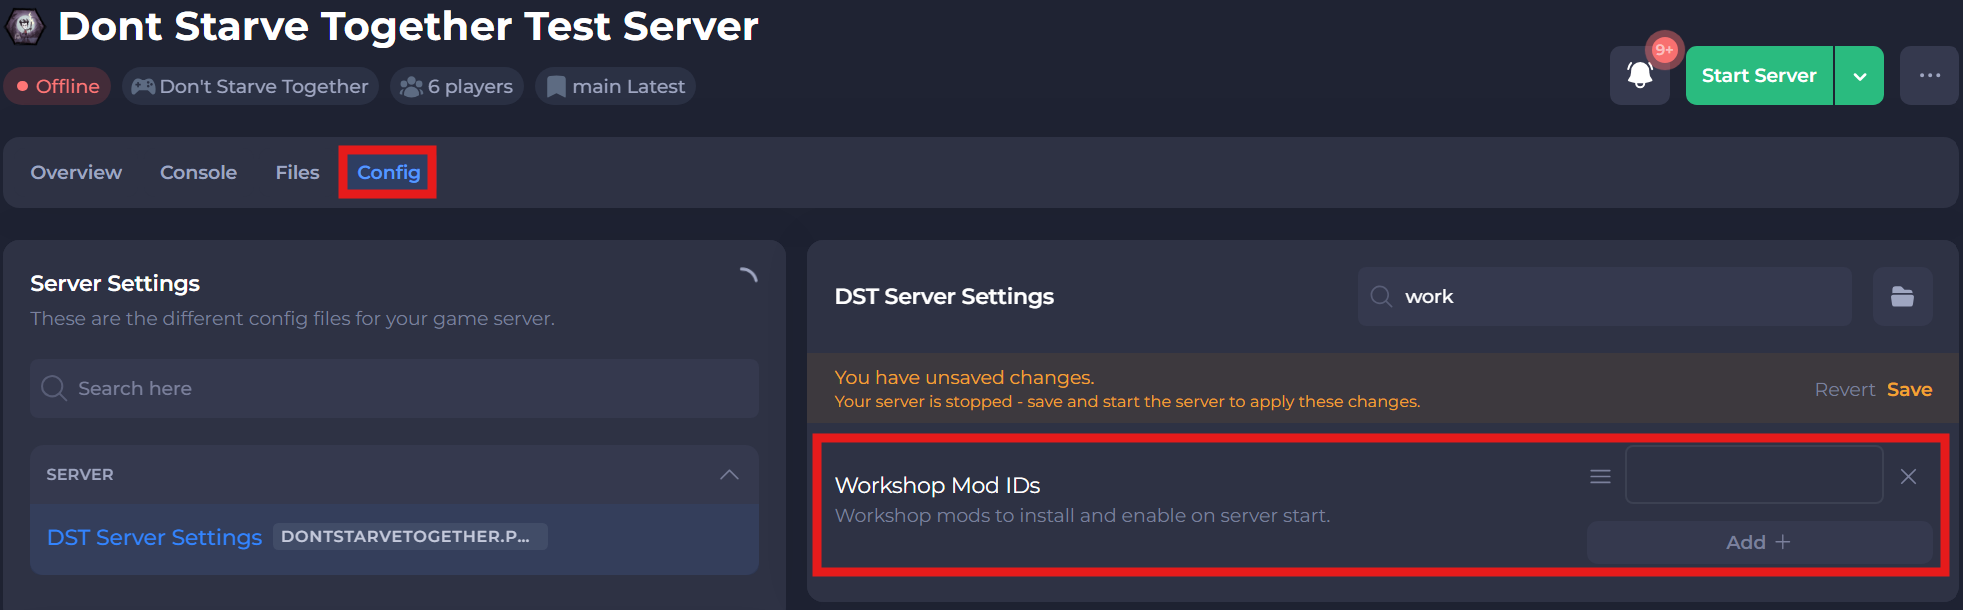
-
Save and restart your server to ensure the new changes apply.
#Disabling Mods on your Server
You may find that you do not wish to use a mod included within a collection or installation, you can easily disable any mod of your choosing.
-
Access your Control Panel and navigate to the Files tab.
-
Navigate to
config/<cluster name>/Masterand edit themodoverrides.luafile.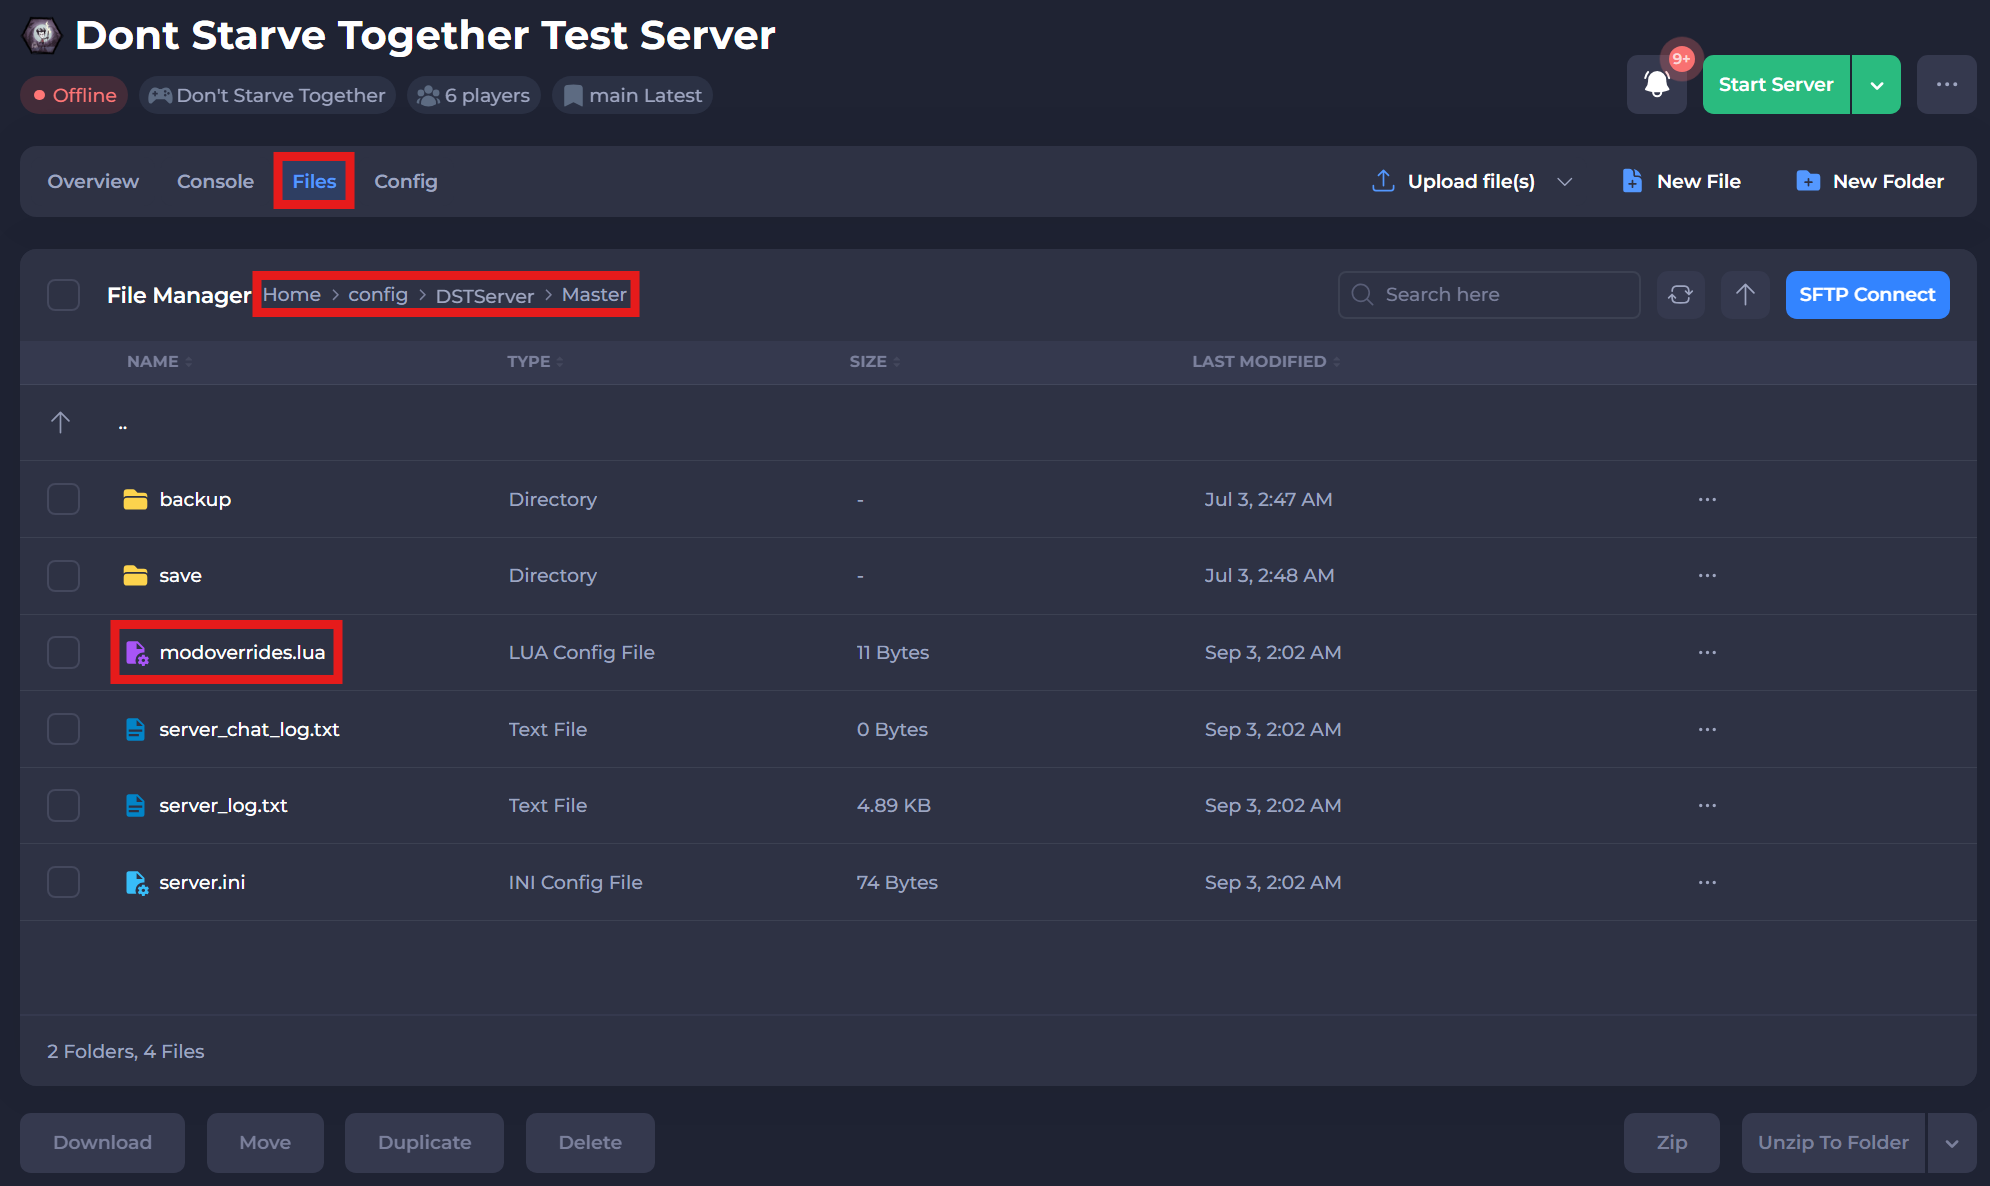
-
Replace
enabled = truewithenabled = falsebelow the workshop IDs that you wish to disable. -
Save and restart your server to ensure the new changes apply.
If you require any further assistance, please contact our support at: https://shockbyte.com/billing/submitticket.php