Minecraft


Minecraft
208 ArticlesRelated Categories
Still have questions?

How to Install Plugins on a Minecraft Server
Plugins are server-side modifications that allow server owners to change certain aspects of the game, which are a great way to extend the capabilities of their server. These plugins do not require a player to have anything additional installed on their client. Don't know what plugins you should install? Feel free to check out our Best Minecraft Plugins list. ::ProseNote{title="Plugin Compatible Server Type Required" description="Before getting started, your server must be running a Server Type that supports plugins such as Paper for Minecraft Java Edition. For more information on what Minecraft server types are available to you, please refer to this guide." appearance="danger"} :: ::ProseNote{title="Important" description="Make sure the plugins you download are compatible with the server version you have installed!" appearance="error"} :: Installing Plugins Manually Plugins are installed by uploading the file to the folder in your server files. We recommend searching popular and reputable websites like Modrinth or SpigotMC when downloading plugins, as it is possible for malware to exist in untrustworthy plugins. Be careful! 1. Access your server's Control Panel and navigate to the Files tab. 2. Select the plugins folder to open it. 3. Upload your desired plugin jar files. You can drag and drop your desired plugin jar files into this folder on your control panel to upload them, or you can click the upload button in the top right. Additionally, you can upload your plugin files using an SFTP client, should you wish to. 4. Start or Restart your server if it is already running. Installing Using the Shockbyte Plugin Installer Shockbyte automatically integrates the plugin libraries of some popular plugin provider websites like Modrinth and Paper Hangar. As a result, you can easily install thousands of popular plugins with one single click! 1. Open your server's Control Panel. 2. Click the Plugins tab to open the Shockbyte plugin library. 3. Locate your desired plugin, then click the Install button. 4. Start or Restart your server if it is already running. That's it! You've now successfully installed a plugin, and when the server restarts, you will be able to see it by running the command.

How to Install Data Packs on your Minecraft Server
Data packs are a feature available for Minecraft worlds in versions 1.13 and later. They can add or override existing advancements, structures, recipes, and more. ::ProseNote{title="Data Packs" description="The data pack system is a feature that is exclusively available to Minecraft Java Edition. To add similar customizations on Bedrock Edition servers, refer to this guide: How to Install Behaviour Packs on your Minecraft Server." appearance="default"} :: Data packs can be added to single-player or multiplayer worlds, and the installation process is the same. --- Installing a Data Pack on your Minecraft Server To install a data pack, you must upload it to your datapacks folder found within your world files. 1. Download the data packs that you would like to use. 2. Navigate to your Control Panel and Shut Down your server. 3. Access your server files and navigate to . ::ProseNote{title="Note" description="This step assumes that you have not changed the name of your world. If your world has a different name than , you will want to navigate into instead." appearance="discovery"} :: 4. Upload your datapacks to this folder. Data packs are distributed in a ZIP format. If the data pack is from Vanilla Tweaks, you must unzip the file first before uploading it to your server. 5. Start your server. After installation, you may view and manage your data packs by using the command.

How to Install and Use Spark
Spark is a performance profiling plugin/mod which provides you with a variety of tools which help when diagnosing performance and memory issues. While Spark is simple to install, it has a lot of options, commands, and information that can feel a bit overwhelming to users. If you need help at any time, please don't hesitate to contact our 24/7 support team or check out the Spark documentation available here. --- Installing Spark To install Spark, you will need to download its jar file, then upload it to either your mods or plugin folder, as Spark is compatible with both Spigot/Paper servers and Forge/Fabric servers. 1. Download Spark from CurseForge or SpigotMC. There are two versions of Spark available. Depending on your server type, you will either want to use the CurseForge version or the SpigotMC version. If you are running a server type such as Spigot or Paper, you will want to download the SpigotMC version: https://www.spigotmc.org/resources/spark.57242/ If you are running a server type such as Forge or Fabric, you will want to download the CurseForge version: https://www.curseforge.com/minecraft/mc-mods/spark 2. Access your Control Panel and Shut Down your server. 3. Navigate to the Files tab. 4. Navigate to the or directory. ::ProseNote{title="Note" description="If you downloaded Spark from SpigotMC, you will want to navigate into the plugins folder. If you downloaded Spark from CurseForge, you will want to navigate into the mods folder." appearance="danger"} :: 5. Upload the Spark.jar file. 6. Start your server. --- Generating and Accessing a Profiler Report Although there are a variety of utility commands provided by Spark, we will only cover the CPU profiler tool. We highly recommend you refer to the Spark documentation if you'd like to learn more details about the CPU profiler tool or the other tools Spark provides. Running the Spark profiler will generate a link that will direct you to your server's Spark report. This link can be sent to Shockbyte Support to help our staff diagnose the cause of lag; however, it can be insightful to more advanced users as well. 1. Connect to your server and ensure you have OP. You will need OP in order to run commands related to Spark, which you can give yourself by running in your server's console. 2. Allow your server to run for 10 minutes or more, then use the command. 3. Click the link provided after your Spark report generates. Analyzing the Profiler After opening your profiler report, you can click the Server thread dropdown menu to expand the server's threads. According to the Spark Documentation, "Threads (at the top of the profile) will always show 100% next to them; this is because 100% of the time spent profiling the thread was, well, spent within that thread." Call threads (or each item in the dropdown menu) may be a little confusing, especially if you're new to Java programming or Minecraft server internals. You can find a list of notable call frames to be aware of on the Spark Documentation here. 1. Click the Call thread called Server thread to expand the menu. 2. Click the next Call thread which had taken the most percentage of time to complete to continue expanding the tree. 3. Continue this process until you have found a Call thread which gives you enough information to continue troubleshooting. 4. In this example, we can determine that our server lag is caused by an excessive amount of entities. Now we can focus on troubleshooting entity lag thanks to Spark. To learn more about Spark and how to read a report, we highly recommend reading the Spark Using the Viewer documentation.

How to get OP on a Minecraft Server
Operators (OPs) have access to a range of commands that are used to help moderate a server. A few of the available commands for Ops are changing a player's game mode, updating server difficulty, giving items, kicking and banning players, whitelisting, and even stopping and restarting a server. You can view a full list of commands available to OPs here. Players with op permissions will automatically bypass a whitelist if it is configured on your server, granting them access regardless of the whitelist. Ensure that only trusted individuals are given op on your server. ::ProseNote{title="Important" description="If you're using Bedrock Edition, you will also need to enable cheats on your server." appearance="default"} :: Using the Server Console Making a player an operator through your server's control panel is simple, requiring only a single command. This is the fastest method of opping players if your server doesn't have any operators yet. 1. Open your server's Control Panel. 2. In the Console window, enter the OP command. Type the command , replacing <Username with the name of the player you would like to OP, in the Console window, then press Enter to send the command. For example, entering will give the player named Steve operator permissions. If the username of the player you're trying to OP has a space in their name, you will have to surround their username with quotes, like so: . --- Using OP Commands In-game If you already have OP, you can give other people OP in-game. 1. Connect to your Minecraft server. 2. Enter the command /op or /deop. The opposite of the op command is the command. You can also use the command to remove OP permission from a player, should you need to. Once you are opped, you will be able to run administrative commands and actions on your server.
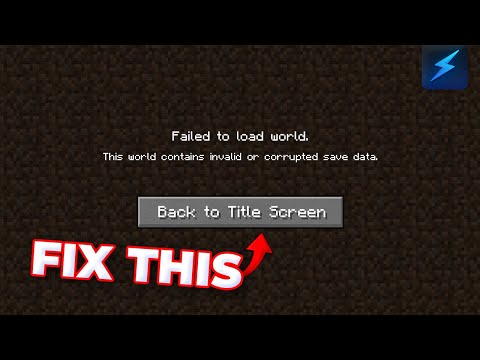
How to Fix Corrupted Minecraft Worlds
World corruption can cause a server to crash, not start at all or prevent a world from loading. If you already have a world backup, we recommend restoring your existing backup instead of proceeding with this tutorial. Otherwise, if you would prefer to fix your existing world, then you can use a chunk manipulation tool like the MCE Editor to delete corrupted chunks from your world. ::ProseNote{title="Important" description="As this process involves modifying your world files, make sure to create a backup of your server before proceeding with the steps in this guide." appearance="error"} :: --- Using the Minecraft Region Fixer Tool The Minecraft Region Fixer tool will automatically delete any corrupted chunks it detects and regenerate them using the same seed data. 1. Generate a backup for your world by following this guide. 2. Download your world to your computer is you haven't already. 3. Download and install Python 3 from this page. 4. Download the latest Minecraft Region Fixer release ZIP file. 5. Unzip the downloaded Region Fixer zip file. 6. Press + on your keyboard to open the Windows Run menu. 7. Enter to open Windows PowerShell. 8. Copy the path of the unzipped tool folder, then enter into the PowerShell window. 9. Copy the path for the affected world folder, then enter the command into PowerShell. 10. You can now re-upload the modified world to your server. Remember to delete the old, corrupted world. --- Additional Options If completing these steps does not fully resolve your issue, we recommend trying a few more things. Use a tool like MCA Selector to select and delete corrupted chunks in your world file. Delete the file in your world folder, then restart your server to test if the issue is resolved. Delete the folder in your world folder, then restart your server to test if the issue is resolved. Delete the folder in your world folder, then restart your server to test if the issue is resolved. If none of these options resolve your world corruption issue, your best option, unfortunately, may be to simply generate a new world.

How to Enable Command Blocks on a Minecraft Server
By default, Command Blocks are disabled in Minecraft to stop players from abusing them. As such, they have to be enabled manually. --- Enabling Command Blocks 1. Access your server's Control Panel and navigate to the Config tab. 2. Click the server.properties file. 3. Tick the enable-command-block field to active. 4. Save the file, then restart your server. After your server boots up, you will be able to use command blocks as expected.

How to Enable and Manage a Minecraft Whitelist
Whitelisting is a feature that allows you to limit the players who can access your Minecraft server. When enabled, only whitelisted players can join your server. This is a good way to prevent unwanted players from joining and making changes to your server. This functionality is built into every Java Edition Minecraft server out of the box. If you wish to add a whitelist to your Bedrock server, you will need to follow a different guide that can be found here. ::ProseNote{title="Important" description="Players with op will automatically bypass the whitelist, allowing them access to the server regardless of the whitelist. Ensure that only trusted individuals are granted operator on your server." appearance="default"} :: Setting Up a Whitelist One way you can enable whitelisting on your Minecraft server is by configuring it in your file and restarting the server. However, we will cover how to set up whitelisting using console commands, as it does not require you to restart or turn off your server at any point. You can also send these commands in-game if you have OP permissions. Please refer to this guide for more information on how to become an OP. 1. Open your server's Control Panel. 2. In the Server Console window, enter the command. You can enable or disable the whitelist on your server using one of the following commands: - This command enables whitelisting. Once enabled, only players on your whitelist can join. - This command disables the whitelist. All players can join the server like normal. --- Managing a Whitelist After enabling the whitelist, only players who are specifically added to the whitelist and players with OP permissions will be able to connect to the server. You can add or remove players from the whitelist using one of the following console commands. Keep in mind, players with OP permission can also use these commands in-game: - After replacing <Username with the name of the player you'd like to whitelist, this will add them to the whitelist immediately. - After replacing <Username with the name of the player you'd like to remove from the whitelist, this will immediately remove them from the whitelist if they were on it before. That's it! You have successfully learned how to use a whitelist to secure your server.