Still have questions?
Jay Miller
Game Engineer

How to Change Your 7 Days to Die Server Settings
One great thing about owning a 7 Days to Die server is the ability to make your own modifications to it.
7 Days to Die features a vast amount of settings that allow you to customize your server exactly to your liking. This can help bring a unique feel to your server, letting it stand out against the rest!
#Editing the configuration file with our editor
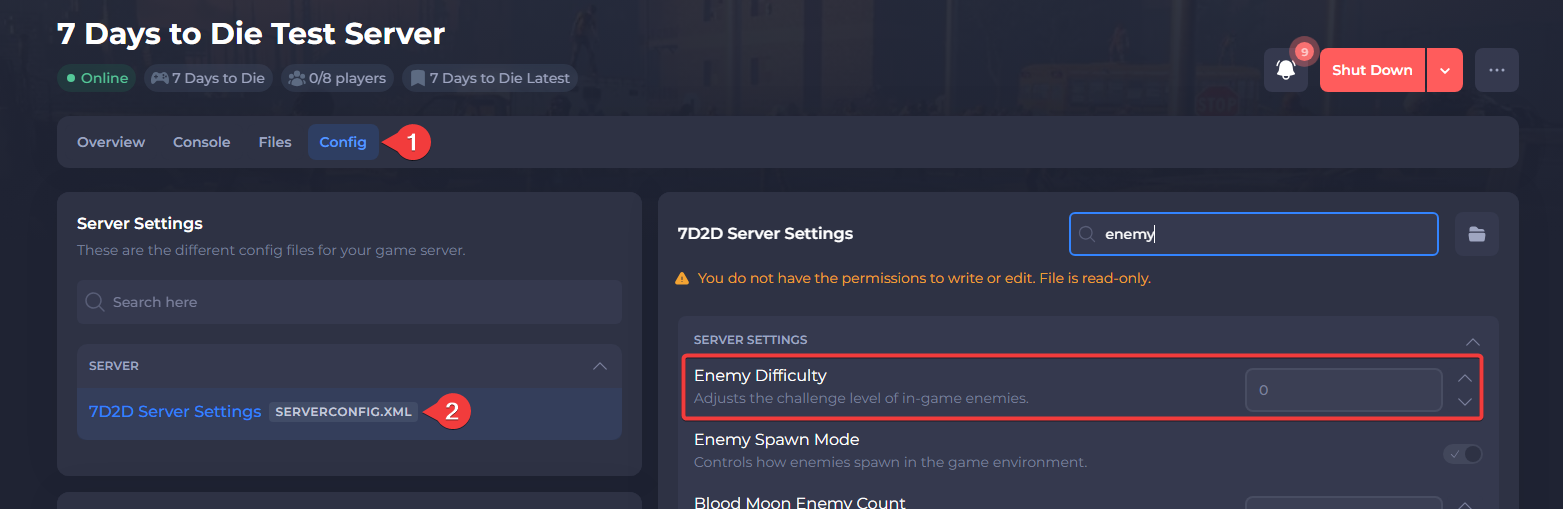
You can configure your 7 Days to Die server settings file with our configuration editor in the Shockbyte Control Panel.
-
Open your server's Control Panel.
-
Navigate to the Config tab.
-
Open 7D2D Server Settings.
-
Locate and set your desired settings. E.G. set
EnemyDifficultyto 0.
- Save the file then Restart your server.
#Manually editing the configuration file
You can also change your 7 Days to Die server settings by editing the serverconfig.xml file manually.
-
Open your server's Control Panel.
-
Navigate to the Files tab.

- Find and open the
serverconfig.xmlfile.

- Locate and set your desired setting. E.G. set
EnemyDifficultyto 0.

- Save the file then Restart your server.
#Guides on other settings
You can adjust your server settings within the serverconfig.xml file with the methods listed above. For other guides on how to configure your server, check out our knowledgebase here.