Still have questions?
Ruben B
Partnership Manager

Getting started with your RedM server
Before players can join your RedM server, you'll need to go through a quick setup process. Fortunately, txAdmin makes this easy with its built-in web interface that guides you through everything step-by-step.
Note:
This guide will help you to set up your RedM server. If you wish to set up a FiveM server, please follow this guide instead.
#Accessing txAdmin
-
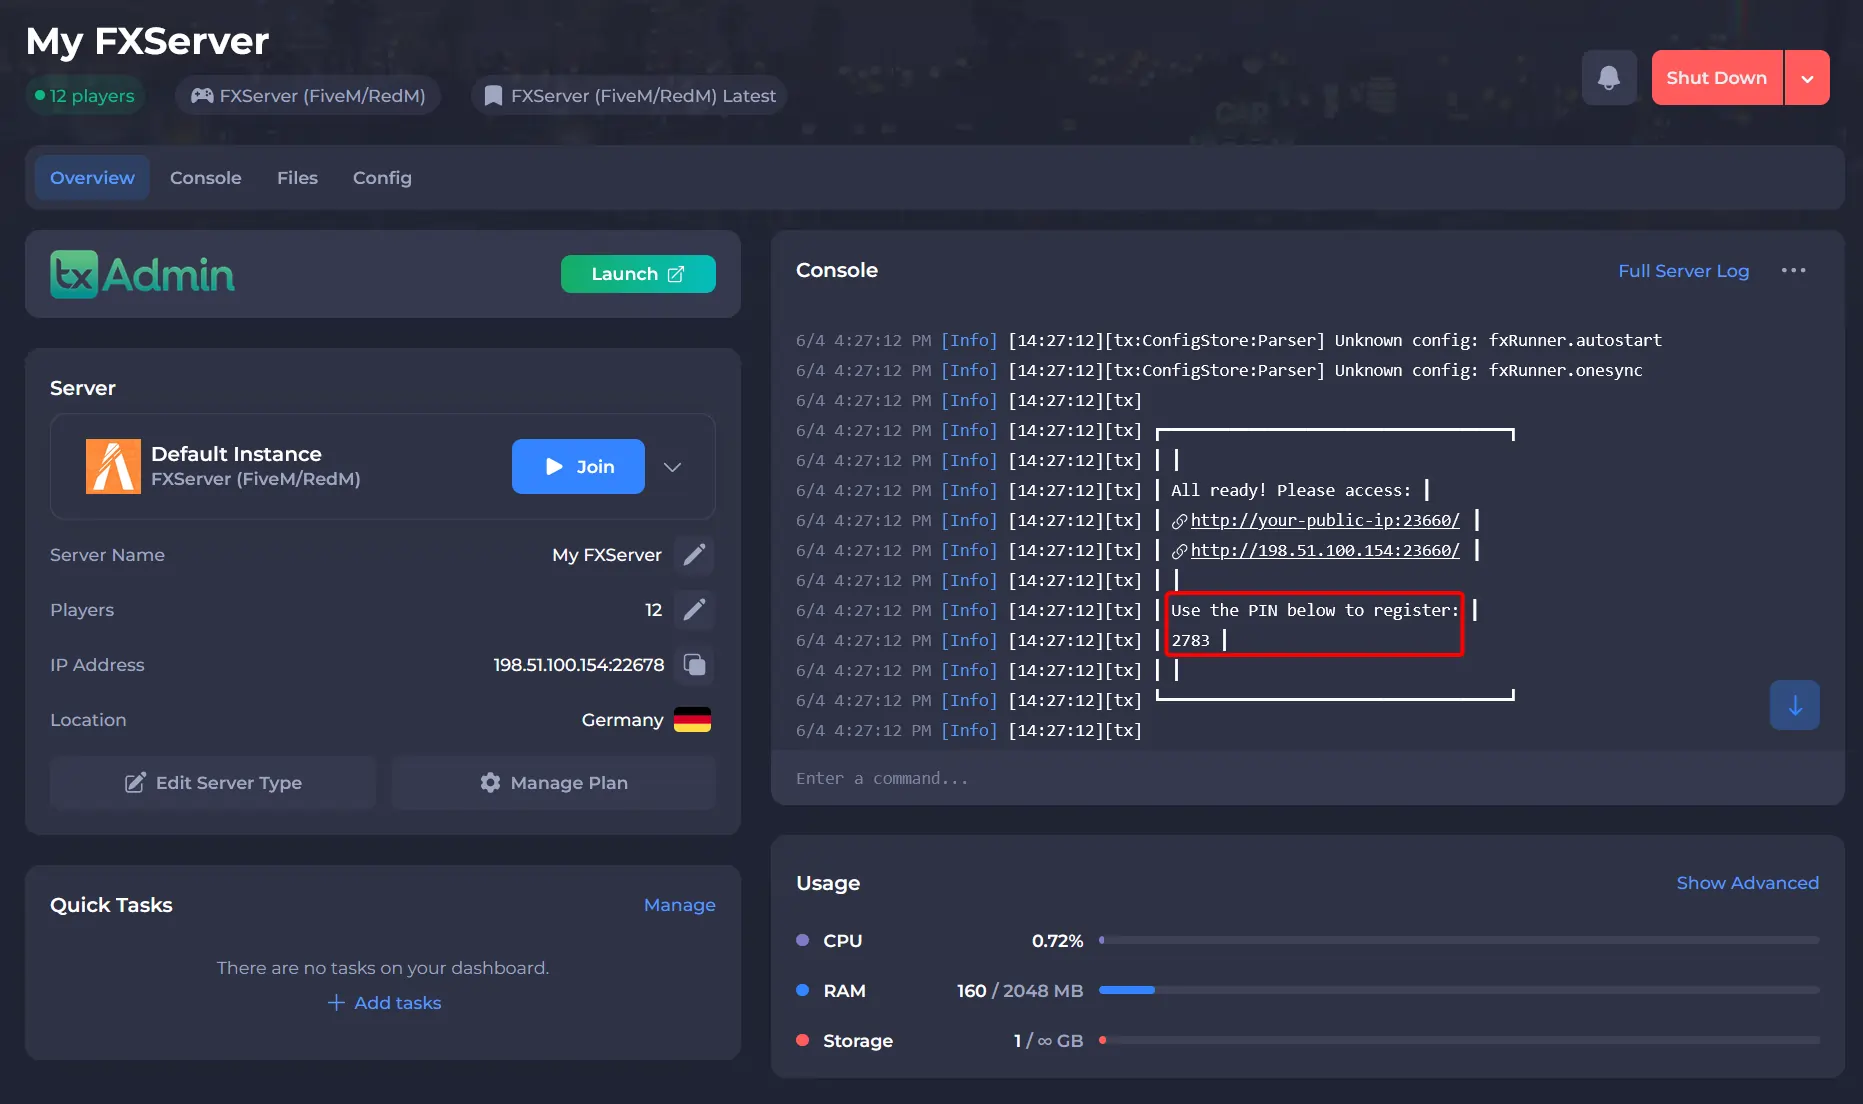
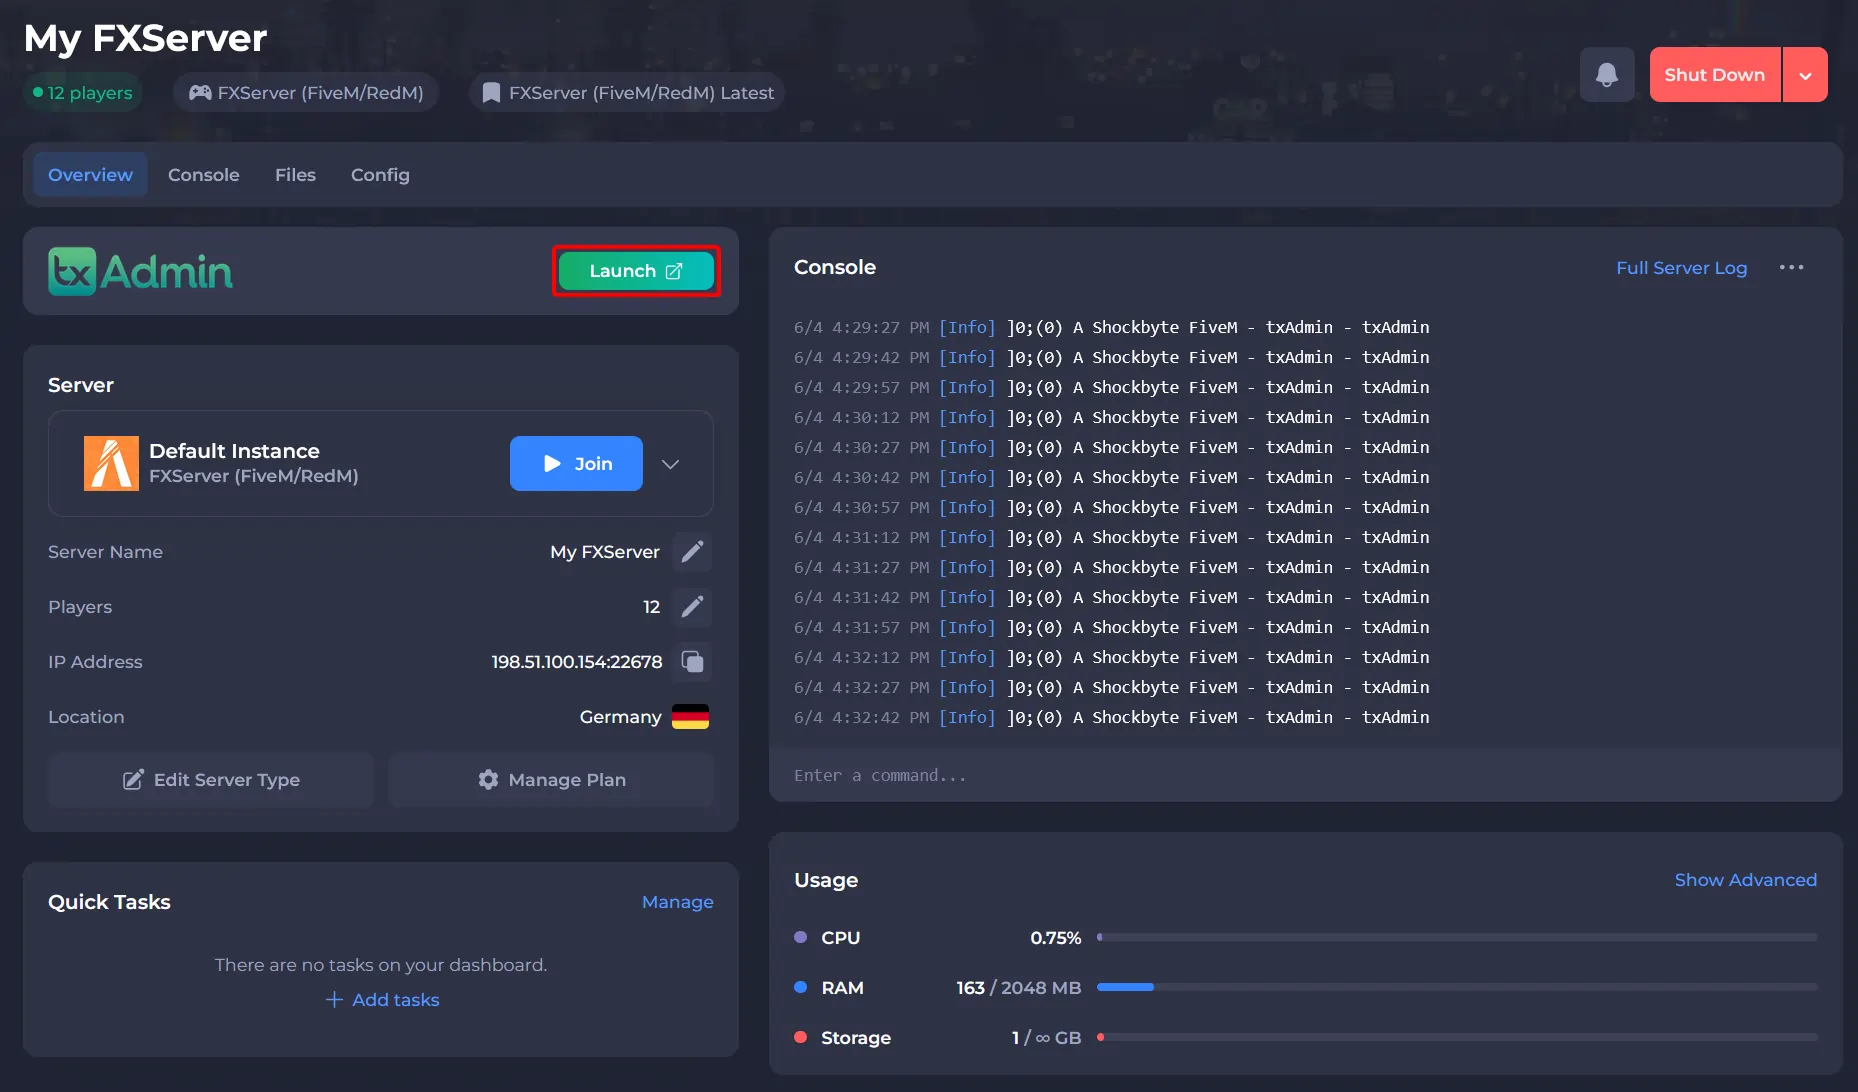
Start your server and check the console output for a line showing the txAdmin registration pin. Can’t find it? Just restart the server to generate a new one.
-
Open txAdmin.
-
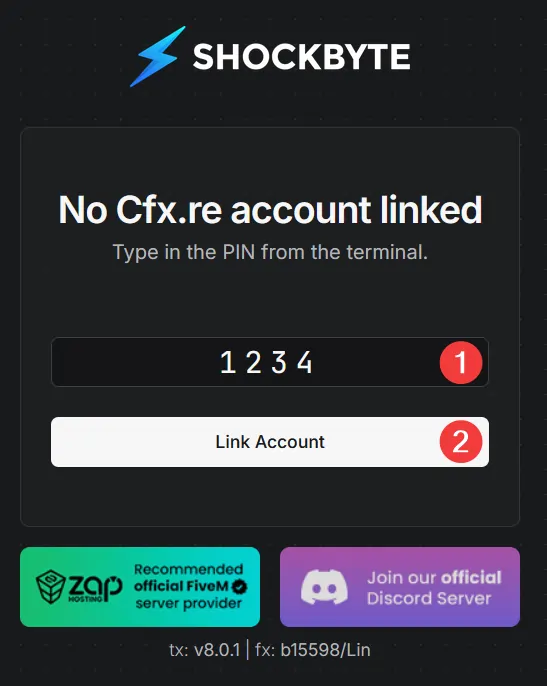
Enter the pin to connect your server to your browser session.
-
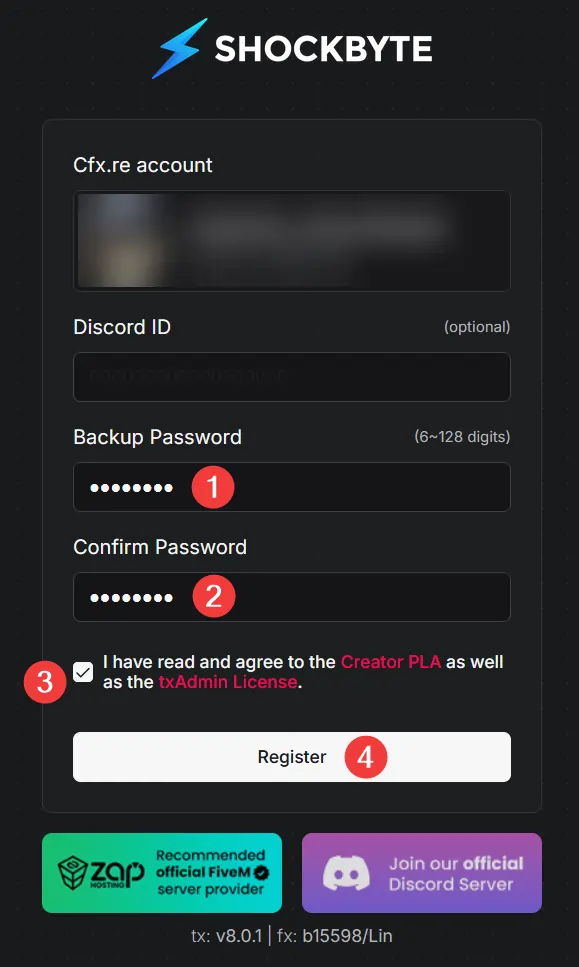
Log in or register your Cfx.re account and give txAdmin permission to access your profile.
-
Create a server-specific admin account to manage the RedM server.
Note:
This password is for txAdmin only and is separate from your Cfx.re account password.
#Setting Up Your RedM Server
Note:
In order to complete this step, you will be required to enter a valid cfx.re license key. Learn how to generate one here.
-
After logging in, choose a deployment method. For most setups, we recommend selecting
Popular Recipes.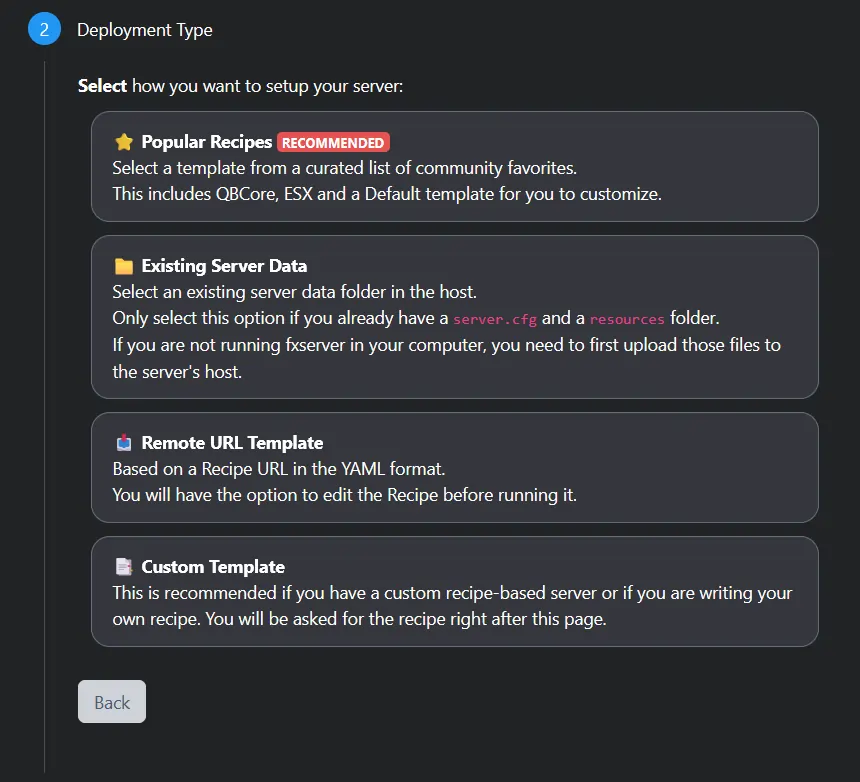
-
Pick a server template. For most setups, we would recommend selecting
RedM Basic Server.
-
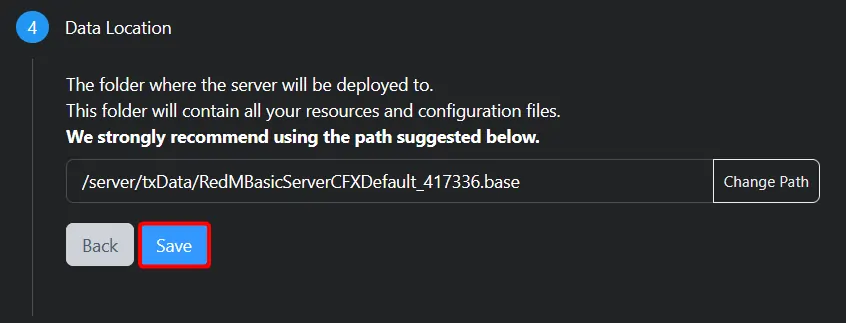
Confirm the data directory by clicking Save.
-
Click
Go to Recipe Developerto continue.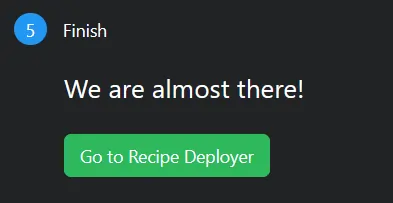
-
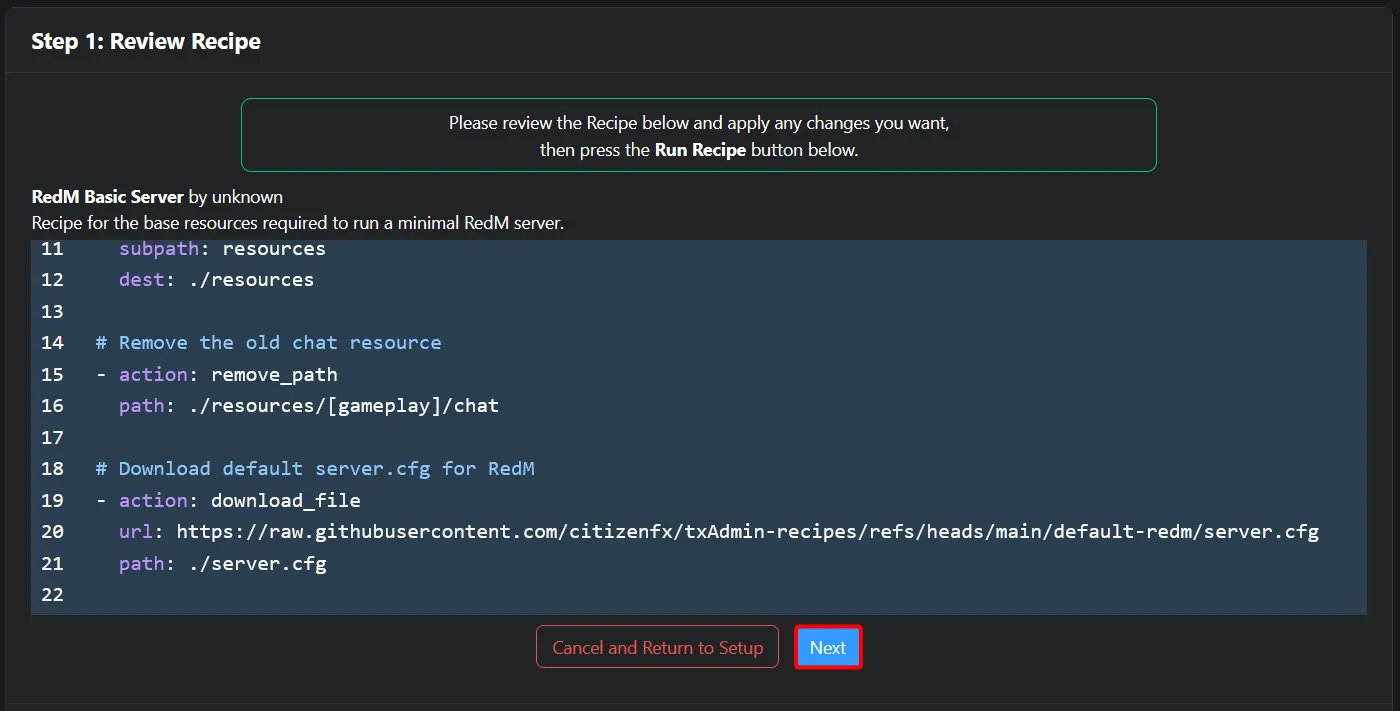
Review the recipe shown and click Next.
-
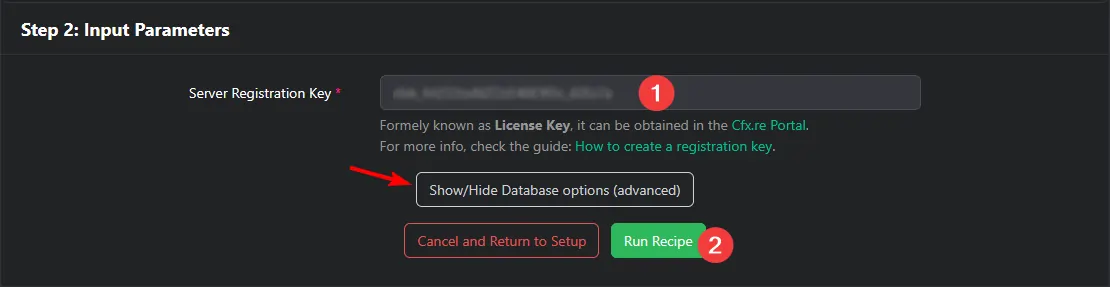
Paste your Cfx.re license key and press Run Recipe. More information on generating a Cfx.re license key can be found here.
Note:
Depending on the chosen template, your server might require a database to store information. If you see the Show/Hide database options button, please first follow this guide before continuing setting up your server.
-
Wait for the setup to complete and click Next to move forward.
-
Now edit your
server.cfgto update the server name, description, tags, and locale settings. A list of valid locales can be found here.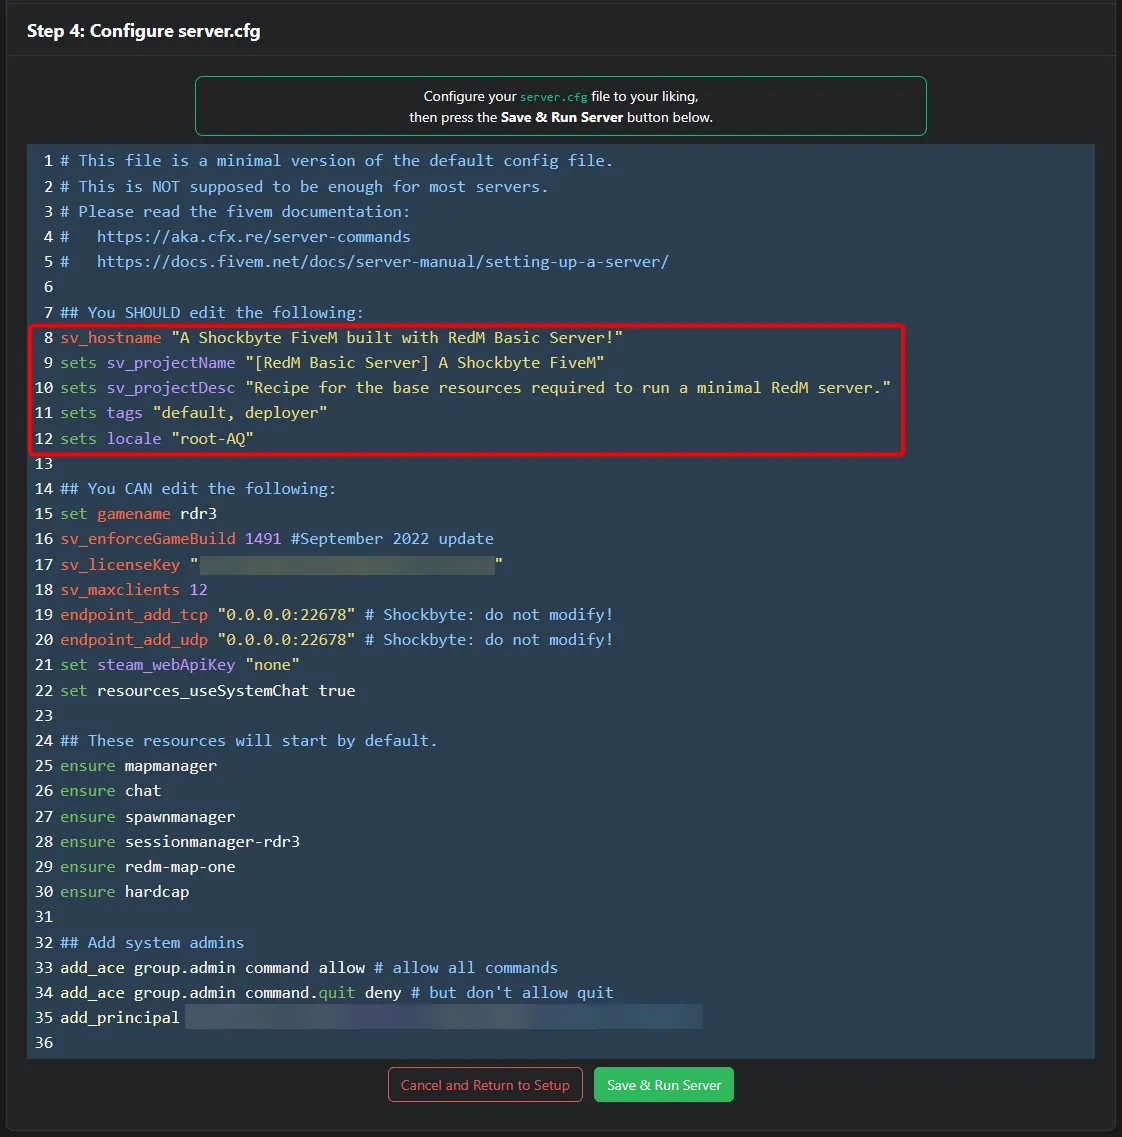
-
Finally, click Save & Run Server to bring your RedM server to life.

Your RedM server is now online and ready for players to join. For more RedM hosting tutorials, check out our full Knowledgebase here.