Table Of Contents
How to Update Your RedM Server Name and DescriptionStill have questions?
Ruben B
Partnership Manager

How to Change your Server Name and Description on your RedM server
Whether you're hosting epic wild west roleplay sessions or building a community for you and your mates, giving your RedM server a custom name and description helps it stand out. Not only does it make your server more recognizable, but it also gives players a quick peek into what your world is all about.
Your server name acts as your first impression—it can reflect your server’s theme, name your town, or highlight your community. Meanwhile, your server description is perfect for listing key features, unique rules, or just the overall vibe of your server.
The good news? Customizing both is super easy using txAdmin.
#How to Update Your RedM Server Name and Description
Follow these steps to customize how your server appears in the RedM server list:
-
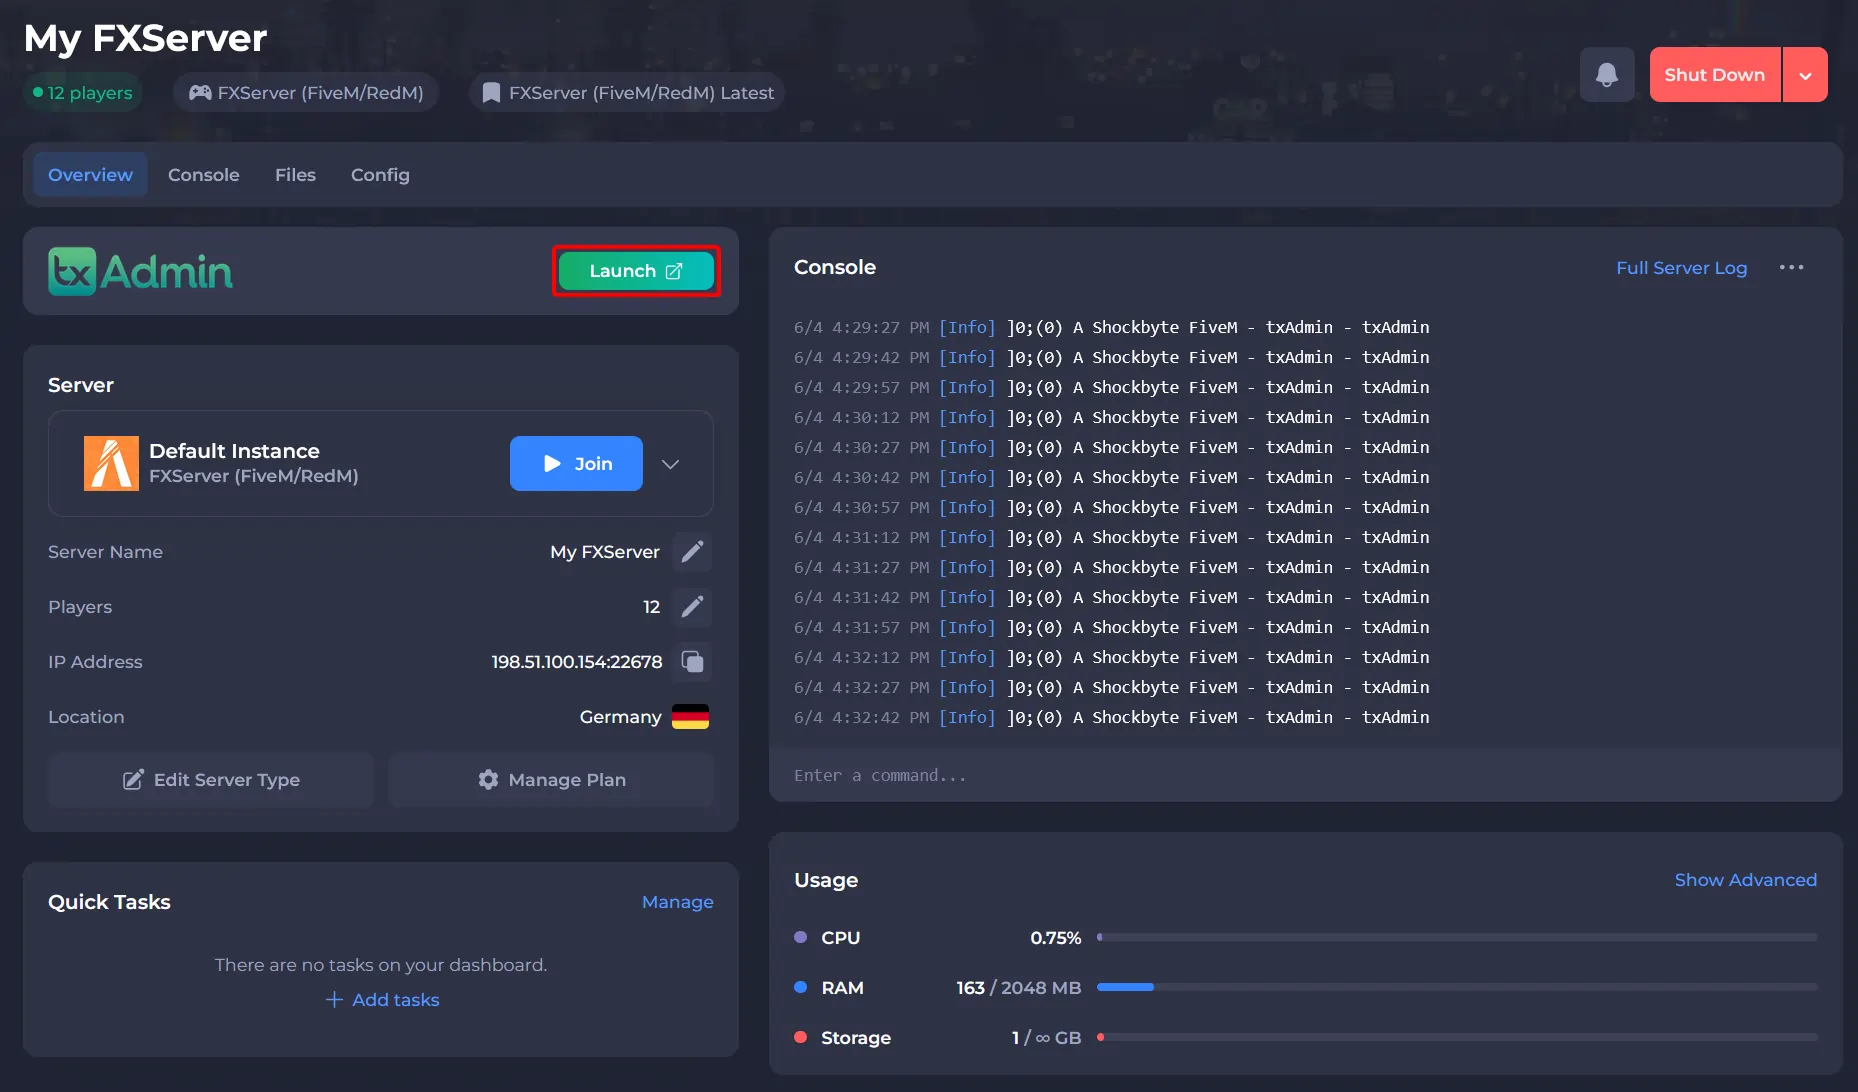
Head to your Shockbyte Control Panel.
-
Launch txAdmin.
-
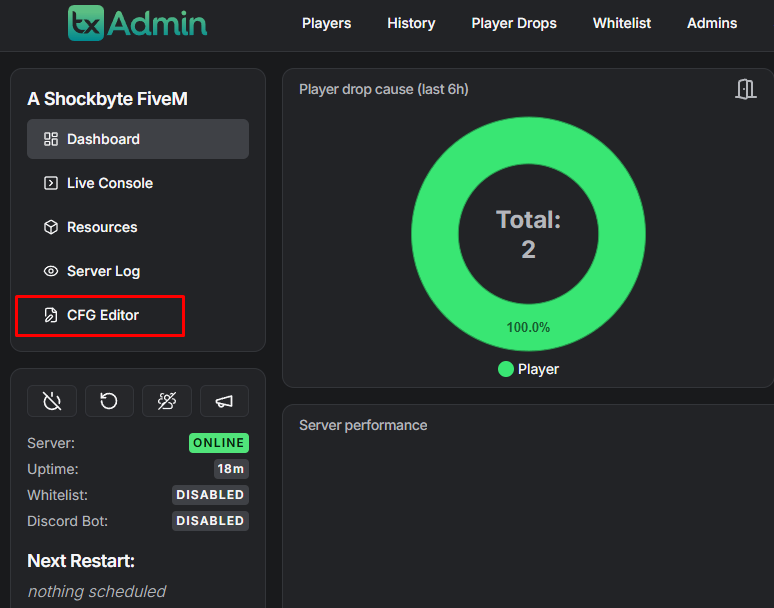
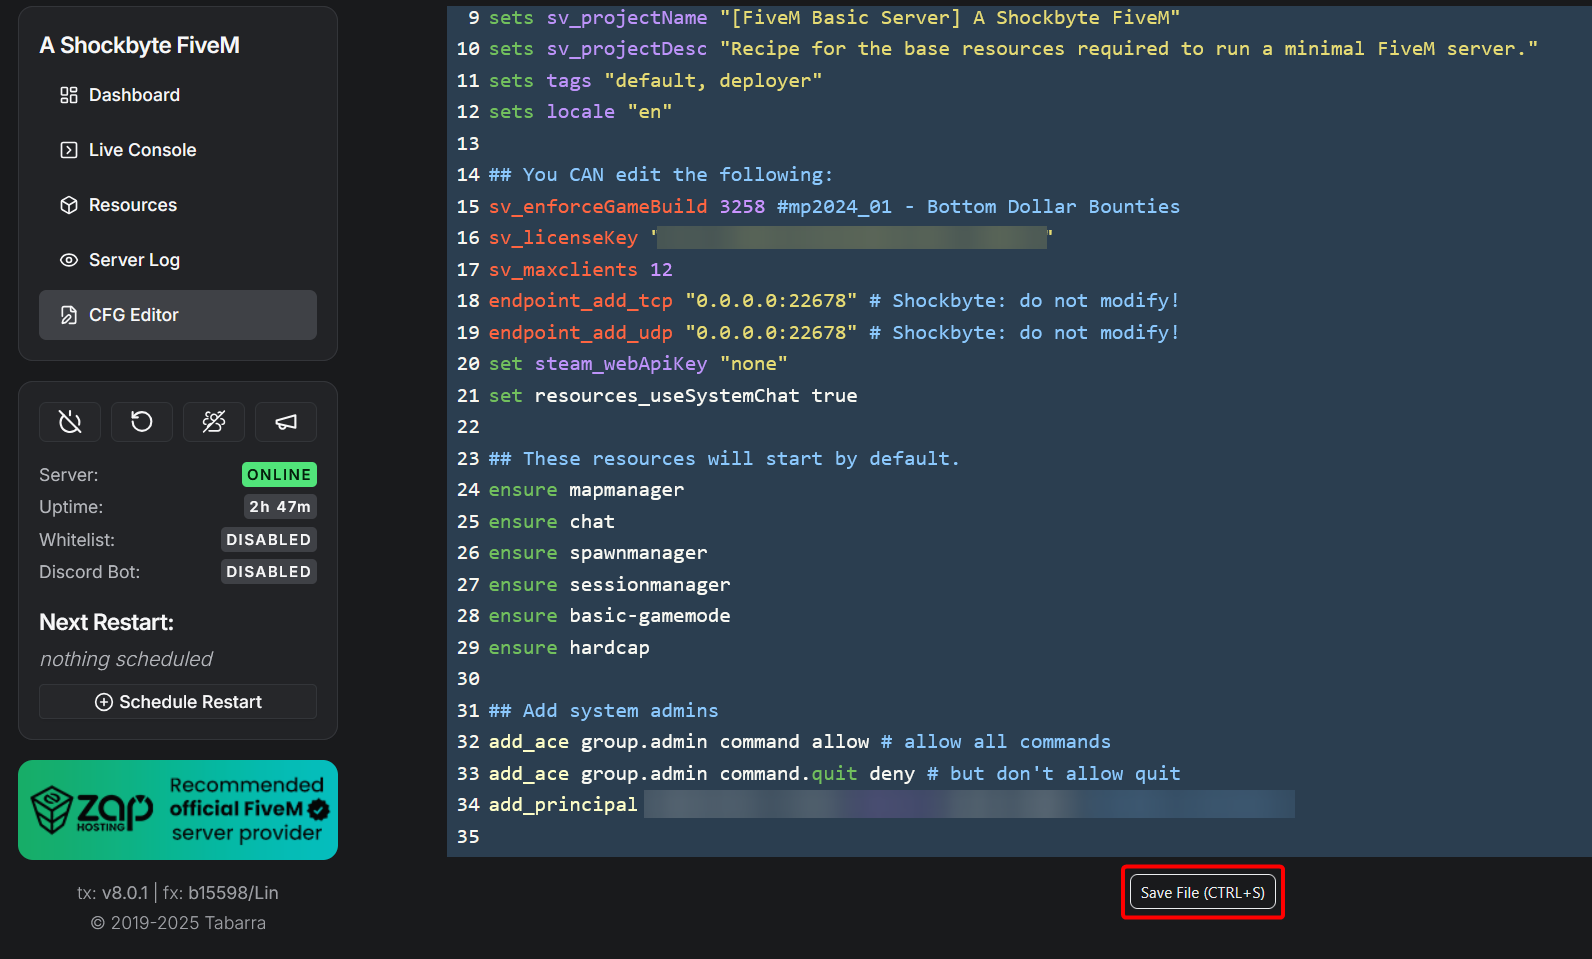
Click on the CFG Editor in the left-hand menu.
-
In the config file, search (Ctrl+F) for
sv_projectName. Replace the text in quotation marks with your desired server name.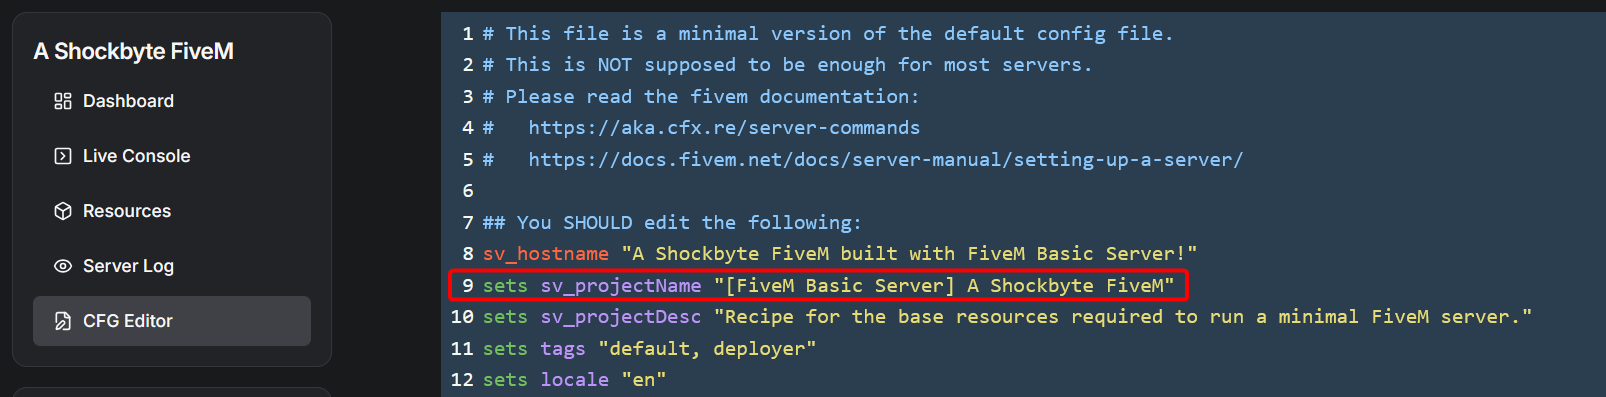
Note:
The format and layout of this file might look slightly different depending on the setup template you chose during installation.
-
Next, search for
sv_projectDescand update the description text to match your server’s theme, features, or guidelines.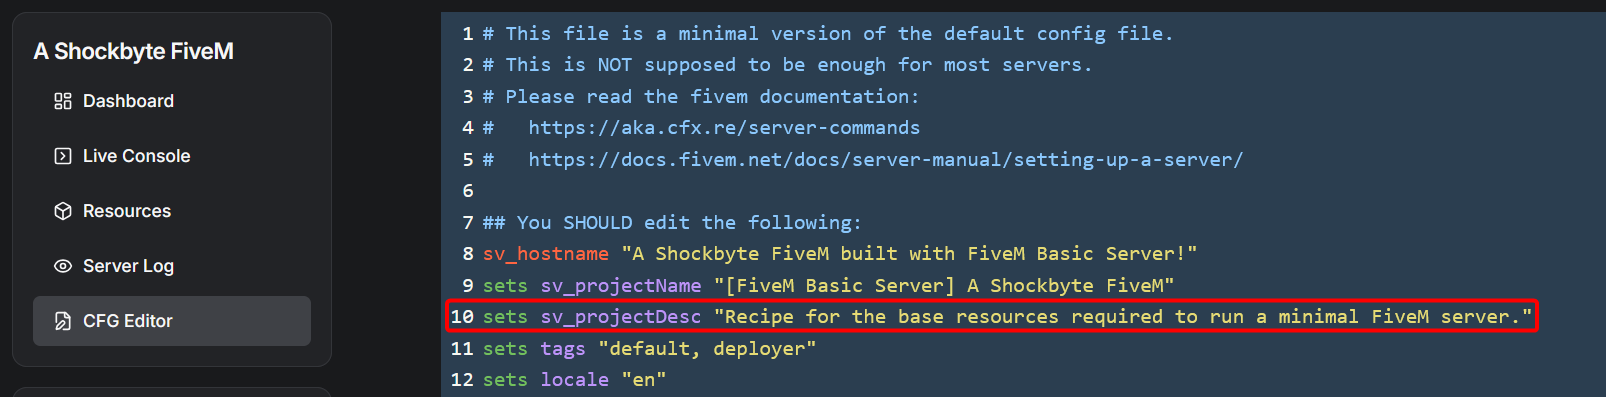
-
Once you're happy with the changes, scroll to the bottom and click Save File.
-
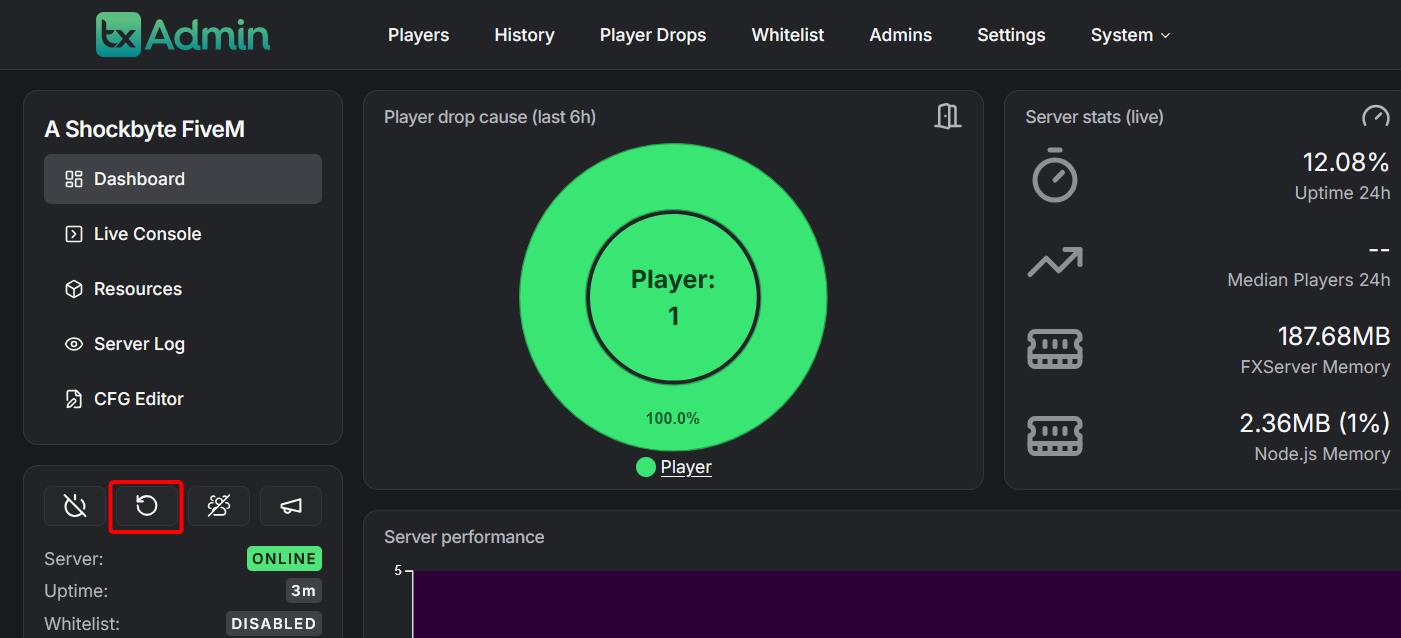
Lastly, restart your server to apply the new name and description.
And that’s it! Your RedM server will now show off its new name and description to players browsing the list. This small tweak can go a long way in making your server more inviting and discoverable.
Looking for more RedM server tips? Check out our full range of tutorials and guides here.