Managing Your Server

Managing Your Server
41 Articles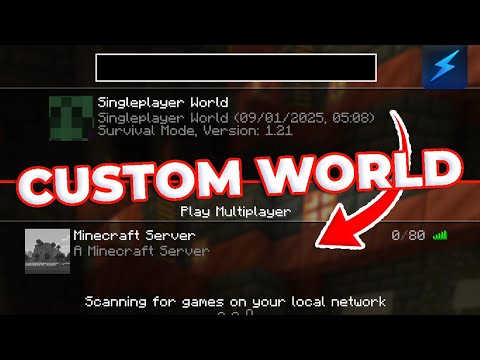
How to Upload and Use a Custom World on a Minecraft Server
If you possess a custom Minecraft world obtained from singleplayer, downloaded online, shared with you by a friend, or sourced from your previous server, you can use it as the world for your new server by uploading and configuring it. This guide covers how to configure a custom world for a Java Edition server. For steps on how to convert a Bedrock world into a Java Edition world, please refer to this guide. ::ProseNote{title="Please Note" description="To ensure a smooth loading experience for your custom world on the server, it's recommended to use worlds generated in the same Minecraft version that your server is running. Using worlds generated in a different Minecraft version may result in issues such as broken chunks, misplaced items, or, in more severe cases, corrupt chunks and entities." appearance="danger"} :: --- Uploading a Custom World You can upload a world folder by navigating to the files page on your control panel or by connecting via SFTP. For the purpose of this tutorial, we will be uploading a custom world using the Shockbyte control panel. 1. Access your server's Control Panel and navigate to the Files tab. 2. Click the drop-down arrow next to the Upload button, and click Upload Folder. You can also hold the key and click upload to automatically select the "Upload Folder" option. 3. Select your desired world folder, then click upload. If the world you would like to upload is in a zip file, make sure you unzip it before uploading the folder. --- Configuring a Custom World After you have uploaded the world you would like to use, you need to set the field in your file to the name of the world folder you uploaded. 1. After your world uploads, navigate to the Config tab and click the file to edit it 2. Set the level-name field to the name of the world folder you just uploaded. 3. Save the file, then restart your server. Once your server boots up, you will be able to login and play with your newly uploaded world.
How to Update your Existing Minecraft World to a New Version
When Minecraft releases new updates, you may be keen to update your existing world to experience all of the new features. Updating your singleplayer world is relatively easy, but you should make sure to create a backup in case any issues arise. How you back up and update your world depends on whether you play Minecraft: Bedrock Edition or Minecraft: Java Edition. ::ProseNote{title="Important" description="You can only update existing worlds to newer versions of Minecraft. Loading an existing world in a version older than the one it was generated with will cause world corruption issues." appearance="danger"} :: Updating a Java Edition World 1. Open Minecraft and navigate to the Singleplayer tab. 2. Select the world you want to update and click Edit. 3. Click and close the game. 4. Relaunch the game in the newer version, then join your world. Your world will automatically load new features or biomes in newly generated chunks. If you wish to locate the backup you took later on, you can do so by clicking the button in the Edit menu. --- Updating a Bedrock Edition World 1. Open the game and click Play. 2. Click the Edit button next to the world you would like to update. 3. Scroll to the bottom and select to make a backup copy. Alternatively to making a world copy, you can also click the Export World button to download a copy of the Minecraft world file itself to your computer. 4. After creating a backup, join your world normally. Your world will now load the new version of Minecraft in newly-generated chunks!

How to Set Up a World Border in Minecraft
A world border is a boundary or limit that surrounds an area of a Minecraft world that prevents players and other entities from moving beyond the border. Setting a world border is especially useful to limit the chunks being generated when players travel your world, which sometimes causes lag or makes your world file's size get excessively large. Players will take damage when outside the border. While redstone builds and water or lava flows are unaffected, the placement of blocks and liquids outside of the border may be limited, if at all possible. ::ProseNote{title="Please Note" description="The world border feature is available to Minecraft Java Edition only. For Bedrock Edition servers (NukkitX or PocketMine-MP), you will need plugins to configure your world border." appearance="default"} :: Setting Up a World Border If you have OP permissions in-game, you can follow these steps using in-game commands as well. However, for this tutorial, we will be using the server console only to set up our world border. 1. Open your server's Control Panel. 2. In the Console window, enter . Specify the center of your world border by using this command, replacing and with your desired X and Z coordinates. It is recommended to set this on your world spawn or to , the physical center of the world. 3. Enter the command . Once the center is set, you can now specify the size of the world border using this command. For example, entering will change the diameter or distance from one end of the border to the opposite end to 20 blocks. --- Other World Border Configuration Commands You can configure some additional world border details using more World Border commands. You can learn more information about the world border and the worldborder commands on this wiki page. - Displays the current size of the world border. - Adjusts (increase or decrease) the world border to the given size within the provided time, in seconds. For example /worldborder set 20 5 will resize the current border size to 20 within 5 seconds. - Sets the amount of damage a player receives every second they're outside the world border. For example /worldborder damage amount 1 will cause the player to take 1 damage per damage tick. \- Sets <distance as the number of blocks from the world border that a player starts to take damage. For example /worldborder damage buffer 5 will cause players to take damage when they're more than 5 blocks outside of the border. \- Sets <distance as the number of blocks from the world border when a player sees a warning of the border's proximity. For example /worldborder warning distance 2 will cause the player to begin seeing the border warning when they are 2 blocks away. - Sets <time as the number of seconds when the player begins to see a warning of the border's proximity as it gets closer. For example /worldborder warning time 2 will wait 2 seconds before warning the player that they are within the border warning proximity. That's it! You now know how to set up a world border for your server. Should you have any issues, please feel free to contact us.
How to Set Up a Minecraft Spawn
The spawn (spawn point) is a location in a Minecraft world where a player or entity is generated. For servers, this is where new players will be located when joining for the first time. Players will also respawn on this location upon death when they have not used a bed or changed their individual spawn point. A lot of servers, through the use of mods or plugins, have a command that allows players to teleport back to the world's spawn point. --- Setting the World Spawn If you have OP permissions in-game, you can simply enter the command to set the world spawn to the location and orientation you are currently standing in. If you would like to set the world spawn point in your server's console, you will need to add coordinates to the command you send. 1. Open your server's Control Panel. 2. In the Console window, enter . After replacing the placeholders , , and with their respective in-game coordinates, you can enter the command to set the world's spawn point to that location. Setting Player Spawn Points You can use the command to set the spawn point of individual players as well, as long as they are online when you run the command. Similarly to the setworldspawn command, if you have OP permissions, you can use this command in-game to set the spawn point of the specified player to the location and orientation you are currently standing in. If you're going to send the spawnpoint command from the server console, you will need to add the exact coordinates of where you'd like to set a player's spawn point. 1. Open your server's Control Panel. 2. In the Console window, enter . After replacing the placeholder with the name of the player you would like to edit the spawn point of, and replacing , , and with their respective in-game coordinates, you can enter the command to change the target player's spawn point to that location. That's it! You've now learned how to set a spawn point on your server.
How to Install Data Packs on your Minecraft Server
Data packs are a feature available for Minecraft worlds in versions 1.13 and later. They can add or override existing advancements, structures, recipes, and more. ::ProseNote{title="Data Packs" description="The data pack system is a feature that is exclusively available to Minecraft Java Edition. To add similar customizations on Bedrock Edition servers, refer to this guide: How to Install Behaviour Packs on your Minecraft Server." appearance="default"} :: Data packs can be added to single-player or multiplayer worlds, and the installation process is the same. --- Installing a Data Pack on your Minecraft Server To install a data pack, you must upload it to your datapacks folder found within your world files. 1. Download the data packs that you would like to use. 2. Navigate to your Control Panel and Shut Down your server. 3. Access your server files and navigate to . ::ProseNote{title="Note" description="This step assumes that you have not changed the name of your world. If your world has a different name than , you will want to navigate into instead." appearance="discovery"} :: 4. Upload your datapacks to this folder. Data packs are distributed in a ZIP format. If the data pack is from Vanilla Tweaks, you must unzip the file first before uploading it to your server. 5. Start your server. After installation, you may view and manage your data packs by using the command.

How to get OP on a Minecraft Server
Operators (OPs) have access to a range of commands that are used to help moderate a server. A few of the available commands for Ops are changing a player's game mode, updating server difficulty, giving items, kicking and banning players, whitelisting, and even stopping and restarting a server. You can view a full list of commands available to OPs here. Players with op permissions will automatically bypass a whitelist if it is configured on your server, granting them access regardless of the whitelist. Ensure that only trusted individuals are given op on your server. ::ProseNote{title="Important" description="If you're using Bedrock Edition, you will also need to enable cheats on your server." appearance="default"} :: Using the Server Console Making a player an operator through your server's control panel is simple, requiring only a single command. This is the fastest method of opping players if your server doesn't have any operators yet. 1. Open your server's Control Panel. 2. In the Console window, enter the OP command. Type the command , replacing <Username with the name of the player you would like to OP, in the Console window, then press Enter to send the command. For example, entering will give the player named Steve operator permissions. If the username of the player you're trying to OP has a space in their name, you will have to surround their username with quotes, like so: . --- Using OP Commands In-game If you already have OP, you can give other people OP in-game. 1. Connect to your Minecraft server. 2. Enter the command /op or /deop. The opposite of the op command is the command. You can also use the command to remove OP permission from a player, should you need to. Once you are opped, you will be able to run administrative commands and actions on your server.

How to Enable Command Blocks on a Minecraft Server
By default, Command Blocks are disabled in Minecraft to stop players from abusing them. As such, they have to be enabled manually. --- Enabling Command Blocks 1. Access your server's Control Panel and navigate to the Config tab. 2. Click the server.properties file. 3. Tick the enable-command-block field to active. 4. Save the file, then restart your server. After your server boots up, you will be able to use command blocks as expected.