We have a video tutorial on how to use LuckPerms:
LuckPerms is one of the more recent and popular permission managers available for the latest versions of Minecraft. This guide will walk you through installing and configuring it for your server. Please note that this guide will be using basic configurations and that they may be adjusted to your liking.
Installing LuckPerms
To install LuckPerms, you can follow these steps:
- Download LuckPerms here
- Open your control panel and navigate to Files > FTP File Access

- Login using your Multicraft password
- Open your
/pluginsdirectory
- Upload the JAR file you downloaded in step 1

- Restart your server
(Optional) Configuring LuckPerms to use MySQL
If you wish to configure LuckPerms to use a MySQL database, you can follow these steps:
- On the main page of your control panel, navigate to Advanced > MySQL Database

- Click Create Database

- Take note of the following information:
- Host
- Name
- Username
- Password

- Go back to the main page of your control panel and open Files > FTP File Access
- Navigate to
/plugins/LuckPermsand click Edit next to config.yml
- Within the open file, set the following configuration options:
- storage-method: MySql
- address: "Host" from step #3
- database: "Name" from step #3
- username: "Username" from step #3
- password: "Password" from step #3

- Press Save at the top of the file.
Configuring Permissions in LuckPerms
To configure permissions and groups in LuckPerms, you can follow these steps:
- Within Minecraft, open the chat and run the command /lp editor

- Click on the link that it gives you in chat and click Yes

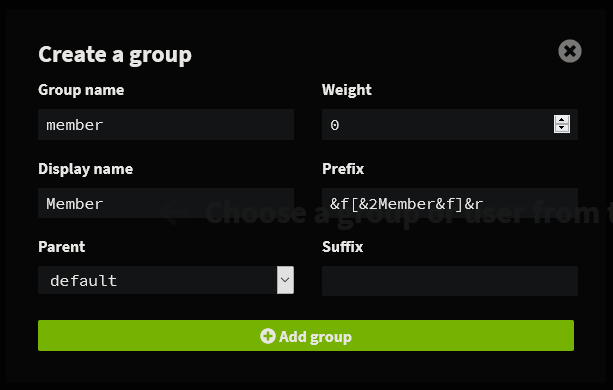
- For the purpose of this tutorial, we are going to use the following groups: default, member, moderator, admin and owner. You can change the group names to fit your liking. Press on the plus icon next to GROUPS to begin making these groups. An explanation of the configuration options are as follows:
- Group name: The official name of the group. This is usually used when referencing the group using in-game commands.
- Display name: How the name of the group will display in the LuckPerms Editor. Note that this is NOT how the group will appear in-game.
- Parent: Which group the group you are creating will inherit. If this is set, the group will have all permissions from the previous group it is inheriting.
- Weight: If a player has more than one group assigned to them, the group weight will determine which group will take priority. A higher number means higher priority and will override a lower weight.
- Prefix: The tag that will be displayed before the player's username in-game (Note, this requires the plugin "Vault")
- Suffix: The tag that will be displayed after the player's username in-game (Note, this requires the plugin "Vault")

- After you have created the groups, you can start adding permissions. The permissions you add will be dependent on what plugins you have installed. The most commonly used plugin is EssentialsX and you can find a list of its permission nodes here. In this example, we are going to give the "Member" group the permission
bukkit.command.help, which will allow them to use the/helpcommand in-game.
- Now, we are going to give all permissions to the "Owner" role.

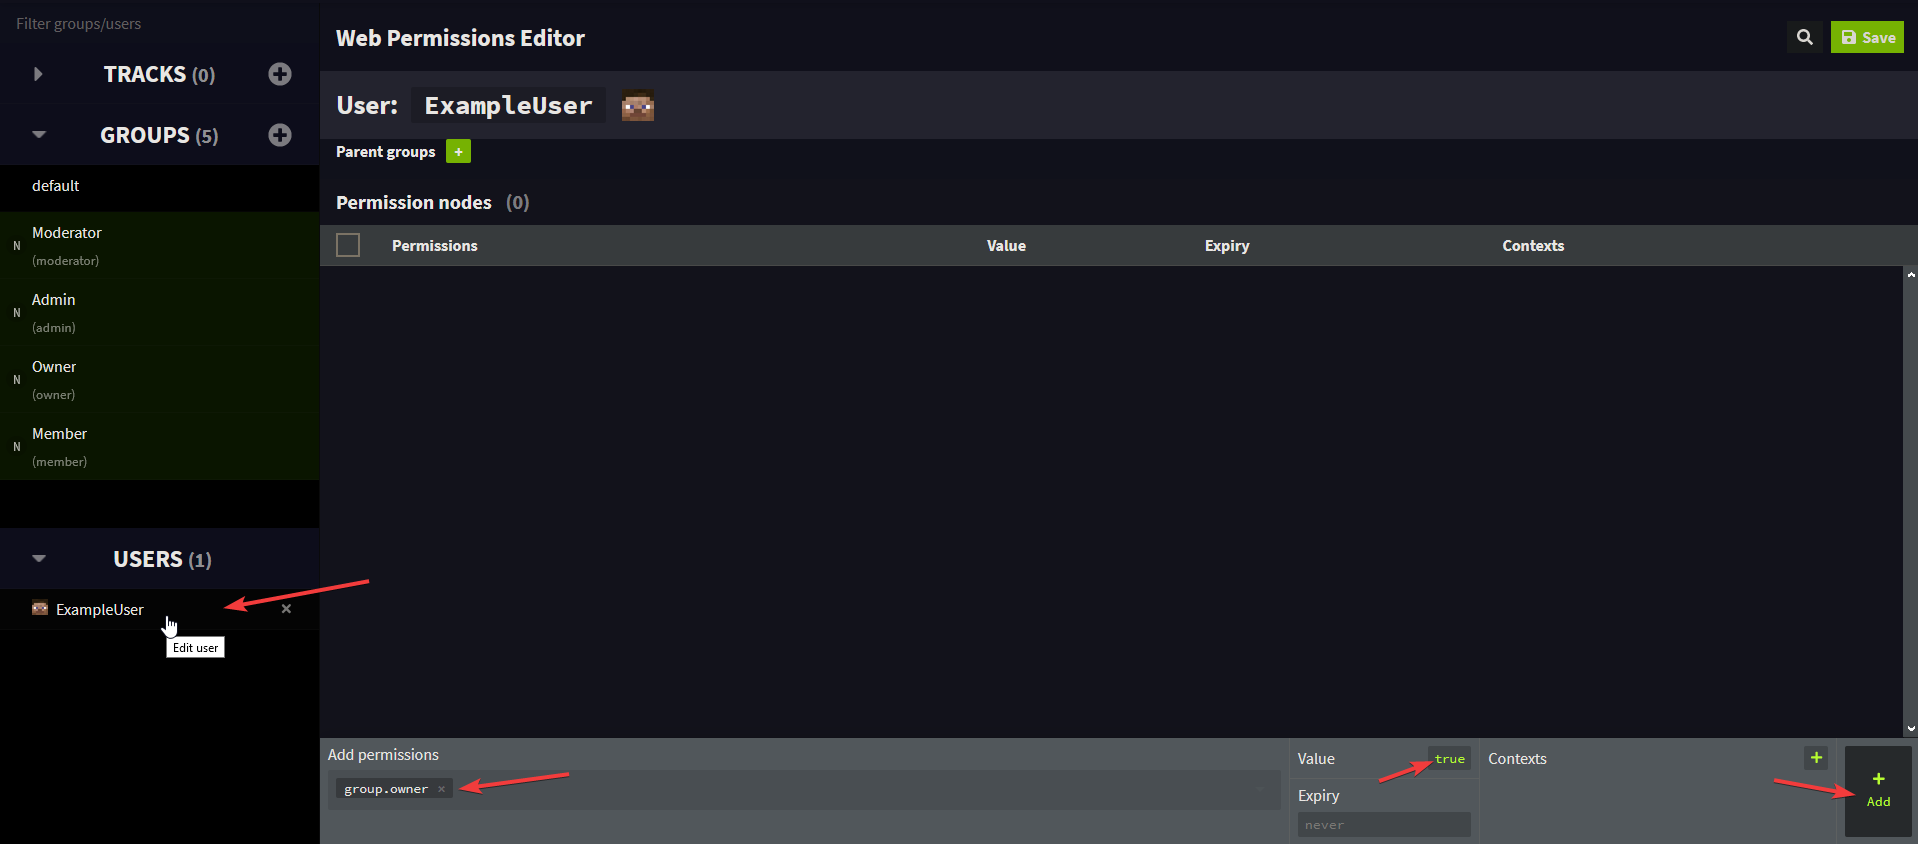
- Assign the appropriate ranks to your user. This can be done by selecting the user from the Users drop-down and adding the permission node
group.groupname
- Press Save at the top of the page. It is going to show a pop-up with a command. Click it to copy the command.

- Go back to Minecraft and run the command in-game. This will apply your changes to the permissions.
That's it! You have successfully configured permissions for your Minecraft server!
If you require any further assistance, please contact our support at: https://shockbyte.com/billing/submitticket.php
