Still have questions?
Shockbyte
Support Team

Creating Scheduled Tasks With The Shockbyte Panel
There are certain tasks or functions that you may want to occur periodically on your server. In order to avoid forgetting to do these tasks yourself, it may be helpful if they automatically happened for you. This is where scheduled tasks come in to play.
You can schedule tasks to automatically run on your server using the control panel. Such tasks could include backing up your server, restarting your server, or anything else you could imagine. Almost any command can be programmed to run automatically, either once or at a specified interval.
#How to Configure a Task
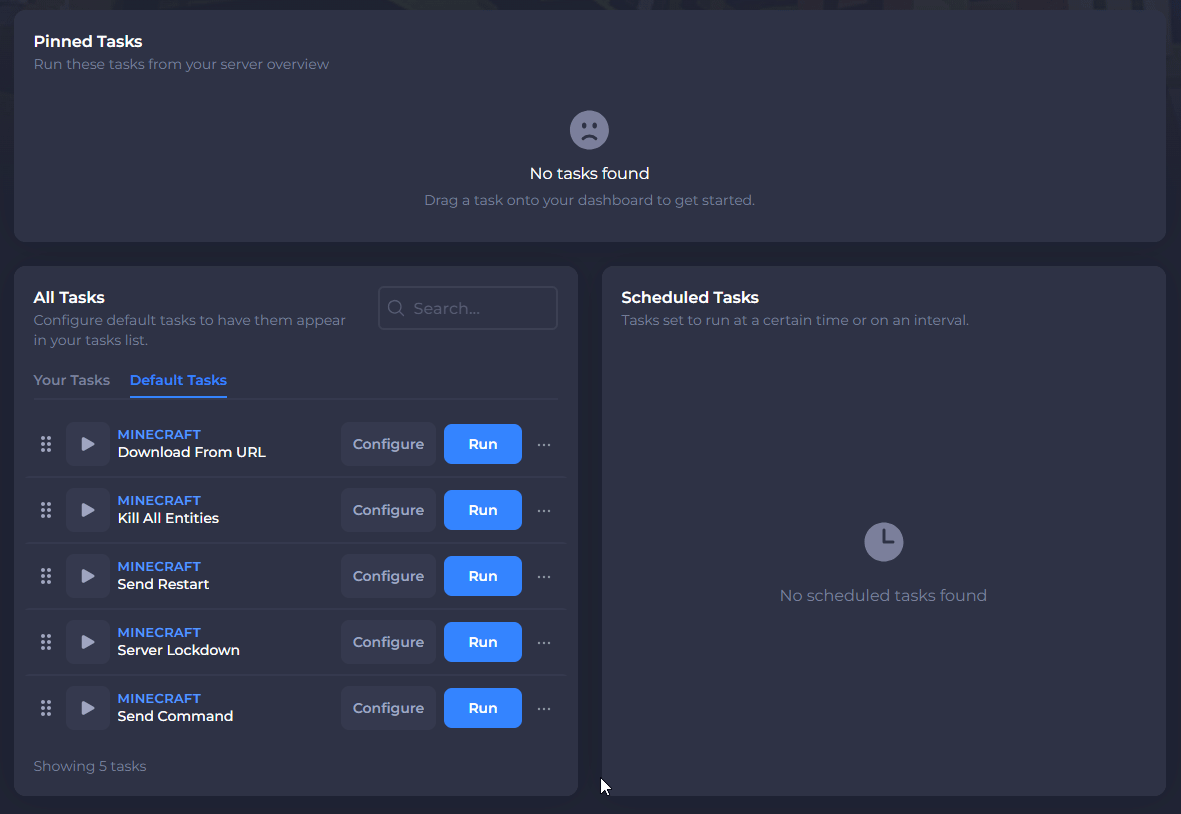
You will be able to configure a task within the Tasks tab on the control panel.
-
Login to your server on the control panel.
-
In the left menu under Server Settings, go to Tasks.

- Under All Tasks, select the task you wish to configure and then click on Configure.

- In the Configure your task window, fill in the required fields and then click on Save.

- Your task will then be saved in the Your Tasks section.

#How To Run a Task
You will be able to run a task from the Tasks page on your control panel.
- On the Tasks page, locate the task that you wish to run.

- To Run the task, click on Run.
Please note that your server will need to be online for most tasks or you will be unable to run the task.

#How To Schedule a Task
You will be able to schedule a task from the Tasks page on your control panel.
- On the Tasks page, locate the task that you wish to schedule.

- Drag and Drop the task into the Scheduled Tasks section.
- On the Schedule Task window, click on Next Step.
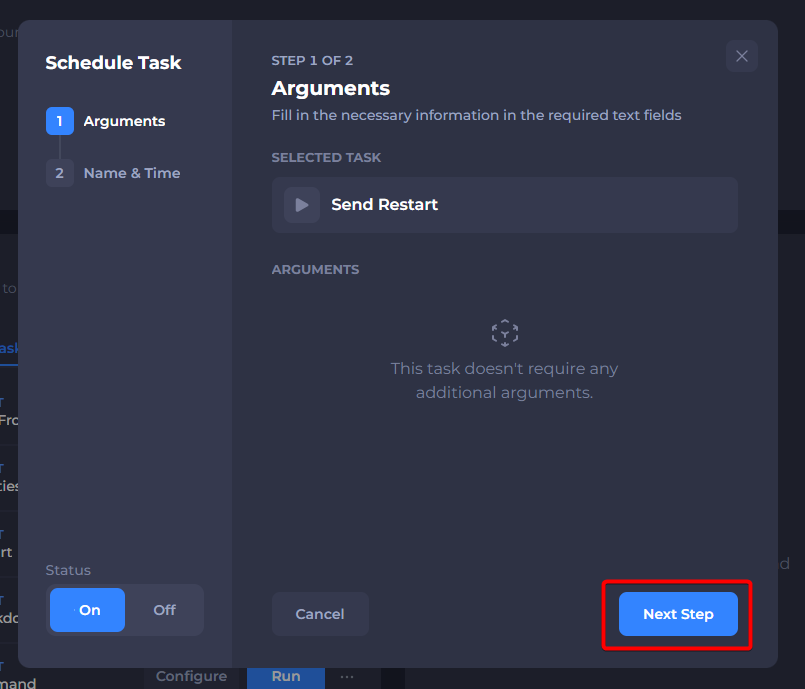
- Then fill in the necessary information such as Name, Date and set intervals if required.

-
Once the information has been added, click on Schedule.
-
The Scheduled task will then appear in the Scheduled Tasks section.
To edit or remove the scheduled task, simply click on the 3 dots next to the task.

#How to Pin a Task
You can pin a task by dragging it into the Pinned Tasks section.
- On the Tasks page, navigate to the task you wish to pin.

- Drag and drop the task into the Pinned Tasks section.

Now you can set up, plan, and run a task easily after following the above guide.