Still have questions?
Kobe Plane
Game Experience Engineer
How to Allocate More Memory to your Minecraft Client
When your server is running a large number of plugins or mods, there are instances where your client may face memory limitations when trying to keep up with everything. This becomes especially apparent when introducing mods into the equation, as the default allocation of 2GB RAM is insufficient. Fortunately, you have the flexibility to adjust the allocated memory for your client; this often results in performance improvements and becomes essential when managing a big pack of mods or plugins.
Please Note
Following this guide will only adjust the RAM allocated to your local game client, NOT your server.
- How to Allocate More Memory to your Minecraft Client (Curseforge)
- How to Allocate More Memory to your Minecraft Client (Forge)
- How to Allocate More Memory to your Minecraft Client (ATLauncher)
- How to Allocate More Memory to your Minecraft Client (FTB App)
#What does Increasing Memory Allocation do?
Boosting your launcher's memory gives Minecraft the power to manage more demanding tasks efficiently. To put it simply, this enables smoother operations when downloading mods and interacting with servers and worlds loaded with numerous plugins, mods, or other custom features.
#Locating Available Computer RAM
Increasing your game memory means dedicating more of your computer's hardware resources specifically to Minecraft. It's very important to verify that your computer has enough available memory before making any adjustments, as it could result in game or even computer crashes.
-
Press Win + R to open a Windows Run window
-
Enter 'dxdiag' to open a DirectX Diagnostic tool window
-
Locate and take note of your available memory
Your system will most likely show you your available memory in MB or Megabytes. One GB (Gigabyte) is 1024MB, so you may need to use a calculator or use a website like this to calculate how many GB you have available.
#How Much Memory Should I Allocate?
Ideally, you want to leave some RAM for your operating system and other potential background processes. Allocating all of your RAM to Minecraft may lead to instability, crashes, or even corruption. Finding the right balance for your specific setup may require some experimentation; however, feel free to reference the chart below for some rough examples.
| Available Memory | Best Amount | Maximum Amount |
|---|---|---|
| 4GB | 2GB | 3GB |
| 6GB | 3GB | 5GB |
| 8GB | 4GB | 7GB |
| 12GB | 6GB | 11GB |
| 16GB | 8GB | 15GB |
| 32GB | 16GB | 31GB |
| 64GB | 32GB | 63GB |
#Increasing RAM - Vanilla Launcher
-
Open your Minecraft Launcher
-
Navigate to Installations and create and press New

- Press More Options and locate the JVM Arguments box
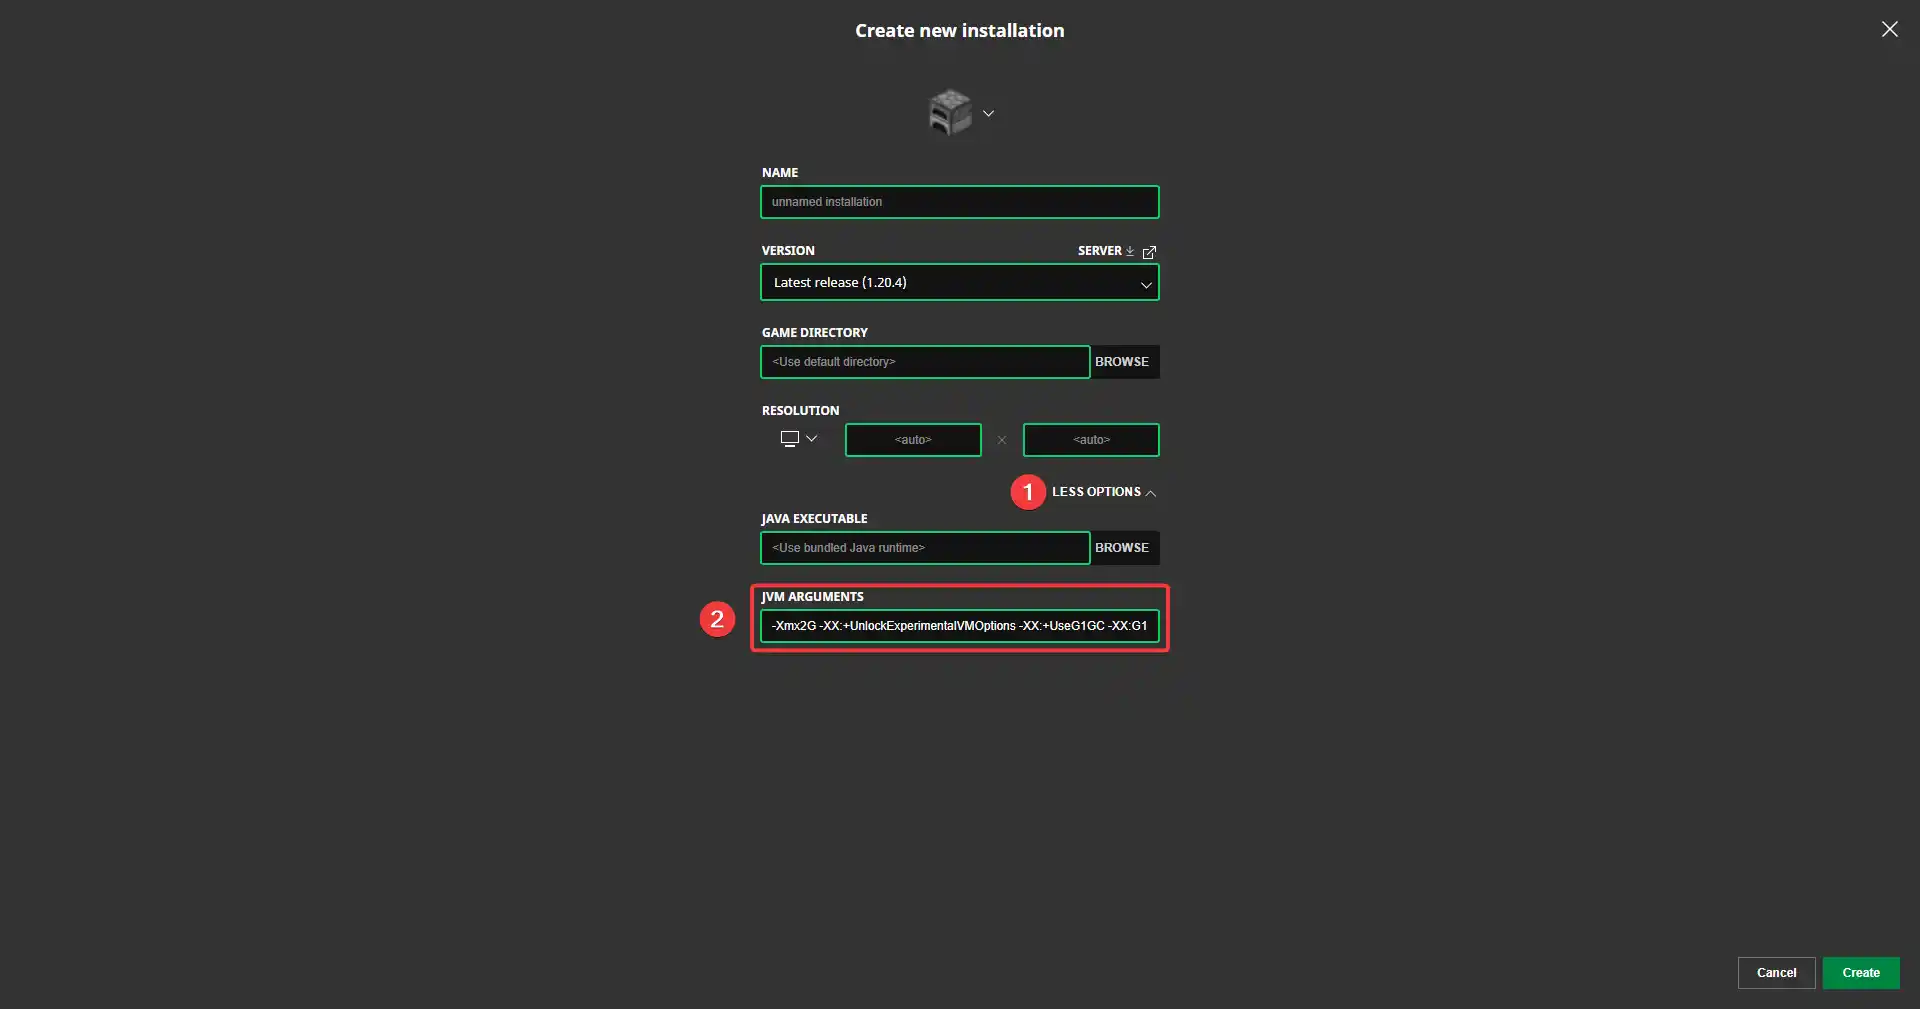
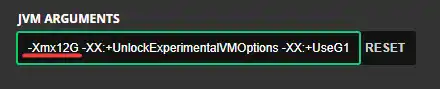
- Modify the -Xmx flag to reflect your desired RAM
Locate the -Xmx2G flag, and replace the '2G' with your desired amount of RAM. For example, if you would like to allocate 12 GB of RAM, you should set the flag to -Xmx12GB.
- Name the installation to your liking, then click Create

- Find your new installation, then click Play

After clicking play, your client will boot up with the new amount of RAM you have allocated towards it. If your client crashes, you will want to keep increasing the amount.