Dynmap is a plugin that allows you to view a live map of your Minecraft server world, similar to Google Maps. This tutorial will teach you how to set this plugin up for your server. Before anything else, you should already have Dynmap installed on your server. These can either be downloaded from SpigotMC or CurseForge depending on your Server Type.
We also have a tutorial to guide you on how to install Dynmap as well as any other plugins into your server available here, should you need it.
Additionally, it is recommended to Setup a World Border for your worlds before generating your Dynmap to limit how much server space Dynmap (and your world) can take up. All of the Dynmap files are stored locally in the server files as we do not support MySQL Databases as a storage method for Dynmap.
Setting Up Dynmap
After installing Dynmap on your server, you must configure a few more files to finish setting up the plugin.
- Log into your Multicraft panel account and Stop your server.

- Navigate to Files > FTP File Access. Then, log into the FTP File Manager.

- Navigate to the Dynmap plugin folder, which should be found inside the
\pluginsfolder.
Note: If you are unable to locate this folder, be sure that you've fully restarted your server at least once after uploading the Dynmap JAR file into your plugins folder to allow the plugin files to generate.
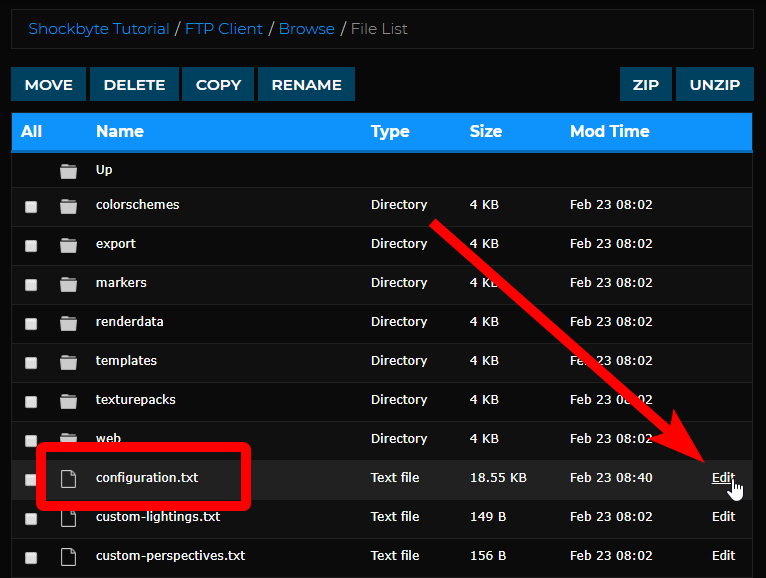
- Locate the file named "configuration.txt" and click on the Edit link on its right-hand side.

- In the "configuration.txt" file, look for the line that says
deftemplatesuffix. Set this todeftemplatesuffix: vlowresordeftemplatesuffix: lowres.
Note: Dynmap generates images for each chunk, which can accumulate and occupy a large space in your server storage. The setting above ensures that the generated images are not too large and that your server does not violate Shockbyte's Fair Use Policy.
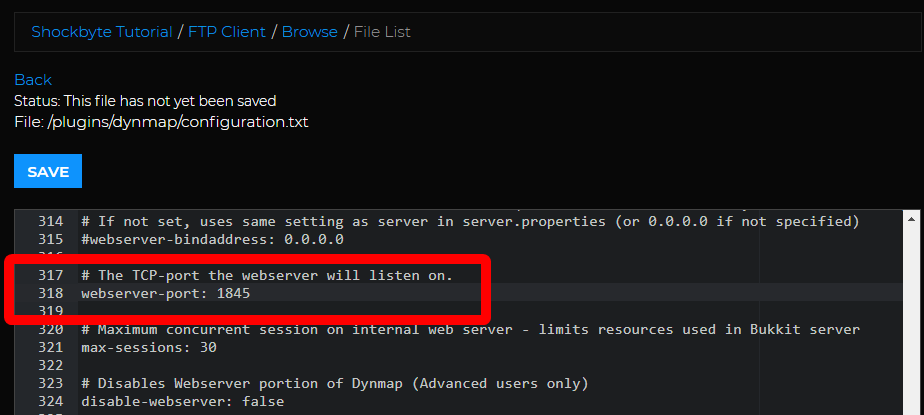
- On the same file, locate the line with the
webserver-portsetting. The default value is 8192 but you MUST change this to a port allocated specifically to your server.
To allocate a new port to your server, follow our tutorial on Assigning Additional Ports. After you have allocated the additional port, use it in your config (e.g. webserver-port: 1845).
- Press Save to save all changes and exit the text editor.

- Start your server to load the changes you've made.
- Once your server has fully loaded, test your Dynmap map by navigating to
http://IP:PORTon your web browser, replacing "IP" with your Server IP and "PORT" with the Dynmap Webserver Port that you specified in Step 6.
Note: If you are having issues with the domain, please ensure you are usingIn this example, the server IP ishttp://IP:PORTinstead ofhttps://IP:PORT.192.168.2.1so the Dynmap live map can be accessed through this linkhttp://192.168.2.1:1845.
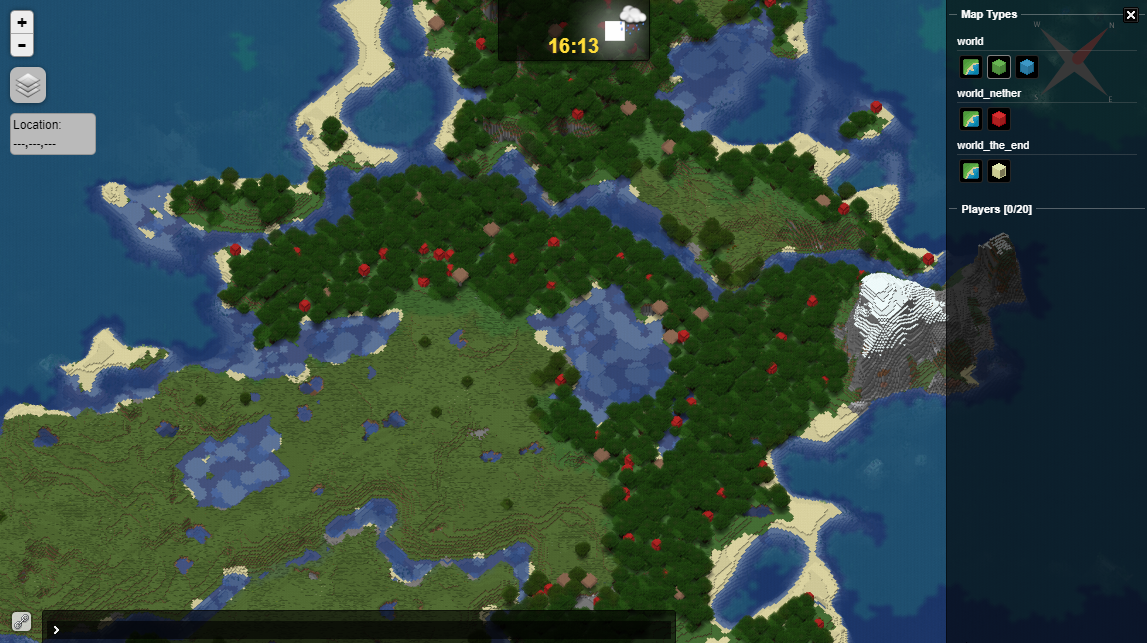
If you've configured Dynmap correctly, you should be directed to your server's dynamic map page. However, you might see a blank map similar to the screenshot below. This is normal because the map images have not yet been generated. This will gradually be generated as players move around the world.
- (Optional) To fully generate your dynamic map, use the command:
/dynmap fullrenderin your console or in-game
Note: Generating your map will use up a huge portion of your server RAM and may cause lag spikes; this is completely normal. It is recommended to do this when there are no players on your server to prevent interruptions or lag while playing.

If you require any further assistance, please contact our support at: https://shockbyte.com/billing/submitticket.php

