Soulmask features an in-game community/private server list. To provide your server with an identity, it is recommended to customise your server's name and description when players use the server list to connect, or if you wish for your server to be available to the public.
Keep in mind that it is recommended to direct connect to your server instead of using the in-game server list. This is because the in-game server list has poor filtering options and seems to be inconsistent when it comes to displaying servers.
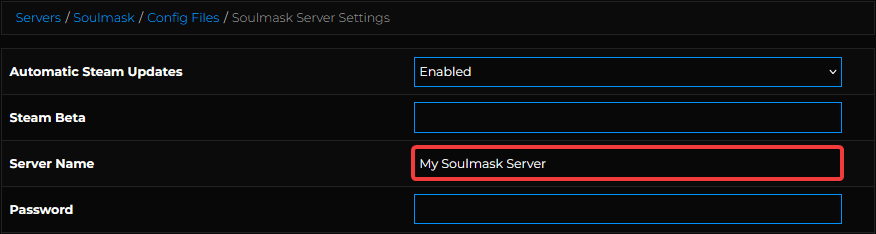
Changing your Server Name
You can configure your server name from the Soulmask server settings file, located on your server's control panel.
- Access your control panel and Stop your server.
- Navigate Files > Config files.

- Click Soulmask Server Settings.

- Locate the Server Name option, and set your desired server name.
- Save and Start your server.

Interested in purchasing Soulmask servers with instant activation, easy customisation, and great & extensive Knowledgebase articles? Click the link to purchase Soulmask server hosting.
To learn more about Soulmask Server Hosting, you can browse our library of Knowledgebase articles here.
If you require any further assistance, please contact our support at: https://shockbyte.com/billing/submitticket.php