When you upload a Singleplayer world to your server or vice-versa, your player data such as your inventory and player statistics won't transfer without making any changes.
Without converting your world or deleting the players.db file, you may notice you won't be able to join your world or your server is crashing. This is because the way Multiplayer and Singleplayer loads player data is stored differently.
If you haven't already, first read our Knowledgebase guide on uploading or downloading your world.
You can convert your world between Singleplayer and Multiplayer by following these instructions:
How to Convert Your Singleplayer World to Multiplayer
- Stop your server from the Control Panel.
- Upload your Singleplayer world to your server by following our guide here.
- Create a workspace folder at any location you'd like on your computer. This isn't required but it will make it easier to work on converting your player data.

- Navigate to
Files > FTP File Accesson your control panel and login to this via an FTP client such as Filezilla or WinSCP.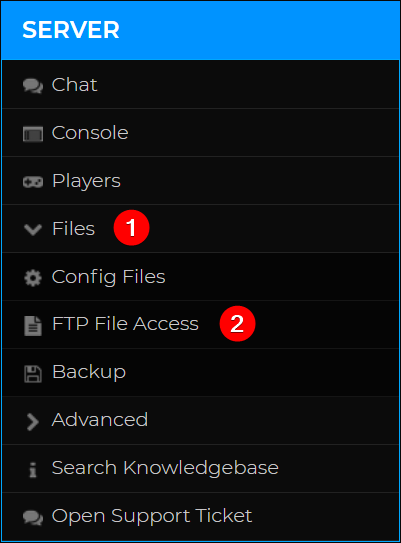
- Click on the /Zomboid folder, then navigate to `/Saves/Multiplayer` in your servers FTP directory.

- Keep note of the World Name on your control panel. By navigating to Files > Config Files > Project Zomboid Server Settings.

- Click on the world name that matches the world field on your control panel. Download the
players.dbfile and place it in your workspace folder. You can also grab theplayers.dbfile from the Singleplayer world instead if you haven't replaced the file yet.
- Rename the players.db file you've moved to oldPlayers.db
Note: You don't need to rename the players.db file to the name mentioned in our Knowledgebase. You can use any name but you are only renaming the file temporarily so it's easier to work with. - Download SQLite Database Browser (DB Browser) from https://sqlitebrowser.org/dl/
- Open DB Browser, then click
File > Open Database
- Locate the workspace folder you've created, then open oldPlayers.db

- Click Browse Data, then select the
localPlayerstable. If there's any player data in the table, you can confirm the oldPlayers.db file is using the Singleplayer format.
- Delete the players.db file on your server from the FTP directory.

- Start your server to regenerate a multiplayer compatible players.db file.
- Join your server and create a new character. It doesn't matter what statistics you choose for the player as this will be reset after transferring the data.
- Leave, then stop your server from the control panel.
- Navigate to your world folder in your servers FTP directory.
- Download the players.db file to the workspace folder on your computer.

- Rename the players.db file to newPlayers.db

- Open DB Browser, then click
File > Open Database - Locate the workspace folder, then open newPlayers.db

- Click Browse Data, then select the
networkPlayerstable. If there's any player data in the table, you can confirm the newPlayers.db file is using the Multiplayer format.
- Open the oldPlayers.db file with DB browser.
- Click Browse Data and open the
localPlayerstable. - Keep a reference of the X, Y, and Z values. Copy and paste this to any note-taking software of your choice.
- Right click on the field in the data column for your player and press Copy as SQL. Paste this in the document with your X, Y, and Z values.


- Open the newPlayers.db file with DB browser.
- Click Execute SQL, then run the SQL command mentioned at the bottom of this Knowledgebase article. Replace the values in the SQL command with the values you've taken note of previously. You will want to modify the
networkPlayerstable. - Click the Execute all/selected SQL button. This looks like a play button and is located near the top left of DB Browser.

- Click Browse Data and confirm the changes were applied.
- Press the File button, then click Write Changes and Save All. Exit DB Browser.

- Navigate to your workspace folder and rename newPlayers.db to players.db
- Upload the newly renamed players.db file to
/Zomboid/Saves/Multiplayer/YOUR_WORLD_NAME
- Start your server and connect to join with your Singleplayer character data.
How to Convert Your Multiplayer World to Singleplayer
- Stop your server from the Control Panel.
- Download your world by following our guide here.
- Make sure you've replaced the players.db file as mentioned in the previous Knowledgebase guide.
- Create a workspace folder at any location you'd like on your computer. This isn't required but it will make it easier to work on converting your player data.
- Navigate to the location you've downloaded your world to in your Project Zomboid game directory.
- Locate the players.db file that contains your multiplayer player data to the workspace folder you've created. You can find this directly on your server in the world directory.

- Move the players.db file to the workspace folder you've created, then rename this to oldPlayers.db
Note: You don't need to rename the players.db file to the name mentioned in our Knowledgebase. You can use any name but you are only renaming the file temporarily so it's easier to work with. - Download SQLite Database Browser (DB Browser) from https://sqlitebrowser.org/dl/
- Open DB Browser, then click
File > Open Database - Locate the workspace folder you've created, then open oldPlayers.db
- Click Browse Data, then select the
networkPlayerstable. If there's any player data in the table, you can confirm the oldPlayers.db file is using the Multiplayer format. - In the
networkPlayerstable, keep a reference of the X, Y, and Z values. Copy and paste this to any note-taking software of your choice. - Right click on the field in the data column for your player and press Copy as SQL. Paste this in the document with your X, Y, and Z values.
- Open the players.db file located in the Project Zomboid game directory with DB Browser. This would be the world folder on your computer located under
C:/Users/YOUR_USERNAME/Zomboid/Saves
- Click Execute SQL, then run the SQL command mentioned at the bottom of this Knowledgebase article. Replace the values in the SQL command with the values you've taken note of previously. You will want to modify the
localPlayerstable. - Click the Execute all/selected SQL button. This looks like a play button and is located near the top left of DB Browser.
- Click Browse Data and confirm the changes were applied.
- Press the File button, then click Write Changes and Save All. Exit DB Browser.
- Start Project Zomboid on your computer, then press the
LOADbutton.
- Select the world you've just uploaded and press
PLAY
SQL Command Cheatsheet
When running the command, replace the text REPLACE_WITH_TABLE with the table you're updating.
If you're converting your world from singleplayer to multiplayer, the table you will be modifying is networkPlayers.
If you're converting your world from multiplayer to singleplayer, the table you will be modifying is localPlayers.
You can find the full command below. Don't forget to replace all values indicated in the comments!
    -- Update player data

    UPDATE "main"."REPLACE_WITH_TABLE" -- Select which table you'd like to modify.

    SET data = NULL -- Replace “NULL” with value inside the copied SQL command VALUES(); method

    WHERE id = 1;  -- The ID is the row you're replacing the value of for the character you created earlier.


    -- Update player X coord

    UPDATE "main"."REPLACE_WITH_TABLE" -- Select which table you'd like to modify.

    SET x = 0 -- Replace with the X coordinate of the player.

    WHERE id = 1;  -- The ID is the row you're replacing the value of for the character you created.


    -- Update player Y coord

    UPDATE "main"."REPLACE_WITH_TABLE" -- Select which table you'd like to modify.

    SET y = 0 -- Replace with the Y coordinate of the player.

    WHERE id = 1;  -- The ID is the row you're replacing the value of for the character you created.


    -- Update player Z coord

    UPDATE "main"."REPLACE_WITH_TABLE" -- Select which table you'd like to modify.

    SET z = 0 -- Replace with the Z coordinate of the player.

    WHERE id = 1;  -- The ID is the row you're replacing the value of for the character you created.
