If you are looking to run a Project Zomboid server for a small group of people, we recommend making your server private. There are a number of things that can prevent random people from joining your server: setting a password, adding a whitelist or hiding the server from the Internet tab.
Accessing Server Settings
In order to make your server private, you will need to change your server settings.
- Login to your server’s Control Panel.
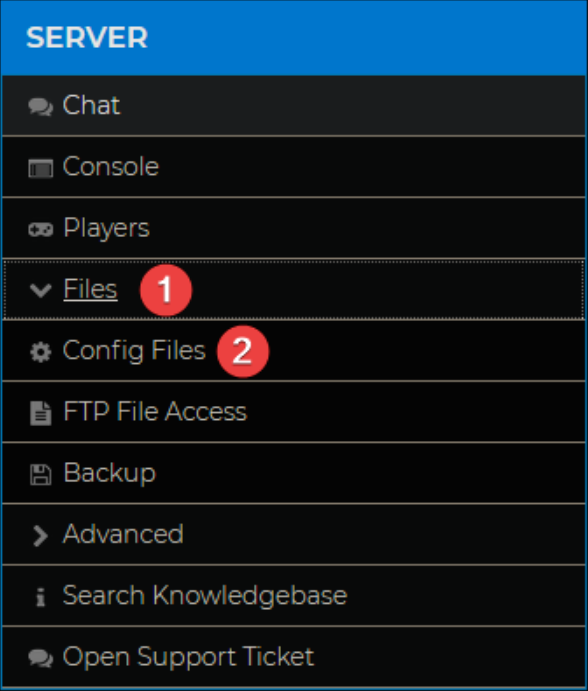
- On the left-hand side, navigate to Files > Config Files.
- Open
world.ini. Here you will be able to edit the most common settings.
Setting a Password
A password will allow you to restrict access to the server when a player adds it to Favorites.
- Locate the Password= line of
world.iniand enter the password you’d like.
- Save the file and restart your server.
Enabling a Server Whitelist
Whitelisting will only let players on the list enter the server.
- Locate the Open= line of
world.iniand adjust the value:- true means whitelisting is disabled;
- false means whitelisting is enabled.

- Save the file and restart your server.
You can then use the server Console to manage the whitelist:
AddUser <username> <password>- adds any user to the whitelist; requires their in-game Account Password.AddUserToWhitelist <username>- adds an already connected user to the whitelist.RemoveUserFromWhitelist <username>- removes a user from the whitelist.AddAllToWhitelist- adds all online users to the whitelist.
Other whitelist-related options in world.ini include:
AutoCreateUserInWhiteList=true/false- automatically add users to your whitelist.DropOffWhiteListAfterDeath=true/false- removes a player from the whitelist if their character dies.
Hiding a Server from Public
You can also control whether or not your server can be found in the Internet tab in-game, which is a list of community servers.
- Locate the Public= line of
world.iniand adjust the value:- true means your server can be seen on Steam;
- false means your server cannot be seen on Steam.

- Save the file and restart your server.
When making your server public, do not forget to set the Public name and description of your server using our knowledgebase guide on How to change the name and description of your Project Zomboid server.
Now your server is only available to users of your choice! If you are creating a community, make sure to check out our article on How to become an admin on your Project Zomboid server.
If you require any further assistance, please contact our support at: https://shockbyte.com/billing/submitticket.php