So you’ve followed our guide on ordering a Minecraft server and you’re keen to play on your new Minecraft server. But how do you get started?
Logging into the Control Panel
Once you've successfully paid for your order, check your registered email inbox for the email containing your Minecraft server details and Multicraft panel login information. You may also find a copy of the same email in your client area.
Your Multicraft Control Panel will provide you with access to all controls of your server, including starting and stopping it, configuration, and world settings. You’ll need to sign in here before connecting to your server.

Starting Your Server for the First Time
Once you’ve signed into your control panel, the first screen you will see is your server homepage.
Before starting your server, you’ll need to select a server type from the Server Type dropdown menu at the bottom of the screen. We recommend using PaperMC, as it is one of the most optimized Minecraft server types available. You can read more about our available server types here.

Once you have chosen your server type, press Start to start the server and generate the necessary files. Your server may take a few minutes to fully start for the first time, but don’t worry, this is completely normal.
Connecting to Your Server
To connect to your server, you’ll need your Server Address. You can find this address on your control panel.
Once you’ve found your server address, you can follow our guides to connect for the first time:
Adding Yourself as an Operator
As the owner, it is important that you have full control over your Minecraft world. This can be done by adding yourself as an operator.
An operator (op) is someone who has access to commands that are used to manage the server. Controls given to operators include access to moderation commands, changing the server difficulty, whitelisting, and more. You can view a list of operator commands here.
You can op a player by typing op [username] in the console, which you can access by clicking Console on the left-hand side of your server homepage.

Should you have any more questions about this, we have a guide you can refer to here.
Configuring your Server Settings
When you first start up the server, there may be some settings that you wish to change to suit your needs. This can all be done in your control panel.
- Stop your server.
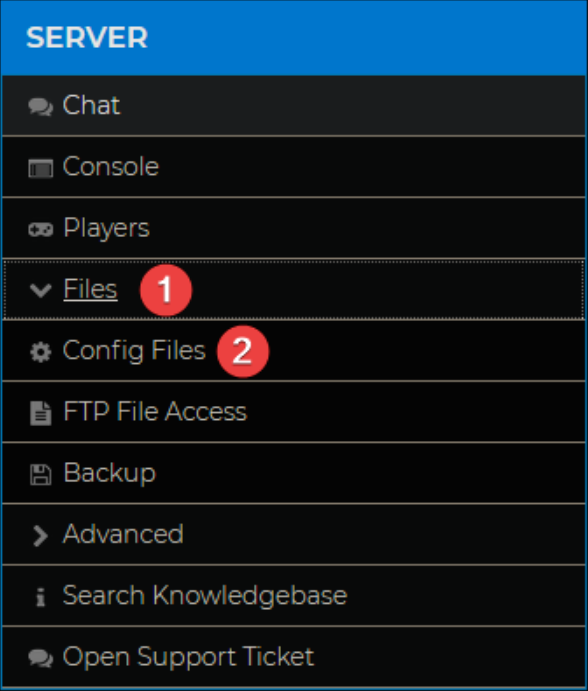
- Navigate to Files > Config Files > Server Settings.

- Change any desired settings by following our configuration guide.
- Save and Restart your server.
To learn more about Minecraft server hosting, you can browse our library of Knowledgebase articles here.
If you require any further assistance, please contact our support at: https://shockbyte.com/billing/submitticket.php
