If you’ve never owned a Project Zomboid server in the past, setting it up for the first time can be a daunting task. This article will provide you with the basics needed to set up your server and configure it to your liking.
HOW TO JOIN YOUR SERVER
Before you join your server, you will first need to ensure that your server is set to public. This is to allow your server to be visible in the in-game server lists.
- Login to your server's Control Panel.
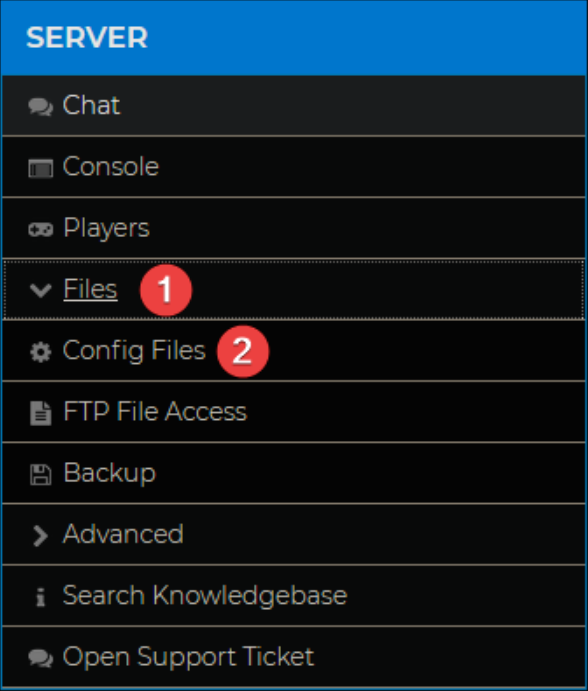
- On the left-hand side, navigate to Files > Config Files.
- Open the world.ini file, in here you will be able to edit the most common settings.

- Locate
Public=falseand change it toPublic=true.
- Click Save, and restart your server.
Once done, you can refer to our guide on How to Join Your Project Zomboid Server.
HOW TO CONFIGURE YOUR SERVER
There are many ways you could configure your server, but some common changes include setting a server name and description, as well as making the server private.
Setting a server name and description will show players what your server is about, so make sure to include any information about your server that you deem necessary for others to know!
HOW TO UPLOAD A SAVEGAME
Uploading a singleplayer save to your multiplayer server is a great idea if you’d like to expand on an existing base with your friends, or if you don’t want to erase your current progress in your world. We have a guide on How to upload or download a Savegame for your Project Zomboid Server here.
HOW TO GIVE YOURSELF ADMIN
Having admin privileges is largely useful for managing players and having more control over your server. However, there are plenty of commands you can use to make your gaming experience more fun.
If you’d like to run admin commands in-game, you will first need to learn How to Become an Admin on Your Project Zomboid Server.
You are now able to join your server, and can customise it to your liking!
If you require any further assistance, please contact our support at: https://shockbyte.com/billing/submitticket.php