Plugins are server-side modifications that allow server owners to change certain aspects of the game, which are a great way to extend the capabilities of their server. These plugins do not require a player to have anything additional installed on their client.
Looking for plugins to install? Check out a list of the Best Minecraft Plugins.
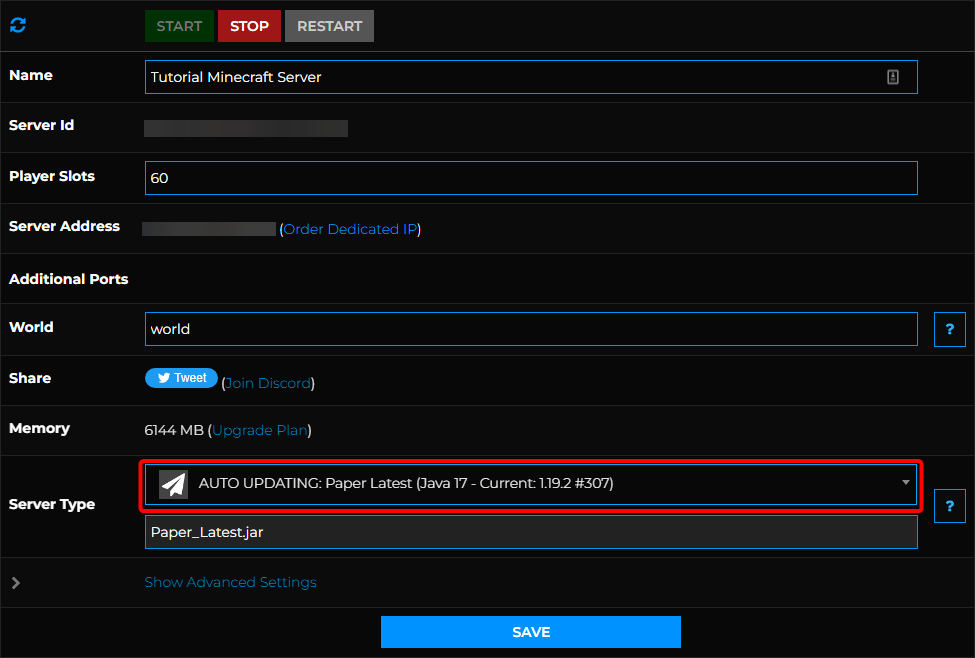
Before getting started, your server must be running a Server Type that supports plugins such as Paper and Craftbukkit for Minecraft Java Edition, and PocketMine-MP and NukkitX for Bedrock Edition. You can select these from our control panel under the Server Type dropdown menu.
Installing Plugins Manually
Plugins are installed by uploading the .jar file to the /plugins folder in your server files.
- Access your control panel and Stop your server.
- Download any plugins you wish to install from the following sources.
• SpigotMC (Java)
• BukkitDev (Java)
• Poggit (PocketMine-MP)
• CloudburstMC (NukkitX)
Important: Make sure the plugins you download are compatible with the server version you have installed!In SpigotMC, you can check and choose the plugin version that is compatible with it in the Updates tab. Server versions compatible with the plugin may also be indicated on the top section of the overview page.
In BukkitDev, you can check under the File tab. Each plugin version has a corresponding version list that it's compatible with.
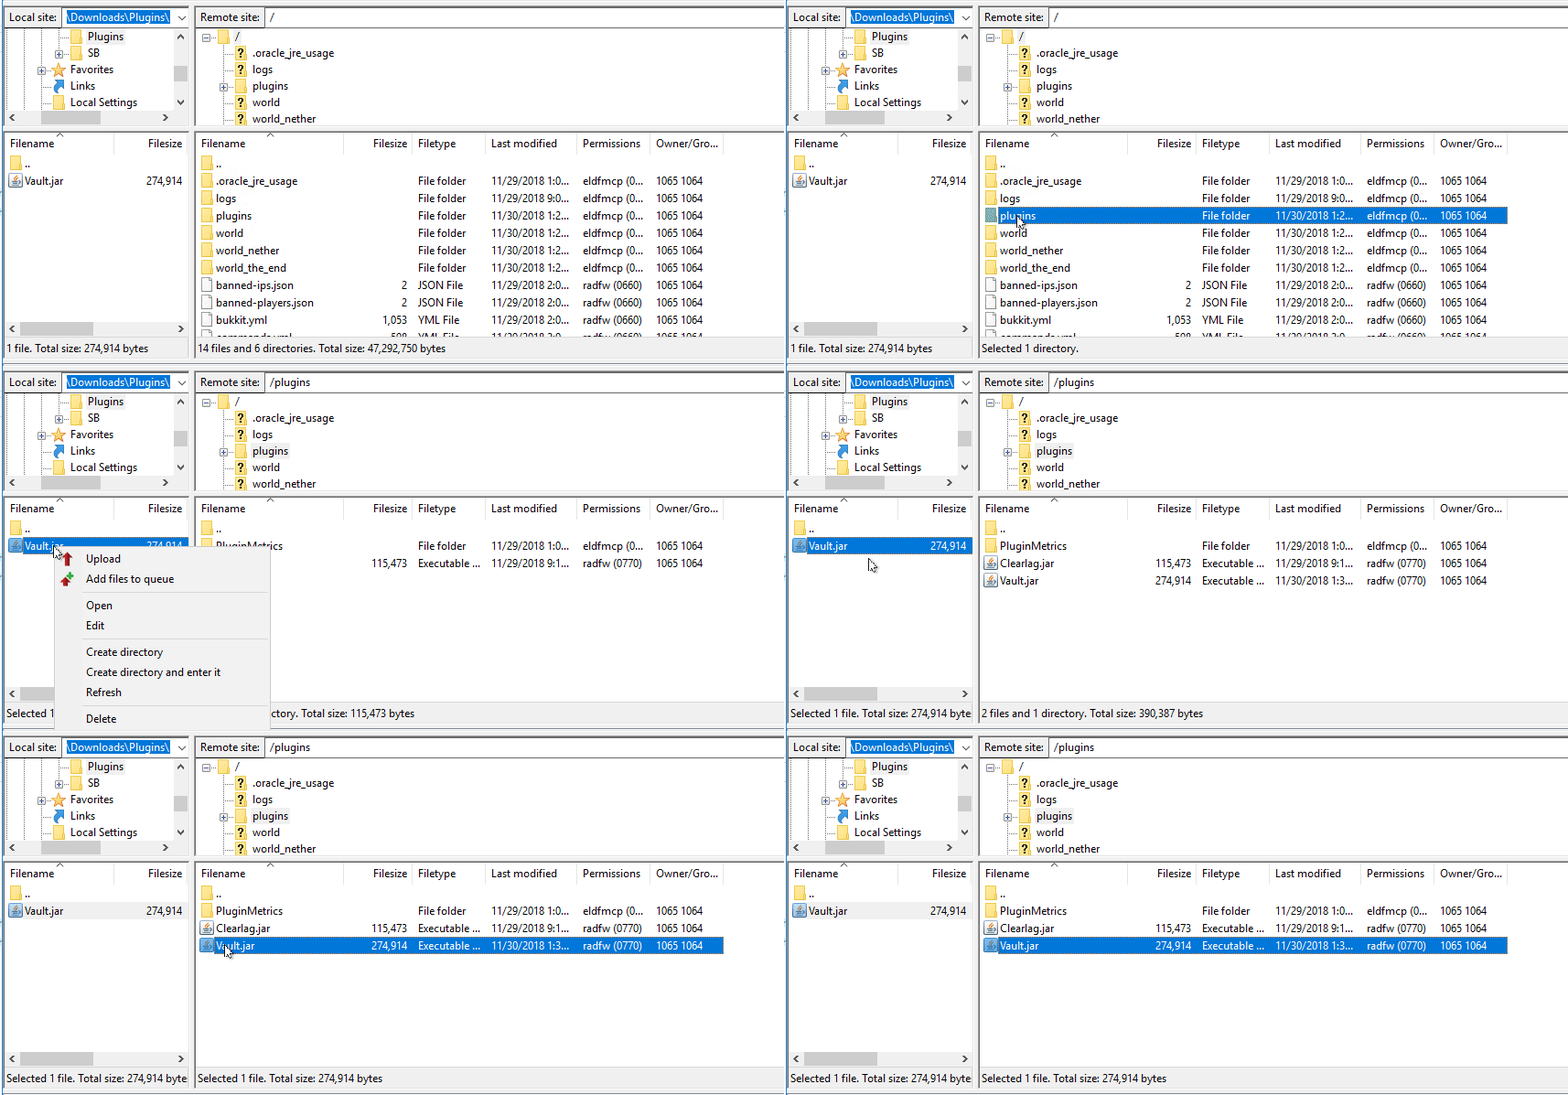
- Connect to your server's FTP, we would suggest Filezilla.
- Upload your plugins into the
/pluginsfolder in your server directory.
- Start your server.
Installing from Multicraft's Plugin List
- Access your control panel and Stop your server.
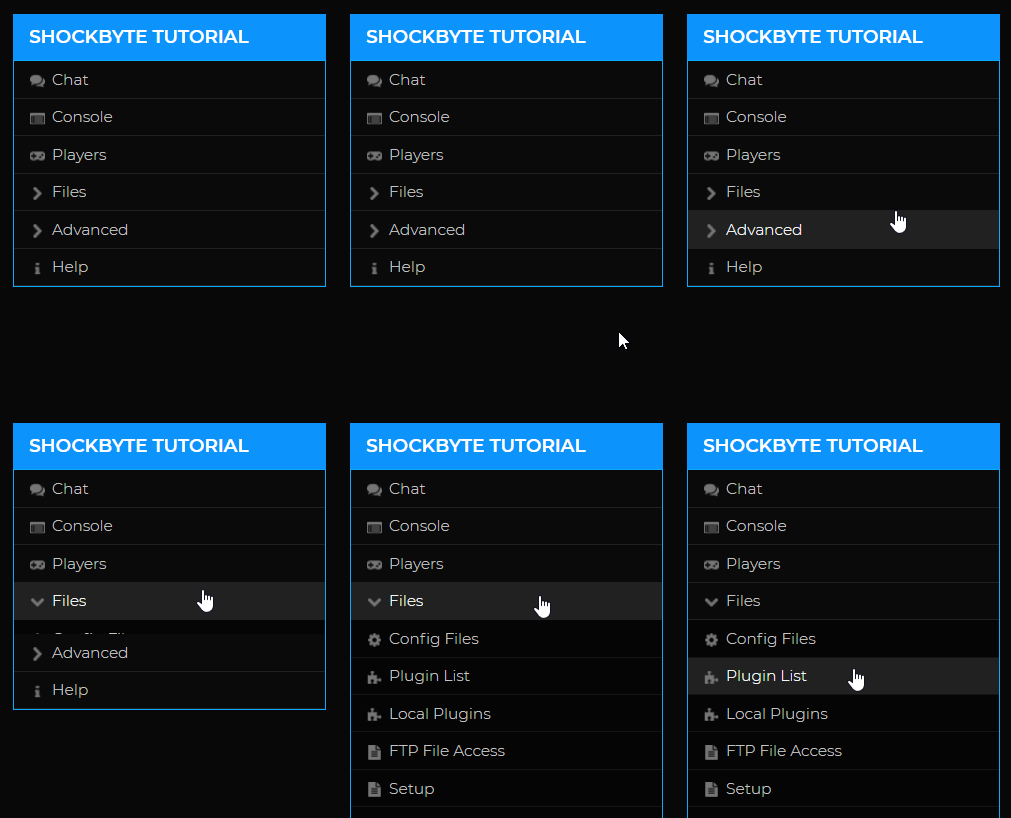
- Navigate to Files > Plugin List.

- In this page, look for the plugin you would like to install. You may use the Source and Category filters to narrow the list down or type the plugin name under Name to search for specific plugins.
Once you've located the plugin, simply click on the name to navigate to the plugin information page.
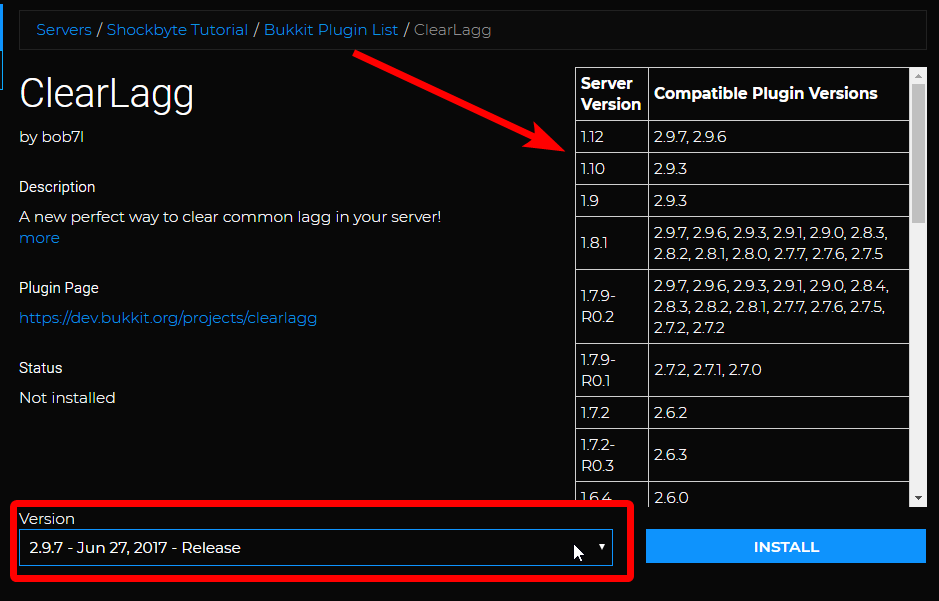
- On the plugin information page, select the plugin version that is compatible with your server's version. You may use the table on the right-hand side of the page to check which plugin version to use on your server.

- Once you have selected the correct version, click Install.

- Start your server.
You're done! Some plugins will now generate configuration files located in /plugins/<plugin_name> folders, allowing you to tweak their behaviour.
To ensure the plugins are correctly installed on your server by using the command /plugins in-game or plugins on your console.
If you are trying to uninstall plugins instead, you can find our guide here.
If you require any further assistance, please contact our support at: https://shockbyte.com/billing/submitticket.php
