Starbound has a variety of mods available on the Steam Workshop, ranging from minor cosmetic changes to entirely new gameplay mechanics. After following this guide, you will be able to play with custom mods in Singleplayer or on any modded server using the same mods.
Downloading Starbound Mods From the Steam Workshop
This is the simplest method of getting Starbound mods installed on your PC.
- Open Starbound’s Steam Workshop.
- Subscribe to any mods you would like to install.

- Wait for the mod to finish downloading.
- Launch the game to complete the installation.
Locating and Distributing Starbound Mods from the Steam Workshop
You'll need to locate any mods installed through Steam if you want to easily distribute Starbound mods to your friends or install mods to a Starbound server.
- Open your Steam directory.
Note: By default, your Steam directory is located atC:\Program Files (x86)\Steam\. However, this depends on where you’ve installed Starbound. - Navigate to
steamapps\workshop\content\211820.
- Locate the Steam Workshop ID of the mod you wish to install. This ID can be found in the Steam Workshop URL, as shown below.

- Open the folder of your chosen mod ID.
- Copy the
contents.pakfile to any other folder outside your Steam directory. Any folder works; however, it’s recommended to keep this somewhere convenient. - Rename the
contents.pakfile to the name of your chosen mod.
You will need to repeat these steps for every mod you’ve installed. Once you have all mods in one folder, you can upload these to your server and distribute them to any players.
Installing Starbound Mods Manually
Starbound has a range of mods that are exclusively available on third-party websites such as Nexus Mods. The steps below are solely for installing from these sites.
- Launch Steam and access your Library.
- Locate Starbound, right-click the game and select Properties…

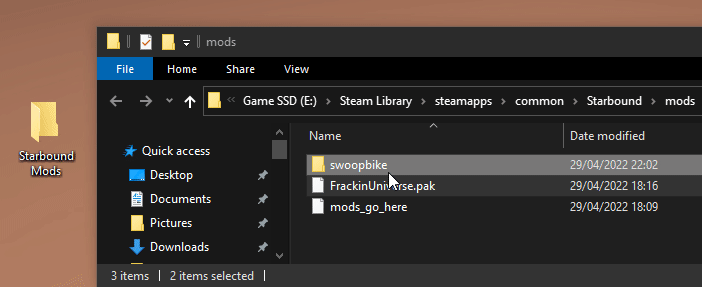
- Navigate to Installed Files and click Browse…

- Open the
modsfolder.
- Move any mods you’ve downloaded to the folder.
.pak extension; however, some mods may just contain a folder with all mod data. Depending on how an individual mod author distributes the mod, you may need to unzip the downloaded file first.It’s recommended to also store a copy of all mods in a separate folder somewhere memorable for both Steam mods and manually installed mods should you want to distribute or install them on your server.
Your mods have now been successfully installed locally! You can now proceed to Installing Mods on your Starbound Server.
If you require any further assistance, please contact our support at: https://shockbyte.com/billing/submitticket.php